The 1. page content
- page: Installing the base system and ISPConfig and checking the installed services
- page: Create and set primary web account, email account, DNS zone, domain name redirection
- page: Checking web interfaces, requesting and installing PTR records and SSLs, troubleshooting
Content
Introductory
Az ISPConfig control panel we can easily manage the websites on our server as well as other web services. In this description, we will review how to build and provision our ISPConfig3 server, as well as how to set up the free, Let's Encrypt issued by SSL certificates for the control panel, main services and our websites.
On this page, we will install the basic system, the ISPConfig control panel with the necessary components, and then check the existing web interfaces and services.
Compared to the previous server installation tutorials, I intend this description to be a more comprehensive and complex guide, in which we prepare the perfect server from start to finish, which we then test in a live environment. Of course, we speed up all of this by using the already existing tutorials, which is why the previously prepared installations are not detailed here, but rather focus on the live environment, so that anyone can create their own working server based on the description.
The domain name linuxportal.eu mentioned here will be redirected to this presentation VPS during the preparation of tutorials of this type (requiring a live server environment), and after the description is finished, I will redirect it back to its storage on this server for "parking", and then the following description, you will be redirected there again, and so on. Therefore, at the time of reading the description, the domain name linuxportal.eu may display content different from what you see in the pictures (for example, the result of another description, etc.), so consider this domain name as a kind of temporary availability.
If all our conditions are ready, let's start the work!
Minimal server installation and setup
The first step is to install and configure the minimal server.
Installation
As I mentioned above, we have already done the installation of the minimum server many times, so I will not go into detail here, but just give a few thoughts here as a guideline.
Dedicated server
A dedicated server is a physically separate computer that is supplied by the service provider with electricity and an Internet connection. In this case, only the subscriber has control over the machine's resources and settings. About the latter only if you do not request special system administrator help, otherwise the service provider manages everything. But the point here would be precisely the system we supervise, so we will continue along this line.
The advantage of a dedicated server is, for example, unlimited freedom and full utilization of military resources. The disadvantage is the higher price, and if something breaks down in the server, its repair and restoration are coupled with several downtimes. For example, in the case of an older model, it is more difficult to obtain spare parts for it. Previously, I also managed my websites on such a server for years, there were no problems with it, but due to the sharp increase in electricity prices, I was forced to move to a VPS.
If we install on a dedicated server, we most likely have to install the basic system as well, which we can typically do from a remote console (usually an IPMI console). In this case, we can see the entire boot process here, as well as the start of the installation image file attached to the machine - by the service provider.
Therefore, if the installation image file offered and configured by the service provider or uploaded by us (if the service provider allows this) has started, then we can install the basic system in the usual way in VirtualBox. The following tutorials have already been made about this:
- Install Debian 8 (Jessie) Minimum Server
- Install Debian 9 (Stretch) Minimum Server
- Install Debian 10 (Buster) Minimum Server
- Install a minimum server for Ubuntu 18.04 LTS (Bionic Beaver)
- Ubuntu 20.04 LTS (Focal Fossa) minimal server installation
- Debian 11 (Bullseye) minimal server installation
Here you can choose according to your taste, or even install based on other sources, but the main thing is that the installation of the basic system does not include any additional services, such as Apache, PHP, MySQL, etc. So, during the installation of the basic system, let's leave the system "clean" and make only a few basic settings. The above links are worth checking out because of the basic settings after installation, because although they overlap a lot, each of them contains a setting that may not be included in the other. But we'll get to those later.
VPS
A VPS (Virtual Private Server), as the name implies, is a virtual machine that runs on a physical machine. More of this happens on a stronger server. Here, depending on the type of virtualization, physical hardware resources are shared and used between virtual machines.
The advantage of VPS is, for example, cost efficiency, and virtual machines and containers can be moved more easily to another physical server in the event of a failure, so if a hardware problem occurs, there is less downtime than with dedicated servers. The disadvantage may be less resources.
If you install on a VPS, you can usually choose from a pre-installed basic system template with most service providers, so in this case you can also save the time associated with installing the basic system.
In this description, I am also installing on a VPS, so I already have a Debian 11 (Bullseye) base system available at the start, on which I only have to make a few settings. However, before the settings, it is worth setting up the hosts file on our own machine.
Setting up hosts files
After the completion of our minimal server, the server is already SSHis also available through In the case of a dedicated server, we do the installation ourselves from the console, so we can switch to using our comfortable, familiar SSH client program only after the installer is finished. In the case of a VPS, since the system is already ready, we can immediately log in via SSH with the root user and the password initially set by the service provider.
In both cases, the point is the same: in the first round, we can only access the server with the machine's IP address. To make work more convenient, it is advisable to configure the hosts file in the operating system of our home computer so that we can also access our server with a host name, as long as no domain name is directed to it. Since this setting is the most relevant at this point (after the server is ready), we will talk about it here.
For Windows operating systems, edit the following file:
C:\Windows\System32\drivers\etc\hosts
For Linux operating systems, the following:
/etc/hosts
In both cases, the format is the same, so let's set it administrator or on Linux rootas the IP address of the server, then the hostname. Here you can specify several lines at the same time, in which you can also refer to subdomains. My own example:
178.238.208.205		linuxportal.eu
178.238.208.205		vps.linuxportal.eu
178.238.208.205		www.linuxportal.eu
Here in the first line I set the IP address of the VPS to the main domain name, and then in the second line the server FQDN I set his name. This will be important in several places later on. Finally, in the third line, I set the www subdomain. This is not so important, but if we want to access our things with www during the installation and settings, then set it up.
I would like to touch on the FQDN name for one more sentence. This will be the name that Linux will use hostname It is also output to the -f command, so this will be the full name of the server. I use "vps" here, but anything else can be specified. If we have several servers and we want to use them all in the same domain (for example, in the case of a company infrastructure), we can use vps1, vps2, or any subdomain name to distinguish them from each other under our main domain name.
If we are satisfied with this, from here on we can connect from our home computer with the specified hostname instead of the IP address, and we can continue with the basic settings.
Defaults
Whichever type of server we work with, the following basic settings should be made to make working on the server more comfortable.
At the end of the above minimal server installation tutorials, quite a few useful settings have already been presented in detail, here we will only collect the most useful ones.
Set a fixed IP address
In the case of VPSs, the provider has already made this setting and the installed template already includes it. On dedicated servers, however, we have to solve this. The setting can be viewed at the links below.
On Debian systems:
On Ubuntu systems:
Here, make sure that in the previous description the 192.168.1.140instead of IP address, set the IP address received for the dedicated server, as well as the other specified values.
Create your own user
Although we will do most of this installation as root, let's first create our own user. To do this, run the following command:
adduser <felhasználó>The command creates the user, his group, his home directory, into which the template files are copied, and then we have to enter his password. Then it asks for a few more data, which are of no importance, only left over from the old Linux world, e.g. Full name, room number, work phone number, etc. Let's press enter on these.
Set Sudo
A sudo command, we can run commands as root with normal users. When working in the terminal, this is unavoidable unless you log in as root every time, which is not recommended. By default, it is not installed on Debian systems, so if you work on a dedicated server, you must install the sudo package. For example, my VPS template already included it. So this is different. To install the command and set up our user, follow the link below if you haven't already done so
On Debian systems:
On Ubuntu systems:
Alias, colors and setting the prompt
The following part here is not vital, but we can make the terminal much more comfortable with it. Setting these is a matter of personal taste, examples can be found below as a guideline.
An example on Debian systems:
An example on Ubuntu systems:
Enable Bash Programmable Command Line Addition
A Bash a programmable command line extension facilitates the entry of commands and their parameters. Details and settings below.
On Debian systems:
On Ubuntu systems:
Check hostname
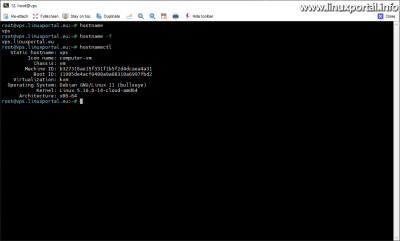
Check the hostname a hostname and the hostnamectl using commands:
hostname
hostname -f
hostnamectl
After making the above settings, it looks like this on my VPS:
Nano setup
A Nano is an excellent command-line editor that we will use often. To set it up, see the link below:
SSH setup
This is also not mandatory, but it is strongly recommended to make SSH more secure on production servers. To do this, we need to do a few things.
Creating and setting SSH keys
SSH key access is beneficial from two points of view:
- It provides a higher degree of security if password access is disabled after setting it up, because after that SSHD will discard any connection that tries to access without a key.
- It also follows from the first point that since we do not need to use passwords, we can access our server automatically after setting it up. This greatly facilitates the performance of automated tasks, such as the down/up synchronization of our websites and the execution of other background operations performed on the server.
First, create an SSH key pair on your home computer and copy the public key to the server. You can find a description of this on Debian systems here:
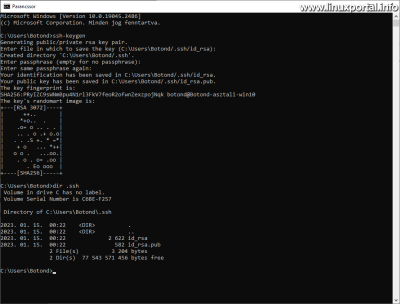
The current guide was created for Linux computers, but you can also generate an SSH key pair on Windows machines in the same way. To do this, open a Windows command line window, then run the ssh-keygen command in the same way as on Linux:
As you can see, the key is generated in the same way on Windows. So this just needs to be replaced in the description above. However, the easiest way to copy the public key is to create it id_rsa.pub file in a notepad, copy it, then open it in the SSH client ~ / .Ssh / authorized_keys file and copy it and save it. Just make sure that there are no accidental spaces before and after the key.
Next, we set the private key in the SSH client program of our home computer, if it does not manage the generated keys automatically. But on Linux, for example, we can connect automatically in the terminals.
Disable password login
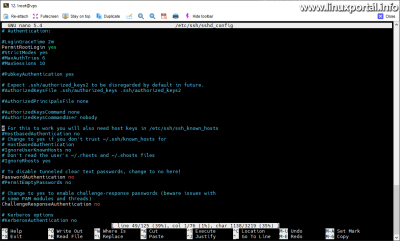
If we have tested the key entry, so we no longer need to enter a password, we can enter without it, then we can disable password entry in the next step. To do this, open the server as root / Etc / ssh / sshd_config file:
nano /etc/ssh/sshd_configAnd let's look for such a line: "PasswordAuthentication". Uncomment it if you still have the default file and set it to "no".
As you can see here, I have even turned on the PermitRootLogin parameter, so if I log in with keys, I can log in as root right away, there is no need to bother with sudo and the password if I want to log in directly as root . But that's also a matter of taste.
If we have saved the configuration, we can even restart sshd:
systemctl restart sshdBut if we also set up the next part, we can wait for that.
Setting a custom SSH port
We can make our SSH server even more secure by setting a unique port number instead of the standard port 22. You can find a description of this below:
Let's not deal with the UFW parts here, since it is not yet on the machine, or if it is, for example, in the case of Ubuntu, it is not yet active.
If we are satisfied with this, let's restart SSHD.
Updating libraries
This will be more or less enough for the basic setting and also for warming up. If we have reached this point, we can start the automated installation of the ISPConfig server, but before that, let's update our package repository database and our packages:
apt-get update
apt-get upgrade
Of course, the installation script will also run this, but I prefer to run it separately.
Automated installation of ISPConfig
I previously prepared the automated installation of ISPConfig in the description below:
Since we are going to do the same thing now, I won't go into everything in such detail here, so that we can make better progress.
Hereinafter root user let's continue!
Show help
First, let's run the help of the installation script, and then we will briefly review what configuration we need. The help is displayed with the following command:
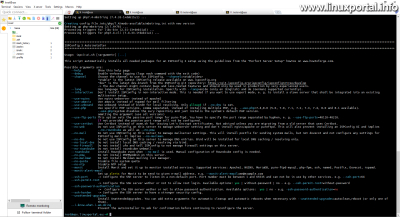
wget -O - https://get.ispconfig.org | sh -s -- --helpAfter a little installation and configuration, the help page appears:
For the sake of better clarity, I will also copy it in text:
******************************************************************************************************************************************************************************************************
ISPConfig 3 Autoinstaller
******************************************************************************************************************************************************************************************************

Usage: ispc3-ai.sh [<argument>] [...]

This script automatically installs all needed packages for an ISPConfig 3 setup using the guidelines from the "Perfect Server Setup" howtos on www.howtoforge.com.

Possible arguments are:
    --help          Show this help page
    --debug         Enable verbose logging (logs each command with the exit code)
    --channel       Choose the channel to use for ISPConfig. --channel=<stable|dev>
                    "stable" is the latest ISPConfig release available on www.ispconfig.org
                    "dev" is the latest dev-branch from the ISPConfig git repository: https://git.ispconfig.org/ispconfig/ispconfig3/tree/develop
                    -> The dev channel might contain bugs and less-tested features and should only be used in production by very experienced users.
    --lang          Use language for ISPConfig installation. Specify with --lang=en|de (only en (English) and de (German) supported currently).
    --interactive   Don't install ISPConfig in non-interactive mode. This is needed if you want to use expert mode, e. g. to install a slave server that shall be integrated into an existing
                    multiserver setup.
    --use-nginx     Use nginx webserver instead of apache2
    --use-amavis    Use amavis instead of rspamd for mail filtering
    --use-unbound   Use unbound instead of bind9 for local resolving. Only allowed if --no-dns is set.
    --use-php       Use specific PHP versions, comma separated, instead of installing multiple PHP, e.g. --use-php=7.4,8.0 (5.6, 7.0, 7.1, 7.2, 7.3, 7.4, 8.0 and 8.1 available).
                    --use-php=system disables the sury repository and just installs the system's default PHP version.
                    ommiting the argument (use all versions)
    --use-ftp-ports This option sets the passive port range for pure-ftpd. You have to specify the port range separated by hyphen, e. g. --use-ftp-ports=40110-40210.
                    If not provided the passive port range will not be configured.
    --use-certbot   Use Certbot instead of acme.sh for issuing Let's Encrypt certificates. Not adviced unless you are migrating from a old server that uses Certbot.
    --no-web        Do not use ISPConfig on this server to manage webserver setting and don't install nginx/apache or pureftpd. This will also prevent installing an ISPConfig UI and implies
                    --no-roundcube as well as --no-pma
    --no-mail       Do not use ISPConfig on this server to manage mailserver settings. This will install postfix for sending system mails, but not dovecot and not configure any settings for
                    ISPConfig mail. It implies --no-mailman.
    --no-dns        Do not use ISPConfig on this server to manage DNS entries. Bind will be installed for local DNS caching / resolving only.
    --no-local-dns  Do not install local DNS caching / resolving via bind.
    --no-firewall   Do not install ufw and tell ISPConfig to not manage firewall settings on this server.
    --no-roundcube  Do not install roundcube webmail.
    --roundcube     Install Roundcube even when --no-mail is used. Manual configuration of Roundcube config is needed.
    --no-pma        Do not install PHPMyAdmin on this server.
    --no-mailman    Do not install Mailman mailing list manager.
    --no-quota      Disable file system quota
    --no-ntp        Disable NTP setup
    --monit         Install Monit and set it up to monitor installed services. Supported services: Apache2, NGINX, MariaDB, pure-ftpd-mysql, php-fpm, ssh, named, Postfix, Dovecot, rspamd.
    --monit-alert-email
                    Set up alerts for Monit to be send to given e-mail address. e.g. --monit-alert-email=me@example.com
    --ssh-port      -> Configure the SSH server to listen on a non-default port. Port number must be between 1 and 65535 and can not be in use by other services. e.g. --ssh-port=64
    --ssh-permit-root
                    -> Configure the SSH server wether or not to allow root login. Available options: yes | without-password | no - e.g. --ssh-permit-root=without-password
    --ssh-password-authentication
                    ->  Configure the SSH server wether or not to allow password authentication. Available options:  yes | no - e.g. -ssh-password-authentication=no
    --ssh-harden    -> Configure the SSH server to have a stronger security config.
    --unattended-upgrades
                    Install UnattendedUpgrades. You can add extra arguments for automatic cleanup and automatic reboots when necessary with --unattended-upgrades=autoclean,reboot (or only one of
                    them).
    --i-know-what-i-am-doing
                    Prevent the autoinstaller to ask for confirmation before continuing to reconfigure the server.
Here, if we run through the options listed, the default configuration is perfectly fine, since we can deviate from the default things with these switches. We will go over some key points here, because this is not included in the previous description:
- Apache/Nginx: The default is Apache, we'll continue with that. We will also look at Nginx in another description.
- Spam filters: By default, Rspamd is installed, which is considered better than Amavis in many places. E.g.:
https://www.saashub.com/compare-rspamd-vs-amavisd-new - DNS server: Here, too, the default will clearly be fine BIND9
- PHP: It loads all PHP versions by default and configures them in the ISPConfig panel, so it should be fine that way too.
- ftp: Personally, I haven't used FTP for a long time, instead I synchronize everywhere with rsync, so it doesn't matter where the FTP port goes, I usually disable it anyway. But if someone needs it, set it to the appropriate port for them.
- Let's Encrypt: ISPConfig used to be a Certbot ACME he preferred a client, but it's been a while acme.sh ACME client is preferred. This will also be fine on the default acme.sh, so we won't touch it.
- --no-xxx switches: With these, we can skip the services in question, but let's add them all, because we will need them, so we will neglect these switches.
- Reminder: Well, monit is what doesn't go up by default if we don't ask. I set this here because it serves a good purpose. I will also provide a monit-alert-email address where you can send notifications. It's a useful thing.
- SSH Parts: We've already set up SSH for ourselves above, so we don't need to touch that here either.
In essence, these would be the most important things. Accordingly, the installation can then start.
Installation
Based on the above, our installation command is as follows:
wget -O - https://get.ispconfig.org | sh -s -- \
    --monit \
    --monit-alert-email=admin@linuxportal.eu
Here, for the sake of clarity, I have broken it into several lines, which can be copied and run at the same time.
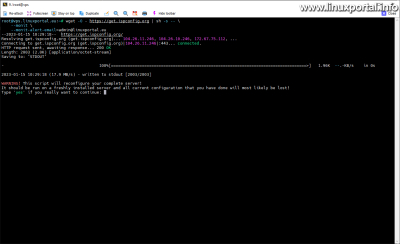
The installer starts:
The rest of the smaller parts of the automated process can be viewed at the link above Debian 11 perfect server in the description.
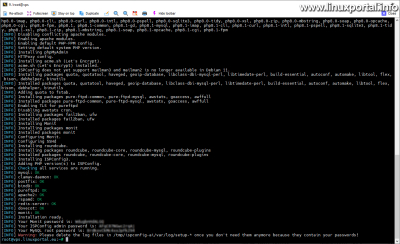
And the end of the installation looks like this:
Save your passwords here, then delete the tmp log file:
rm /tmp/ispconfig-ai/var/log/setup-*
Checking the installed web interfaces
In the next step, we check the installed web interfaces to see if everything is in order. We can access these interfaces in the browser with the IP address of the server, but if we have set up our hosts file, we can also use the domain name, which we will later direct to our server.
ISPConfig
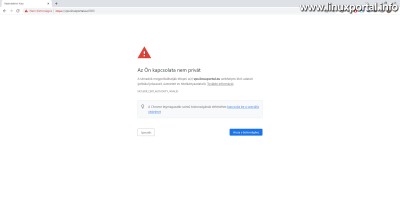
By default, our ISPconfig panel is available on port 8080, where it works by default via an SSL connection. However, since our domain name is not yet assigned to the server, the installer generates a self-signed certificate for itself, which throws a well-known error message in the browser when loading.
https://vps.linuxportal.eu:8080/
Our connection is of course private, only because the certificate was not issued by an official CA (Certificate Authority), such as Let's Encrypt, but instead loads a self-generated certificate, so the browser sees it as an error. But you don't need to worry about that, clicking on the Advanced button will open a small additional section, then click on the link "Forward to vps.linuxportal.eu (not secure)" (or the link of our own website that appears).
Here, the ISPConfig panel is available even with addresses without www or subdomains, depending on what we set in our hosts file.
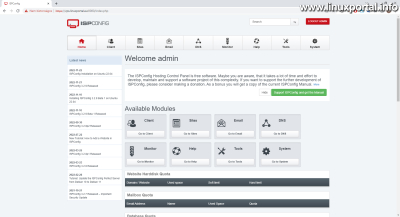
After proceeding, the login section will appear, here we enter the admin password received at the end of the installation and log in as admin:
Here we can even look around, but here we move on to check the next interface.
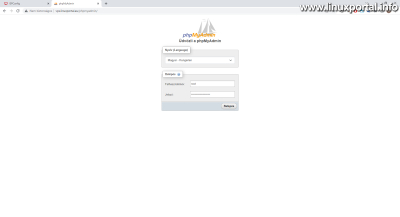
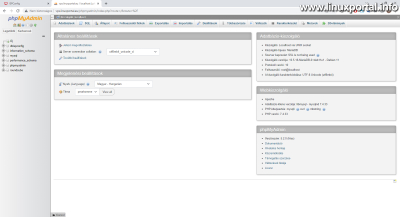
phpMyAdmin
For the time being, the phpMyAdmin web database management interface can be accessed with a plain HTTP connection from the subdomains we set (in the hosts file), for example:
http://vps.linuxportal.eu/phpmyadmin/
Here we enter the root user and the MySQL password received at the end of the installation, and the well-known home screen appears:
Roundcube Webmail
The Roundcube web mail client is available here, for example, also only via http protocol:
http://vps.linuxportal.eu/webmail/
This also works, but for the time being we do not know how to log in, because an email address must be created for this, but this will also be done in due course.
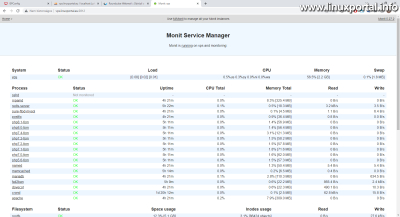
Monit
This is at the following address and port number:
http://vps.linuxportal.eu:2812/
Here, too, you will be asked for the user and password in an HTTP authentication window. Enter admin and the Monit password received at the end of the installer:
As you can see, this is a flawless installation, all features and resources are fine. Monit monitors server services and resources nicely for us in the background. If something stops, reaches a set limit, or experiences abnormal operation, you will be notified by email. It's a useful thing.
One more thing to know about this is that it is not displayed by the default Apache web server of our server, but it has its own small internal web server, which must be set up separately to work, for example, on an HTTPS connection. But there will be time for that later.
Interestingly, this can even be queried from the command line with the following commands:
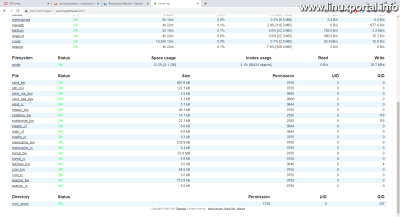
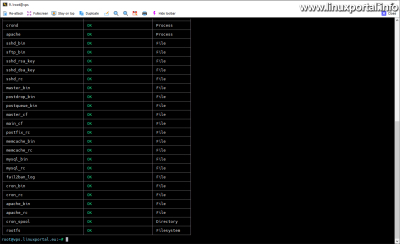
If you want a shorter summary, then:
monit summaryOf course, this is a longer list, only the end is visible here.
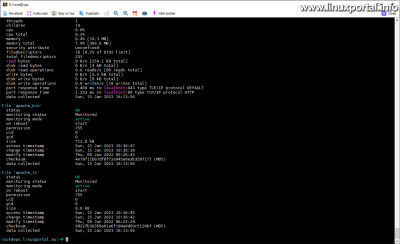
Also, if we request a more detailed status report, then:
monit statusAnd this is an even more detailed status report, of which we only see the very end here.
That would be all the services installed by the ISPConfig installation script to check, but let's not go too far yet, because the next page we continue with the settings of our server and sharpening it to the outside world.
- Install Debian 8 (Jessie) Minimum Server
- Install Debian 9 (Stretch) Minimum Server
- Install Debian 10 (Buster) Minimum Server
- Install a minimum server for Ubuntu 18.04 LTS (Bionic Beaver)
- Ubuntu 20.04 LTS (Focal Fossa) minimal server installation
- Debian 11 (Bullseye) minimal server installation
- Perfect server: Debian 8 (Jessie) V1.0
- Perfect server: Debian 9 (stretch) V1.0
- Perfect server: Debian 10 (Buster) V1.0
- Perfect server: Debian 11 (Bullseye) v1.0
- Encyclopedia - IP address
- Encyclopedia - SSH
- Encyclopedia - ISPConfig
- Encyclopedia - phpMyAdmin
- Encyclopedia - BIND (Berkeley Internet Name Domain)
- Encyclopedia - Roundcube
- Manual page - acme.sh
Navigation
- To post registration and login required
- 182 views


