The 1. page content
Introductory
One is great for creating a development or test environment LAMP server quick compilation. For live websites, however, I would prefer a more serious server configuration, such as a perfect server configuration for Debian to 8 or the Debian to 9.
I have already made a description of the About installing Debian 8 (Jessie) LAMP server v1.0, and in this description we will install the LAMP server components on a Debian 9 (Stretch) operating system, which will consist of:
- Apache (version in Debian 9: 2.4.25)
- MariaDB (version in Debian 9: 10.1.38)
- PHP (current version in Debian 9: 7.0.33)
- phpMyAdmin (version in Debian 9: 4.6.6)
These components are all official Debian from your trunk will be installed in the versions indicated above. So later, you can easily update your packages at once APT package manager It helps.
I will label this Debian 9 (Stretch) LAMP installation as version 1.0 because we will add many other add-ons later to make it even more useful and efficient.
The Installation Guide for Debian 10 (Buster) LAMP Server too!
basic Conditions
Of course, it can also be installed on a desktop computer with a graphical environment, the point is that the above components are now first installed on the machine for proper configuration and operation.
System Update
First, log in as root and update our repository database and packages as follows apt-get commands:
apt-get update
apt-get upgrade
Installing MariaDB
As mentioned above, the default database engine in Debian 9 (Stretch) is MariaDB instead of MySQL. MariaDB can be said to be fully compatible with MySQL, so it handles the databases of our websites without any problems. To install the server and client (remaining as root), enter the following command:
apt-get -y install mariadb-server mariadb-clientSecuring your database
We can make our database server and databases more secure by making some settings. There is a separate command for these security settings that guides us through the necessary steps. To start, run mysql_secure_installation command:
mysql_secure_installationThe command first asks us for the database root password:
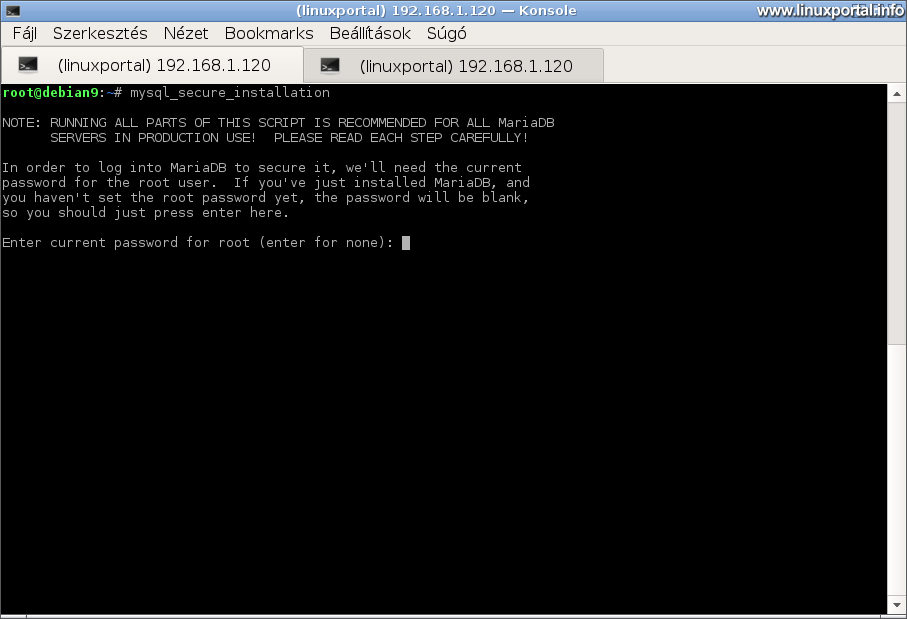
Press enter here, as no root password has been set yet.
You will then be asked if you want to set a root password:
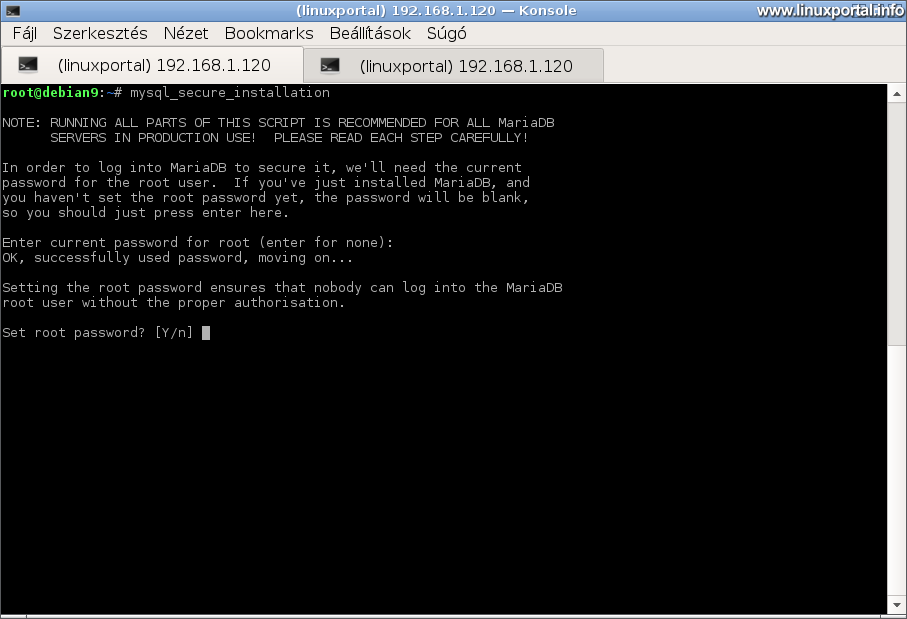
Here we choose yes. You will then be prompted for your new root password and a prompt. Enter a reasonably secure password, which is not very simple. Preferably include numbers, hyphens, etc.
If you have specified it both times, the next step will ask you to delete anonymous users:
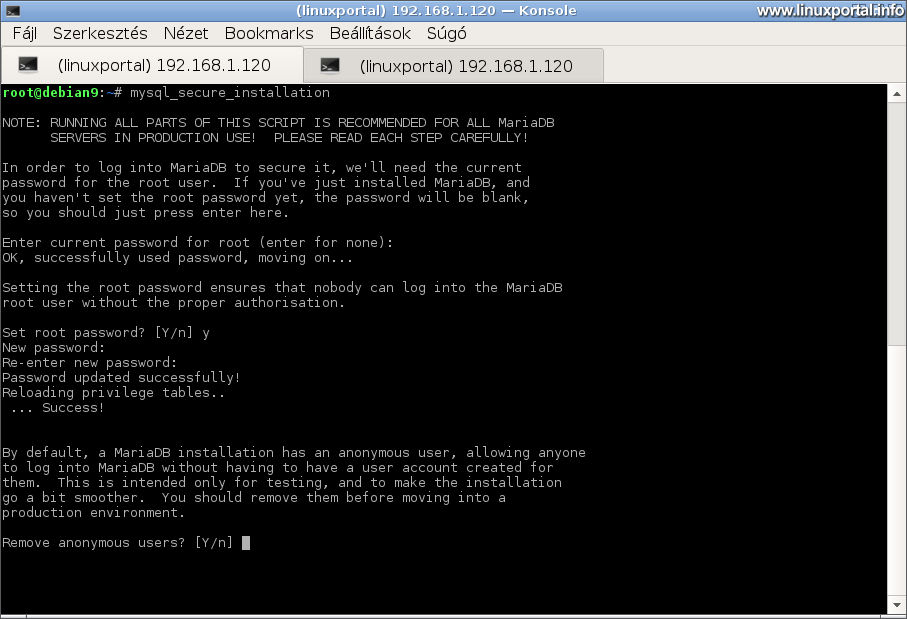
The system provides these anonymous users for development and testing purposes, which we need to delete if we want to secure our database server. So let's choose yes.
The next step is to decide whether to enable or disable remote root access:
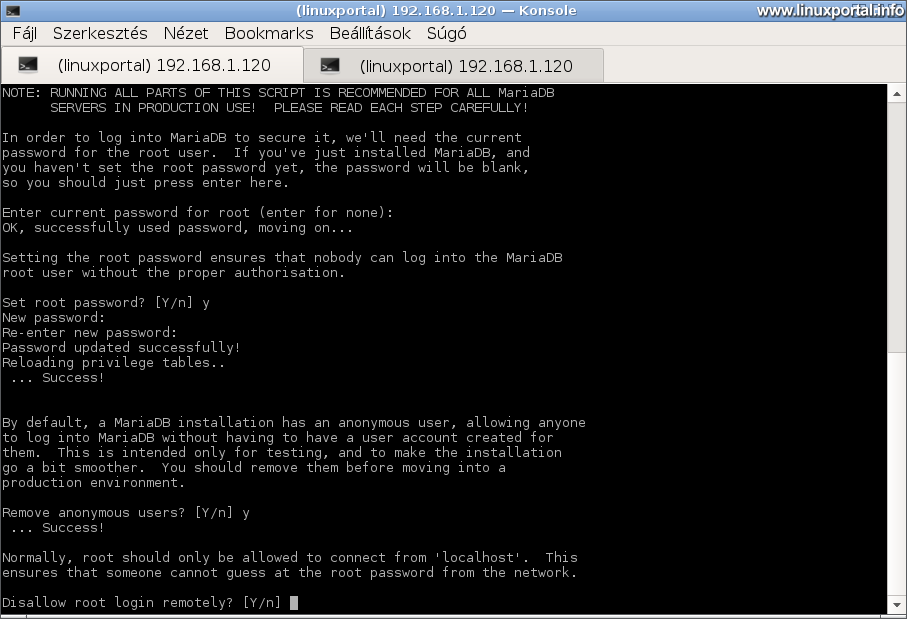
Unlike web database management interfaces running on this server, such as the one below. phpMyAdmin are not considered remote logins because they run on the same server, so localhostlogged in. So here it is Yes If you choose to disable remote root access, you will be able to log in as root as needed from within phpMyAdmin wherever you need it.
So disable remote root access here with the "Y" option.
Then, for test purposes, we have to decide on the fate of the "test" database, which can be accessed by any user:
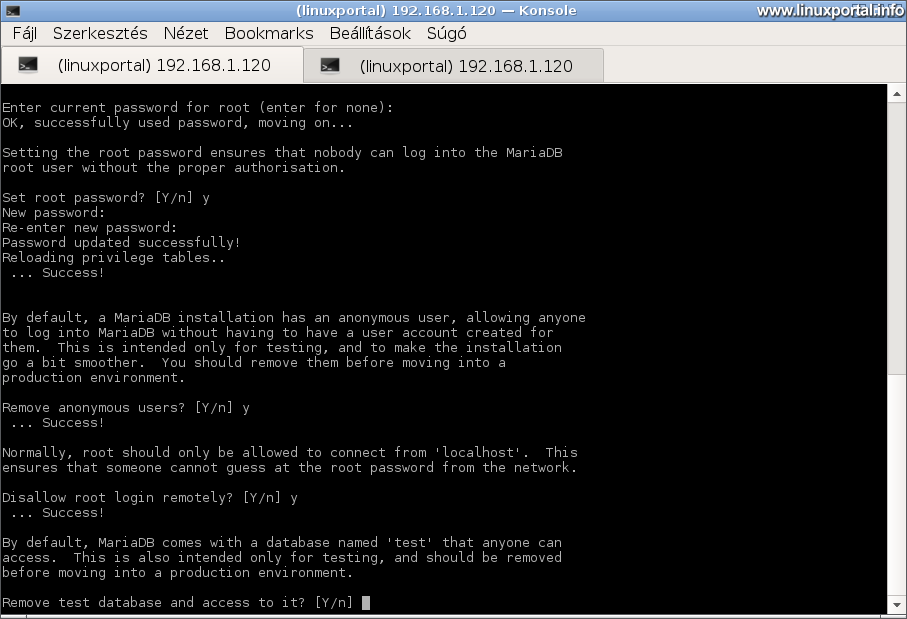
Here again, select Y to remove the test database and its associated permissions.
Finally, you must reload the authorization tables to apply the changes. He asks us about this too, and here we go yes:

You then run the necessary background sections and let us know that our MariaDB database system is now secure, so it can be used in a live server environment.
Install Apache web server
To install Apache2, run the following:
apt-get -y install apache2The default webroot directory is a / Var / www / html. So by default this is one virtualhoszt is configured during installation, whose configuration file is located here: /etc/apache2/sites-enabled/000-default.conf
cat /etc/apache2/sites-enabled/000-default.conf<VirtualHost *:80>
# The ServerName directive sets the request scheme, hostname and port that
# the server uses to identify itself. This is used when creating
# redirection URLs. In the context of virtual hosts, the ServerName
# specifies what hostname must appear in the request's Host: header to
# match this virtual host. For the default virtual host (this file) this
# value is not decisive as it is used as a last resort host regardless.
# However, you must set it for any further virtual host explicitly.
#ServerName www.example.com
ServerAdmin webmaster@localhost
DocumentRoot /var/www/html
# Available loglevels: trace8, ..., trace1, debug, info, notice, warn,
# error, crit, alert, emerg.
# It is also possible to configure the loglevel for particular
# modules, e.g.
#LogLevel info ssl:warn
ErrorLog ${APACHE_LOG_DIR}/error.log
CustomLog ${APACHE_LOG_DIR}/access.log combined
# For most configuration files from conf-available/, which are
# enabled or disabled at a global level, it is possible to
# include a line for only one particular virtual host. For example the
# following line enables the CGI configuration for this host only
# after it has been globally disabled with "a2disconf".
#Include conf-available/serve-cgi-bin.conf
</VirtualHost>
# vim: syntax=apache ts=4 sw=4 sts=4 sr noet
So if you want to migrate the web root directory, etc., you need to modify it in this file.
The main configuration file for Apache2 is: /etc/apache2/apache2.conf.
Testing Apache
We test its operation in a browser (for me, the 192.168.1.120 IP addresses):

A next page continue installing PHP7 ...
- Encyclopedia - LAMP Systems
- Installing Debian 8 (Jessie) LAMP Server v1.0
- Installing Debian 10 (Buster) LAMP Server v1.0
- Install v18.04 on the Ubuntu 1.0 LTS (Bionic Beaver) LAMP Server
- Install Ubuntu 20.04 LTS (Focal Fossa) LAMP Server v1.0
- Debian 11 (Bullseye) LAMP server v1.0 installation
- wiki.debian.org - LaMp
- Debian 9 LAMP Server Tutorial with Apache, PHP 7 and MariaDB
- Install Debian 9 (Stretch) Minimum Server
- Install Debian 10 (Buster) Minimum Server
- Perfect server: Debian 8 (Jessie) V1.0
- Perfect server: Debian 9 (stretch) V1.0
- Perfect server: Debian 11 (Bullseye) v1.0
- Install a minimum server for Ubuntu 18.04 LTS (Bionic Beaver)
Navigation
- To post registration and login required
- 678 views