
Content
Introductory
There are several ways to manage web servers and other servers remotely, one of which is SSH the most common a command line of solutions. The SSH protocol communicates over an encrypted channel between the server and the client. Like all similar communications, SSH transmits data through a specific port, which by default is the well-known tcp port 22. Since the function of this port is known to many people, it exposes the servers to regular attacks. However, our server is secure as it is a highly encrypted channel. However, if many attack attempts/attempts hit our server, they unnecessarily increase network traffic and use our server's resources. This is usually avoided - or at least reduced - by switching this known port to another, unknown port number, which can only be detected by port scanning, which is a more time-consuming task, as tens of thousands of ports have to be searched and queried. Attack attempts and reconnaissance are mostly carried out by robots, which usually only try through the known, default ports of various services, and in many cases they do not start port scanning, but instead go to the next server as a target if they do not find open ports. Therefore, the use of unique ports can provide effective protection against the bulk of attacks.
Of course, it provides greater protection for our SSH server if we use public key access and we disable the password-based access option, however, if this cannot be solved in our own situation, then using a unique port number can also be a good solution.
In this short tutorial, we'll look at how to change SSH's well-known TCP port 22 to a unique port number to minimize the number of attack attempts via SSH.
Overview of Ports
So let's take into account that several services can work in a Linux operating system, especially on a more complex web server installation. Therefore, when choosing the right port, be careful that it does not conflict with the port number of other services.
Disable UFW firewall (optional)
If, on the other hand, only the default iptables firewall works in our system, then there is nothing further to do here.
The UFW firewall is below ufw we can turn it off with the command:
sudo ufw disableWe will discuss enabling the new port number in the firewall and turning the firewall back on later. Leave it turned off while setting the port number of the SSH server.
Setting a custom SSH port
Open configuration file
On Debian / Ubuntu systems, the configuration file for SSHD is a / Etc / ssh / sshd_config located on the route. Let's open it rootto edit as:
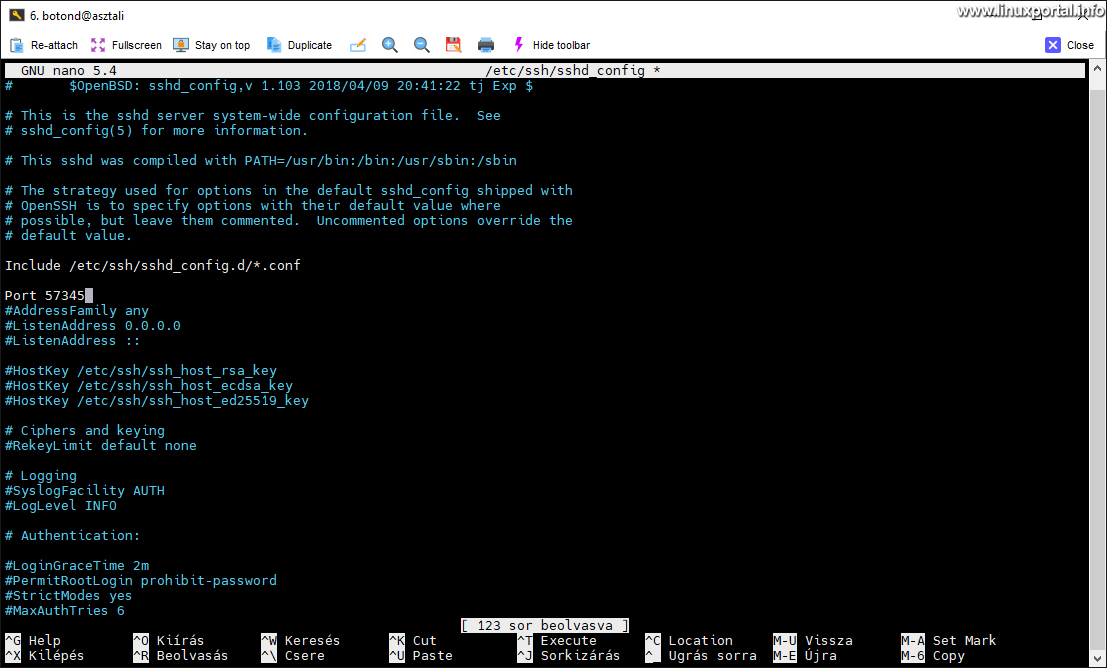
nano /etc/ssh/sshd_configThe beginning of which looks like this, for example, one Debian 11 (Bullseye) minimal server on installation:
#       $OpenBSD: sshd_config,v 1.103 2018/04/09 20:41:22 tj Exp $

# This is the sshd server system-wide configuration file.  See
# sshd_config(5) for more information.

# This sshd was compiled with PATH=/usr/bin:/bin:/usr/sbin:/sbin

# The strategy used for options in the default sshd_config shipped with
# OpenSSH is to specify options with their default value where
# possible, but leave them commented.  Uncommented options override the
# default value.

Include /etc/ssh/sshd_config.d/*.conf

#Port 22
#AddressFamily any
#ListenAddress 0.0.0.0
#ListenAddress ::

#HostKey /etc/ssh/ssh_host_rsa_key
#HostKey /etc/ssh/ssh_host_ecdsa_key
#HostKey /etc/ssh/ssh_host_ed25519_key

# Ciphers and keying
#RekeyLimit default none

# Logging
#SyslogFacility AUTH
#LogLevel INFO

[...]
Here we can see a commented line:
#Port 22
Change port number
After we have reviewed the information about the ports and made sure that the port number we are looking for is free, then we should uncomment the line and set the port number of our choice. For example:
Port 57345
Save configuration file and restart SSHD
Then save the file (CTRL+O in nano) and restart the SSH service:
systemctl restart sshdAfter restarting the service, all new connections will work with the newly set port number, but it will not disconnect our current connection. Exit accordingly, then try to exit again in the usual way. For example, for my virtual machine:
ssh linuxportal@debian11And now it won't let me back, instead we get the following error message:
ssh: connect to host debian11 port 22: Connection refused

Of course, the error message also depends on, for example, whether we use a firewall, how it blocks ports, etc. In the case of the UFW firewall, for example, if the "deny" policy is in effect, we do not receive any response, but the connection is terminated due to a timeout, while in the case of the "reject" policy, an error message is returned.
How to log in by entering the new port number can be found in the next section.
Using SSH protocol commands with unique port numbers
There are many commands we can use on Linux systems that use the SSH protocol. By default, these commands communicate on TCP port 22, but if we changed the default port number 22 of our SSH server, it must be given to them in a separate parameter. Let's see some examples of them. The following commands must of course be started from the client side:
ssh
The first and most important is you ssh command. By using this correctly, we can enter the command line of our system remotely again. The ssh command has a -p You can specify the unique port number with the (small p) option, if you are not using the default port 22:
ssh <felhasználó>@<kiszolgáló> -p <egyedi portszám>Accordingly, staying with my own example, I can return to the virtual machine with the following command:
ssh linuxportal@debian11 -p 57345
ssh-copy-id
Az ssh-copy-id command can be used to copy a public key to the server, with the help of which instead of using a password, we can log in using a public key. The command also has the -p (small p) parameter can be used to specify the unique port number. Example:
ssh-copy-id -i /home/user/.ssh/id_rsa.pub user@remotehost -p <portszám>
(The copied public key was, of course, already created here before, only the use of the ssh-copy-id command with a unique port number is visible here.)
scp
Az scp using command conveniently and we can securely copy files between two remote computers via the SSH protocol. The command has a -P (capital P) parameter can be used to specify a unique port number:
scp -P <egyedi portszám> <forrás fájl> <célfájl>Here is the -p (small p) switch has a different function (Preserves modification times), so don't mix it up!
Staying with my own example, I first create a text file and then copy it to the virtual machine using the scp command:
scp -P 57345 testfile linuxportal@debian11:~/Then test the result:
ssh linuxportal@debian11 -p 57345 "cat ~/testfile"
Just for the sake of interest, in the recent example there is one non-interactive login in a shell, executes the quoted command on the remote server and returns its output. This is a useful solution if you do not want to work in an interactive shell, but only, for example, run commands automatically or process their output. However, note that interactive and non-interactive shells behave differently, so the output of the commands may be different for an interactive and a non-interactive shell. A query for this is, for example, local Bash in shell or on the remote server:
[[ $- == *i* ]] && echo "Interaktív shell" || echo "Nem interaktív shell"
echo $-
ssh linuxportal@debian11 -p 57345 '[[ $- == *i* ]] && echo "Interaktív shell" || echo "Nem interaktív shell"'
ssh linuxportal@debian11 -p 57345 'echo $-'
Of course, this is not closely related to the topic here, I only mentioned it as an interesting point, as well as to practice the ssh command -p using the switch. :)
Rsync
Az Rsync command is an extremely efficient file copying and synchronizing program that can copy files and synchronize file structures not only in local file systems, but also on remote machines via SSH connections. The rsync program can be run either as a daemon or as a plain command. The syntax of the rsync command communicating on a unique port number is as follows:
rsync -e 'ssh -p <egyedi portszám>' <forrás> <cél>Here is the -e we pass a part enclosed in apostrophes as a parameter, which in this case is considered a parameter. Enter ssh and the unique port number in it -p with an internal parameter.
The source and destination can be a local directory or a remote server along with its path. By swapping the source and target, we can change the direction of copying/synchronization.
Let's look at an example of syncing from the local file system via SSH:
First, we automatically create a simple directory structure on the local machine:
mkdir testdir
mkdir -p testdir/{a,b}/{a,b}/{a,b}
We'll look at the tree what it looks like using the command:
tree -d testdir
Then we also check the remote file structure so that we don't accidentally copy things into an existing directory. Here we query in the already familiar way in one step with a non-interactive shell:
ssh linuxportal@debian11 -p 57345 'tree -a'
Then comes the file structure synchronization via SSH with the unique SSH port number:
rsync -vr -e 'ssh -p 57345' --progress ~/testdir/ linuxportal@debian11:~/testdir/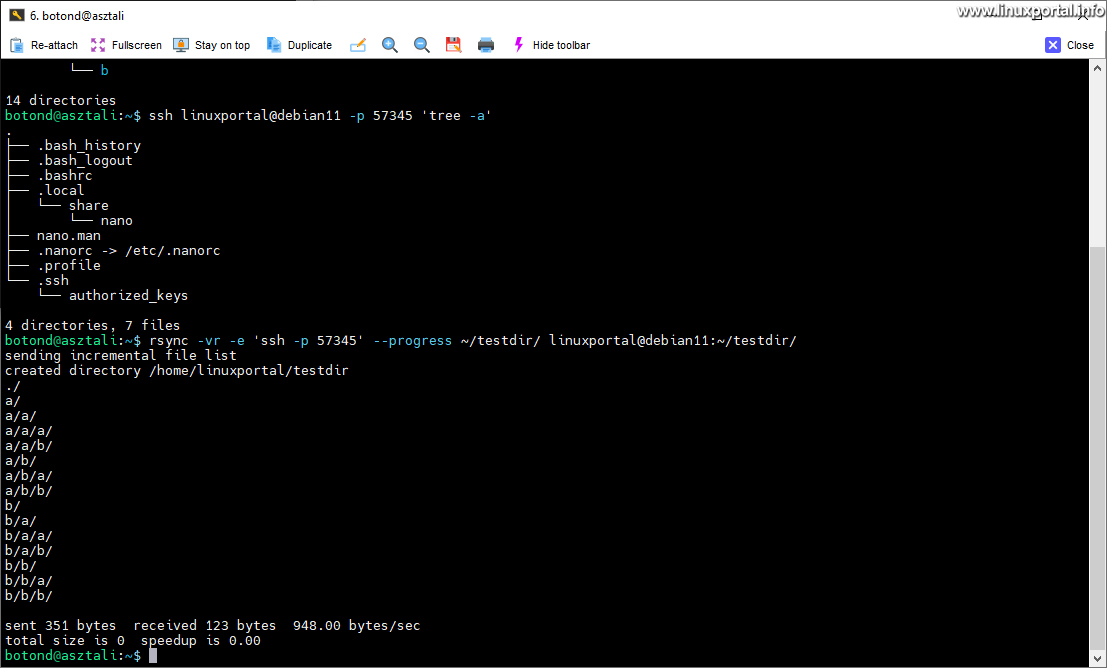
A few more switches have been added here to bring the synchronization to life:
- -in: Verbose. Verbose mode. This way we can see all the details of the operation
- -r: Recursive mode. This will also copy the subdirectories.
- --progress: Process display. It shows the progress bar at the bottom of the screen while the files are being copied. Optional, but useful for copying/synchronizing larger files.
If we have that, we can also check the remote directory structure again:
ssh linuxportal@debian11 -p 57345 'tree -a'
Here we can see that it has copied our entire testdir directory structure. Of course, if there were files in the directories, it would have copied them as well.
The rsync program has many other functions, which will be discussed in a separate description.
Combing and modifying our scripts to use the changed port numbers
The list of commands using the SSH protocol could be continued for a long time, but here I have only described a few that people use often.
If we use these commands in scripts, do not forget to change the necessary parts after changing the port. If we have a more complex script structure, with which we, for example, manage our server and the web pages on it, it is advisable to store the individual port numbers of the various services in separate configuration files and read them from there. Thus, if the line is changed again later, it will only have to be rewritten in one place.
If we have many script files, the one below grep command, we can easily find our scripts containing the above commands:
grep -rnwi "ssh\|ssh-copy-id\|scp\|rsync" ~/bin/or if we don't want to escape, we can use grep -E switch, which supports extended regular expressions (extended regexp):
grep -rnwi -E "ssh|ssh-copy-id|scp|rsync" ~/bin/For example, I have my own script files in the ~/bin directory, but any directory can be specified, and the list of searched commands can also be expanded.
Here are the options for the grep command:
- -r: Recursive search, so it looks through all subdirectories.
- on: It also displays the numbers of the result lines in the output. This makes it easier to scroll to the command you are looking for in the editor.
- w: The search pattern only matches whole words. In this way, we only search for separate command expressions, and results that, for example, start with the same character string as the command are not included.
- i: Ignore case
Setting up and enabling UFW firewall (optional)
If we use a UFW firewall and turned it off before setting the unique SSH port number, our newly set port number must be enabled in the firewall, then we can turn it on.
Let's enable our unique SSH port number set in the UFW firewall root-Kent:
ufw allow 57345/tcpThen turn on the UFW firewall:
ufw enableChoose "y" here and check the status:
ufw status
If there were previously created firewall rules with the OpenSSH application profile or related to the default TCP port 22 that appear in this list, you can delete them. To do this, list them in order with the following command:
ufw status numberedthen delete unnecessary filters with the following command:
ufw delete <tűzfalszabály sorszáma>
Conclusion
Changing the default TCP port 22 of the SSH server is a very simple task, just don't forget to check the free ports and turn off the firewall before doing so. If we have successfully changed the port number, we have already made our system one degree more secure, because fewer attacks will hit our SSH server.
- To post registration and login required
- 173 views