
Content
Introductory
A Debian 11 (Bullseye) was released on August 2021, 14, which is available in multiple desktop environments and, like Debian 10, can be installed in three ways (traditional text and graphics installer, and Calamares). In this description, we will install the version packaged with the KDE Plasma desktop, which can be found at Live version being Squid we will use your installer, which offers a convenient, clean and simplified installation process. This installation is a 64-bit UEFI system machine, where a With GPT partitioning scheme The Debian 11 (Bullseye) operating system is installed on the hard disk.
The KDE Plasma desktop environment
Debian 11 (Bullseye) is the fifth generation of KDE Plasma, an open source, free Qt-based graphical workspace designed primarily for Linux systems. KDE Plasma 5 includes a new default theme known as "Breeze" as well as convergence between different devices. The graphical interface has been completely migrated to QML, which uses OpenGL for hardware acceleration, resulting in better performance and lower power consumption. Among Linux users, KDE is the most popular desktop environment according to most surveys, which is no wonder, as it has a sophisticated, well-designed, user-friendly interface rich in effects and settings, as well as most graphical applications. Here are 10 arguments, which is worth a try.
system Requirements
For Debian 11 (Bullseye) to work optimally, you need at least the following hardware components a Based on Debian's recommendation:
The operating system supports multiple architectures, including 32-bit hardware (i386) for PCs. However, it is highly recommended to use a 64-bit architecture, just because of the software, as there are some that are only made for 64-bit systems. It also needs at least 256 MB of memory and a 400 MHz processor, as well as 30 GB of storage. Of course, these are just the minimum requirements on which the system will boot, of course it is recommended to choose more powerful hardware, such as 1 or 2 GB of RAM, and a 1,5 GHz processor. And if you are installing your system with a more serious, resource-intensive desktop environment, such as KDE Plasma, you may want to insert a video card, as the desktop environment takes advantage of the capabilities of video cards (OpenGL). Today’s modern computers already go well beyond these requirements so they don’t have to hurt our heads because of them; this system works without problems on a modern computer.
Download Debian 11 (Bullseye) - KDE Plasma
The latest Debian installation image files are available in several versions at In the current archive of the Debian CD, but earlier versions are also available at mirror archive.
Netinst
If only a smaller size (netinstall) image file, during the installation of which the installer obtains the necessary components from the Internet, then look for the netinst files in the archive. For Debian 11 (Bullseye) you can also select the "current" submenu, which leads to the latest version, or you can select version 11.1.0 directly in this case. In order for this description to refer to Debian 11 years from now, I also refer to version 11.1.0 here, which is current at the time of writing:
Debian-cd - 11.1.0 - amd64 - iso CD
Download page for the current version of Debian:
Debian - current - amd64 - iso CD
Here you can choose from several ISO files: normal, edu (educational version) and mac (for Macintosh). If you choose one of these, the traditional Debian installer will ask you at the end which desktop environment you want to select. You need a constant internet connection to use it.
Live
The live installation kit allows you to "pre-test" your operating system without making any changes to your computer. In this case, the system only loads into memory and a complete operating system starts. Of course, changes made during use (such as installing software packages, saved files, documents, etc.) will be lost when the machine is turned off. In the case of the Live system, we already have to select the appropriate desktop environment when downloading the image file, as each desktop environment is packaged in a separate image file. These image files are much larger than the netinst versions because they have everything you need to start a live system. Here are two links: the link to the fixed version of the 11.1.0 page and the link to the current version:
Debian-cd - 11.1.0-live - amd64 - iso-hybrid
Download page for the current version of Debian:
Debian-cd - current-live - amd64 - iso-hybrid
Az I have written about iso-hybrid image files before a few words, so I won't go into detail here. Since this description is about installing with the KDE Plasma desktop environment, I kde.iso I download a file and keep going. Another advantage of Live Debian systems (since Debian 10) is that they include the Calamares installer, which is also the subject of this description, so we will use it to install Debian. Once we have downloaded the appropriate image file, we only need to create one bootable device from it.
Creating a bootable device
Once you have downloaded the ISO file, you need to make a bootable device from it and boot your computer. It can even be a DVD, but now we prefer to write them on a flash drive, because DVD drives are not very common in newer computers and laptops. There have been several descriptions of how to make bootable flash drives before:
- Creating a bootable flash drive on Windows
- Creating a bootable flash drive on Linux
- Creating a bootable flash drive on Linux and Windows systems
Our available operating system (on which we create the bootable flash drive) and our target computer (on which we want to install the contents of the ISO file) motherboard firmware type select the appropriate method and then create a bootable flash drive.
The iso-hybrid image files are a dd command can also be used to easily print. About this an earlier one Linux Mint installation guide it has already been mentioned.
If VirtualBoxWe plan to try this installation in , in this case the You can find the correct settings of the machine here.
Boot System
Once we are done, boot the machine with our ISO file.
Boot menu
The boot menu appears at startup.

Let’s take a brief look at the contents of the menu.
Debian GNU / Linux Live (kernel 5.10.0-9-amd64)
This is the default menu that starts Debian 11 in live mode. With live mode, Debian is loaded into and booted from memory, so on the one hand we can review everything before installation to see if we like this system or if it is compatible with our computer's hardware, etc., and - thanks to the Calamares installer - the installation itself takes place via a more convenient graphical interface. We will continue with this menu item, but we will also run through the rest before that.
Debian Live with Localization Support
With localization support, the Live system will start with the settings for the selected country, so the interface language will be set at startup. Unfortunately, the keyboard layout will still need to be set separately in this case, unless you are using an English keyboard.
Graphical Debian Installer
This option starts a graphical version of the Debian Classic Installer.
Debian Installer
This will start the installation with the text mode version of the classic Debian installer.
Debian Installer with Speech Synthesis
This option launches a text-mode installer, where you must first select the language settings, then detect the sound card and some more hardware, and then give speech synthesizer support to the system for the visually impaired. Although I have the On a VirtualBox machine he didn't speak when I tried.
So that would be the boot menu and what we need to know about it now. You can then boot from the very first "Debian GNU / Linux Live (kernel 5.10.0-9-amd64)" menu item.
Booting Debian Live
After selecting the "Debian GNU / Linux Live ..." option, the Live system will start:

Resolution setting (optional)
The Calamares installer needs the resolution, so if, for example, the machine starts at a low resolution, just like the virtual machine, I set the resolution up so that you don't have a problem getting something off the screen during installation.
To adjust the resolution, click the second icon on the taskbar (small sliders on a dark gray background) and the settings panel will appear. Scroll down to the "Display and Monitor" section and click on it. The screen settings section will appear:

Set a higher resolution here. For me, the 1280x792 resolution is right to fit the virtual machine comfortably on my monitor, so I set this up:

Installation
To install Debian 11 (Bullseye), click on the "Install Debian" icon in the upper left corner of the desktop.
Welcome and language selection
The installer welcomes you in the first window and offers to select the system language:
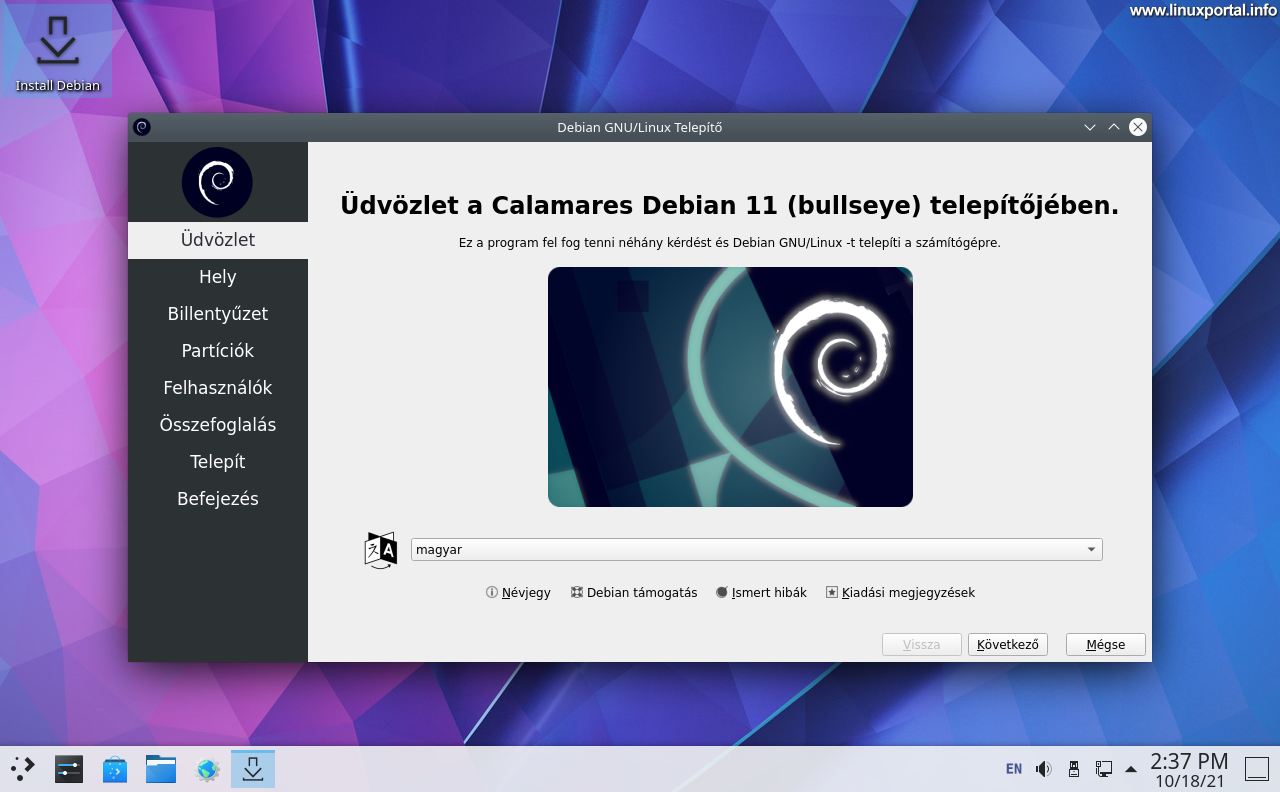
set the desired language here, then Continue the installation.
Select a location
The next step is to set your location:

Here we set the capital for our country and then move on.
Keyboard setup
Then we need to set our keyboard layout:

Here it is advisable to try in the test line at the bottom of the window. Type in pivotal characters such as "qwertz" or "qwerty" strings, or long accents, and even 0 is worth trying to make sure you're in the right place. If all is well, move on.
partitions
In the next window, you need to create the hard disk partitions, where you can see above that your computer is running in EFI mode, which uses the GPT partition table, and you get two choices:
Erase a disc

If you select the first "Erase Disk" option, the installer erases the entire contents of the hard disk selected above, and creates the required EFI, system, and swap partitions according to a preset schema, as shown in the color bar at the bottom of the window. If this pre-configured partitioning scheme is right for us, we can choose this as well, but I will move on here with the manual settings.
Manual partitioning
And if we choose manual partitioning, we need to set everything up:

So if you don’t want to erase your entire hard drive because, say, you still have the partitions you need, or just want a smoother, more personalized distribution, select this option and move on.
In case of a new or empty hard drive, we get an empty list where we have to create the partitions manually:
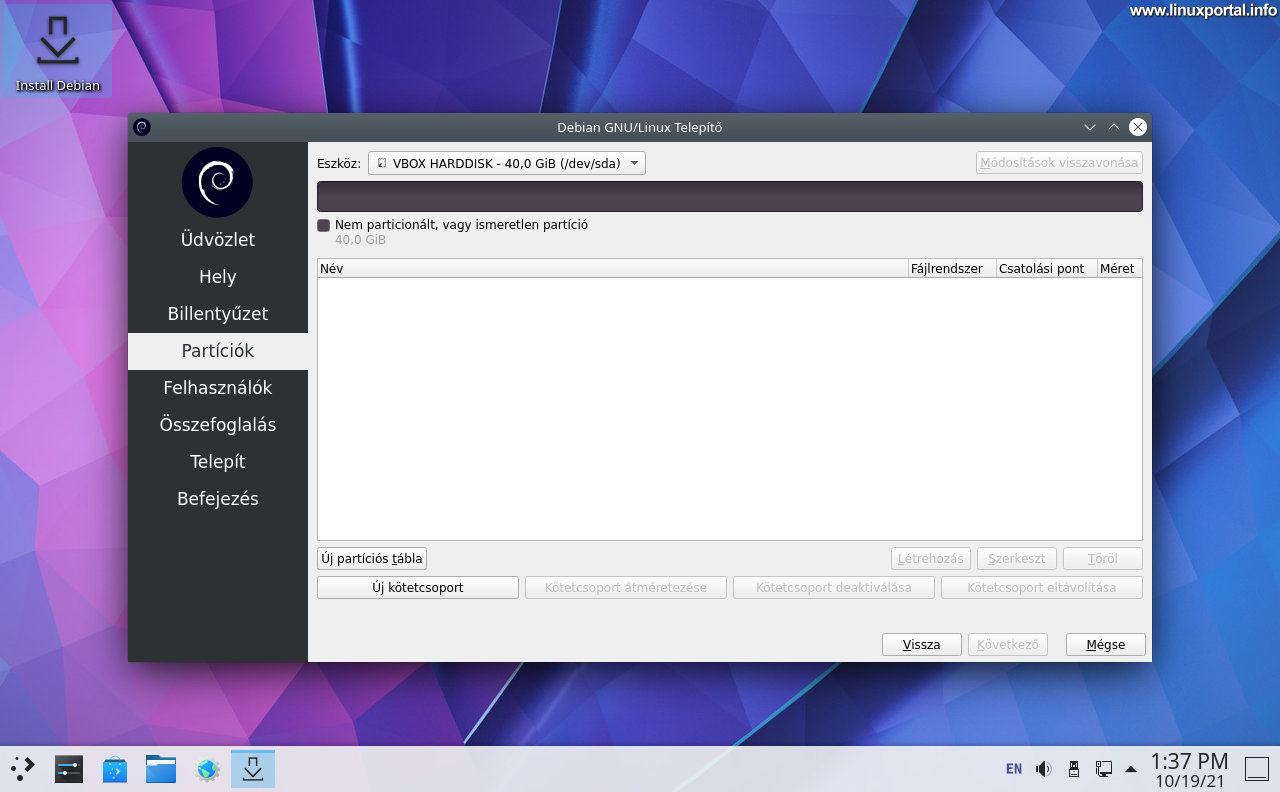
New partition table
On a completely blank hard drive, we first need to create a partition table that contains information about the partitions. Today's modern EFI / UEFI in the case of computers, the GPT partition table, older, BIOS computers and in the case of MBR partition table we need to create. Since this description is made with EFI, I will create the GPT partition table:

Then we return to the previous panel, where the available free space has already appeared:

Then the partitions can come.
Creating partitions
On EFI / UEFI partitioning schemes, you must create an EFI partition from which the machine will boot, and then the operating system partitions can follow. Click on the "free space" line, then the "Create" button below the list will be activated, you can click on it to create new partitions. So let's go in line:
EFI partition
The first partition should be the EFI partition:

Set the following here:
- Size: 512 MiB
- File system: FAT32
- Mount point: / boot / efi
- Flags: boot
Then save it. This also gives us the boot partition for the EFI system. You will later install Debian in this Grub bootloader program.
Go to the "Free space" line again and use the "create" button to create your next partition.
System partition
Create a system partition, this will add the root filesystem:

Settings:
- Size: select as needed, I have now set 25 GB here
- File system: ext3 or ext4
- Mount point: / (root)
- Flags: none
Swap partition (optional)
The swap partition is used as a swap space if the machine runs out of free RAM (Windows paging file call the file used for this purpose, which is located on the system partition). On older machines with less memory, the size of this partition is usually chosen by setting up 2x the amount of RAM in the machine. However, in today’s modern machine, which already has 32 or even 64 GB of RAM, the presence of a swap partition doesn’t matter much here. To follow the traditions, I will now set twice the amount of RAM set for the virtual machine here:

Settings:
- Size: 2x RAM is usually set on machines with low memory
- File system: linuxswap
- Coupling point: none
- Flags: swap
Additional partitions (optional)
I left some more space on the virtual hard drive to illustrate that it is even possible to mount additional partitions on the system. We already have to tailor these to our individual needs. In this example, I'm creating a separate partition for the rest of the home directory, for example, so that users' things will be on a separate partition:

I just created these partitions now, but we can create other types as we like. For example, for web servers, / var directory structure is usually even placed on a separate partition so that the content of web pages is also separate.
So for me now the partition table looks like this:

When you are done creating the partitions, move on.
users
In the next section, we need to set up users:

Here you set your own user, machine name, password and move on.
Summary
Here's a look at what you've set up so far and see if everything goes well:
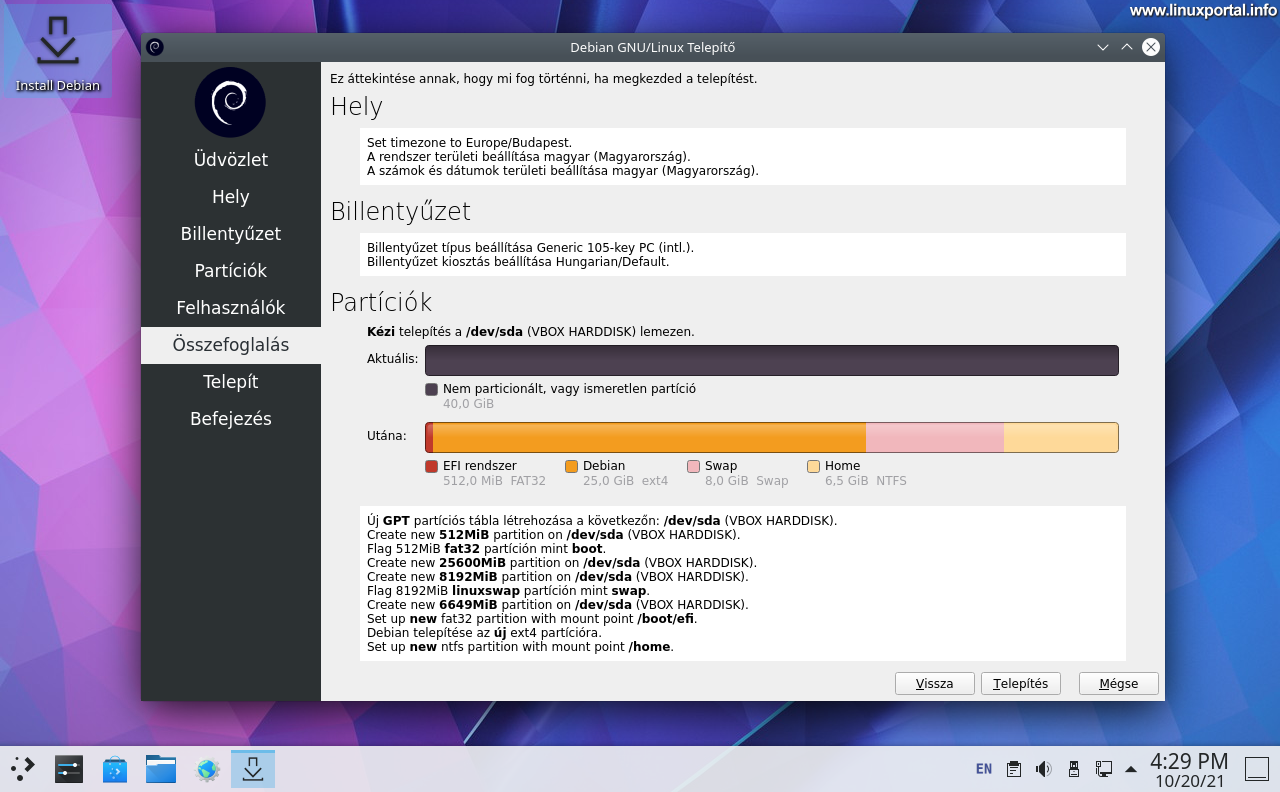
If you see everything as appropriate, click the install button.
Installation
The installation starts, where you can also see its status:


Finally, it prints that the installation was successful and asks for a restart:

Remove the installation DVD or flash drive from the machine, then click Finish and the machine will restart.
Restart the computer
Grub menu
If we restarted the machine, the good old Grub menu will appear first:

Here we select the default "Debian GNU / Linux" option, or wait 4 seconds and the system will boot:
Login
The new design of Debian 11 (Bullseye) is already visible in the login window:

Table
After entering your password, the empty table will appear:

System upgrade
Another important thing to keep in mind is to update and keep your system up to date. As with all Operating Systems, Linux distributions receive regular software updates and fixes designed to maintain the security of the base system and installed components, and to provide additional functionality from time to time. To keep your computer and the data on it safe, it is recommended that you perform this update frequently.
When an update arrives, an icon will appear in the taskbar (to the left of the language setting), which when clicked will bring up the update manager, loading a list of available updates:

Here it is recommended to leave all items checked and then click on the "Update All" button at the top right. You'll then be prompted for a password prompt, followed by updates, as indicated by the blue progress bars next to the items:

After the updates are complete, the system will display that it is up to date.

Of course, we can do this with from the command line also, but for those who do not use a terminal, this is a convenient solution.
Conclusion
This would be a Debian 11 (Bullseye) installation with a KDE Plasma desktop environment. The purpose of this description is primarily to illustrate the installation process with the Calamares installer, so we will discuss the desktop environment in another description. In the meantime, install it, feel free to use it if you liked Debian 11 (Bullseye) with this desktop environment.
- What's new and changes in the Debian 11 (Bullseye) operating system
- Wikipedia - KDE Plasma 5
- Basic graphics systems
- Ubuntu 22.04 LTS (Jammy Jellyfish) UEFI Mode Installation
- How to install Guest additions on Debian 11 (Bullseye) running in VirtualBox
- wiki.debian.org - Documentation - Bullseye - Requirements
- Make bootable flash drives with Rufus 4.3
- To post registration and login required
- 522 views