Content
Introductory
A Linux Mint On January 2021, 8, it announced the release of 20.1, codenamed "Ulyssa," which it made available in a variety of desktop environments. In this description CinnamonWe will install the version packaged with. We've dealt with it before Linux Mint 20 (ulyana) based installation also, we will now look at the latest version of the Linux Mint Linux distribution with the Cinnamon desktop in its original form. This installation is a 64-bit BIOS system machine, where a MBR Partition Schema a 64-bit system is mounted on a single partition on a hard disk.
The Cinnamon desktop environment
Cinnamon is a free and open source desktop environment - for X Window (X11) window managers running on UNIX-like operating systems - that is derived from GNOME 3 but follows traditional desktop conventions. Cinnamon is the primary desktop environment for the Linux Mint distribution, but is also available as many optional desktops for other UNIX-like operating systems (details).
system Requirements
According to the Linux Mint recommendation, our computer must meet the following system requirements:
- 1GB RAM (2GB recommended for convenient use).
- 15GB disk space (20GB recommended).
- 1024 × 768 screen resolution (at lower resolutions, you can move the windows with the mouse by pressing the ALT key if they do not fit on the screen).
As you can see, this system is not a hardware killer instance, it can run excellently on older machines and laptops with more solid parameters. I will be doing this installation on a virtual machine to which I have added 4GB of RAM. And the screen resolution will give way according to the circumstances.
Linux Mint 20.1 (Ulyssa) - Download Cinnamon
The downloaded file is 2GB in size.
Creating a bootable device
Once we have downloaded the ISO file, we need to make it a bootable device from which we will start the computer. It can even be a DVD, but now we prefer to write them on a flash drive, because DVD drives are not very common in newer computers and laptops. You can find information about making bootable flash drives in several previous descriptions, such as the following:
- Creating a bootable flash drive on Windows
- Creating a bootable flash drive on Linux
- Creating a bootable flash drive on Linux and Windows systems
Our available operating system (on which we create the bootable flash drive) and our target computer (on which we want to install the contents of the ISO file) motherboard firmware type select the appropriate method and then create a bootable flash drive.
Although I do now virtual machine I'm going to install this Linux Mint, but for the sake of example, I'll write it to a flash drive on my running Debian system. dd command to download the ISO file. The limitation of ISO printing with the dd command is limited to isohybrid We will be able to boot from flash drives written with ISO files created in this way. For example, Debian creates installer ISO files this way, as well as, to my knowledge, most other distributions. Accordingly, I experimentally created a boot flash drive with this ISO file:
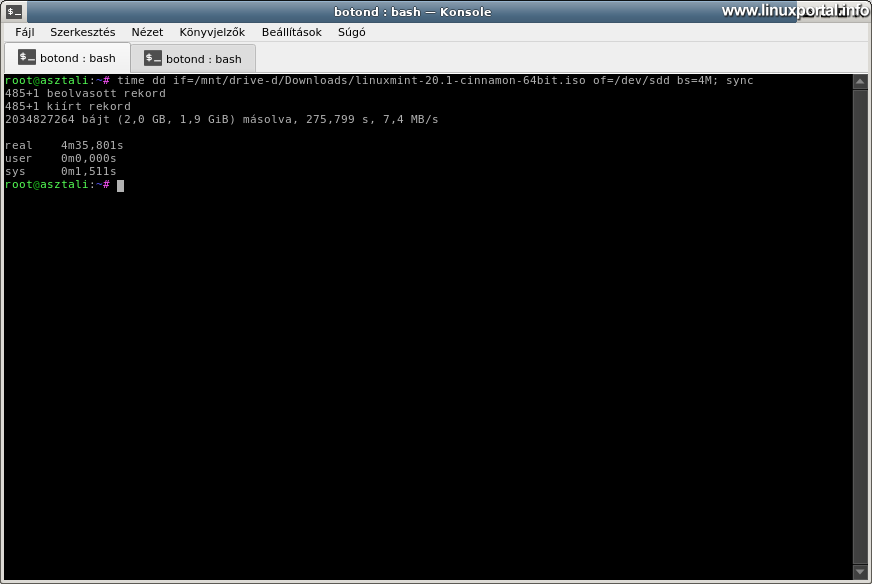
In this example, I even fed a timer team command, although it also writes the elapsed time at the output of the dd command, during which it printed the 2,0 GB ISO file to my flash drive.
I started my laptop with the flash drive made in this way and the installer started with it. Of course, I'm going to do the installation on a virtual machine here now, I just showed you how to use the dd command to easily write ISO files of type isohybrid. Non-isohybrid ISO files are isohybrid can be converted to start with the dd command.
Boot System
Once we are done, boot the machine with our ISO file.
Boot menu
The boot menu appears at startup. Here, if you do nothing, it will start the first menu item after a few seconds. So if you still want to scroll through the menu, use the arrow keys to set the selection and the counter will stop.
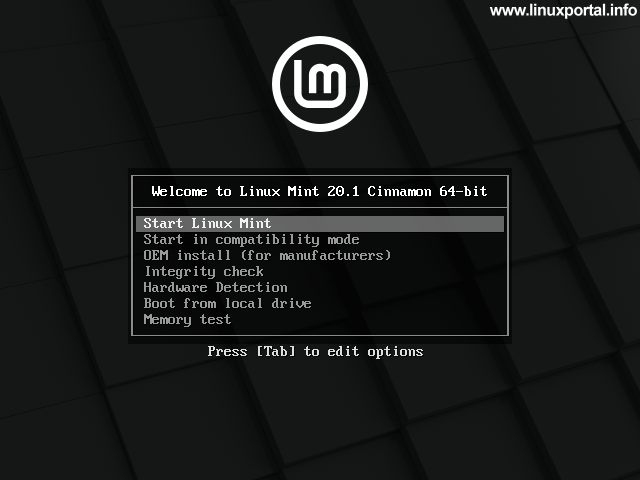
Let’s take a brief look at the contents of the menu.
start linux mint
This is the default menu that starts Linux Mint live in normal mode. With the help of the live function, the system starts in the memory and the operating system is loaded, so on the one hand we can review the whole thing before installation, whether we like this system or whether it is compatible with our computer at all, etc. the installation itself takes place via a graphical interface.
We will move on with this menu item, but before that we will review the rest to see if anyone will need them.
Start in compatibility mode
Compatibility mode is required if something goes wrong with any of our hardware during the previous normal boot mode. In this mode, not all device drivers are loaded, minimizing the possibility of errors. For example, you can use a command line to manually correct errors, configure malfunctioning hardware, and so on. It can help with older computers or laptops that may have unsupported hardware.
OEM installation (for manufacturers)
This feature is used to perform a preinstallation on your computer. It is useful, for example, if you want to sell your computer and also add some operating system that will start your computer, but it does not contain any personal stuff or settings, so the customer will complete the installation. For example, computer vendors also install machines to which they do not want to add a paid operating system. When we install Linux Mint in OEM mode this way, a temporary user is created, which is prepared for the new owner of the machine to customize the machine. The next time you start the OEM after installation, the installer will start on the machine, in which the user will complete the setup of the machine according to their own needs.
Integrity check
With this feature, we can perform an "authenticity" or authentication check before booting, which means that the installation kit checks that the ISO file from which we started the computer matches the copies found on the official download sites. In essence, the system verifies that our installation kit was obtained from the right place, so the downloaded ISO image was signed by Linux Mint and is thus an unmodified or malicious copy made by someone else.
In addition, this check has the advantage that if the contents of the ISO file are accidentally corrupted during the download or even when writing to the boot device, this check will immediately indicate the error, so that the installation or we encounter an error during subsequent use.
Hardware Detection
The Hardware Detection menu launches a text mode interface (the Hardware Detection Tool) where you can view many aspects of your detected hardware, so you can check to see if everything is detected before installation if you are unsure about the correct configuration of your computer.

Boot from local drive
This feature starts the system on the hard disk instead of Live.
Memory body
The memory test menu launches a text-mode tool that performs a detailed memory test:

So that would be the boot menu and what we need to know about it now. You can then start the system with the "Start Linux Mint" menu item.
Booting Linux Mint Live
After selecting the "Start Linux Mint" option, the Live system will start:

Resolution setting (optional)
As already in the Also for Digital Welfare Software Basic Package, I'm switching to a higher resolution here to fit the installer more comfortably. So if you want to switch to a higher resolution, you can do so from the menu or in the graphical interface.

Installation
To install Linux Mint 20.1 (Ulyssa), click the "Install Linux Mint" icon on the desktop.
Welcome and language selection
The installer welcomes you in the first window and offers to select the system language:

Set the desired language here, then Continue the installation.
Keyboard Layout
In the next step, you can set your keyboard layout:

Here is a very useful feature that allows you to try out different keyboard layouts live as you type. For me, the very first option works perfectly.
As you type, we also check the proper operation of accented and long accented characters, as well as the "z" or "y" keys. If these work well, the keyboard layout is good for our keyboard.
Once you have found the correct keyboard layout, go to Continuation button.
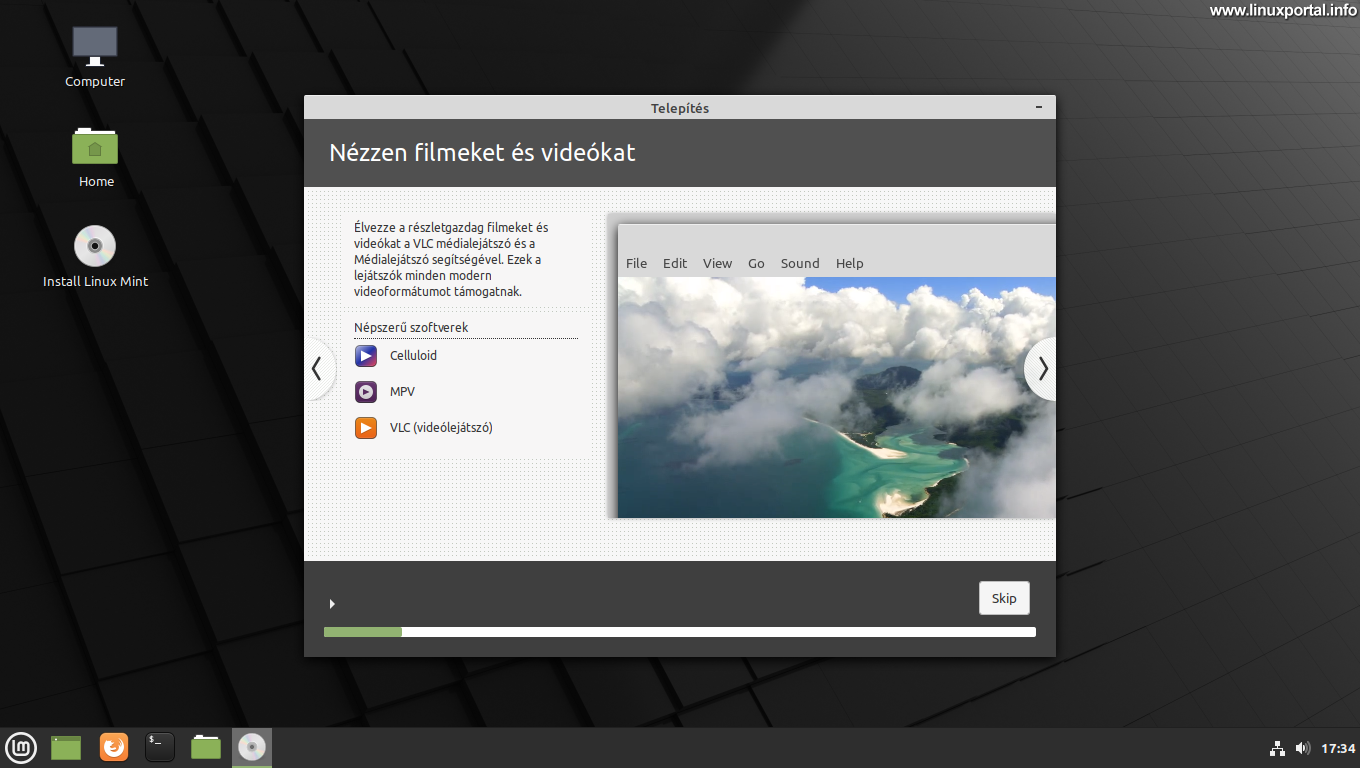
Multimedia codecs
The installer will then offer you the option to install the multimedia codecs needed to play movies, and so on.

It is recommended that you install them, so check it and move on.
Installation type
Here you can essentially control the partitioning settings:

Here, if you select "Erase Hard Disk and Install Linux Mint", you can start the installation right away.
This option erases everything on the hard drive and automatically sets up the required partitions. So if you are sure that there is no important data on your machine that would be wasted in this case, just proceed with this operation!
Otherwise, if you have important data on your machine - such as documents, pictures, etc. from a previous operating system - but we don't know what to do, stop the installation and ask for help!
Here's another one Advanced features ... button also when clicked:

Here you can even configure logical volumes (LVM), and if you select logical volumes, you can even turn on disk encryption. If we don’t know what these are, don’t make it, otherwise we’ll make it according to our needs.
There is even an option called "Something Else", if you choose this, you can manually partition your hard drive according to your needs. We will not go into this in this installation guide, it will deserve another special description, where we will look at the details of partitioning from a more advanced perspective. Here we proceed with the simple installation, which does not require expertise. Of course, if someone has unique needs, they can also create their own partitions manually.
So now the Install now continue by clicking on the button labeled. You will then be asked for confirmation before taking any action:

Here it shows our hard disk (sda) and the partitions created on it. Click continue.
Where are you staying? - Time zone setting
In this step, we need to set the time zone.

Normally, it automatically sets the correct time zone, but if you don’t, enter your capital and then move on.
Who are you? - User account setup
Next, set up the primary user account:

Fill in the form with the appropriate information. For the options below the input fields, it is a good idea to select "Require a password to log in" so that others cannot log in without a password, so your data will be secure. If you need an even higher level of security, you can also check the "Encrypt my folder" option below, although this is not necessary in most cases.
The account created here will be added to sudo users, so you can perform (administrator) tasks that require elevated privileges at any time later.
Once you have completed the form, click on Continuation button.
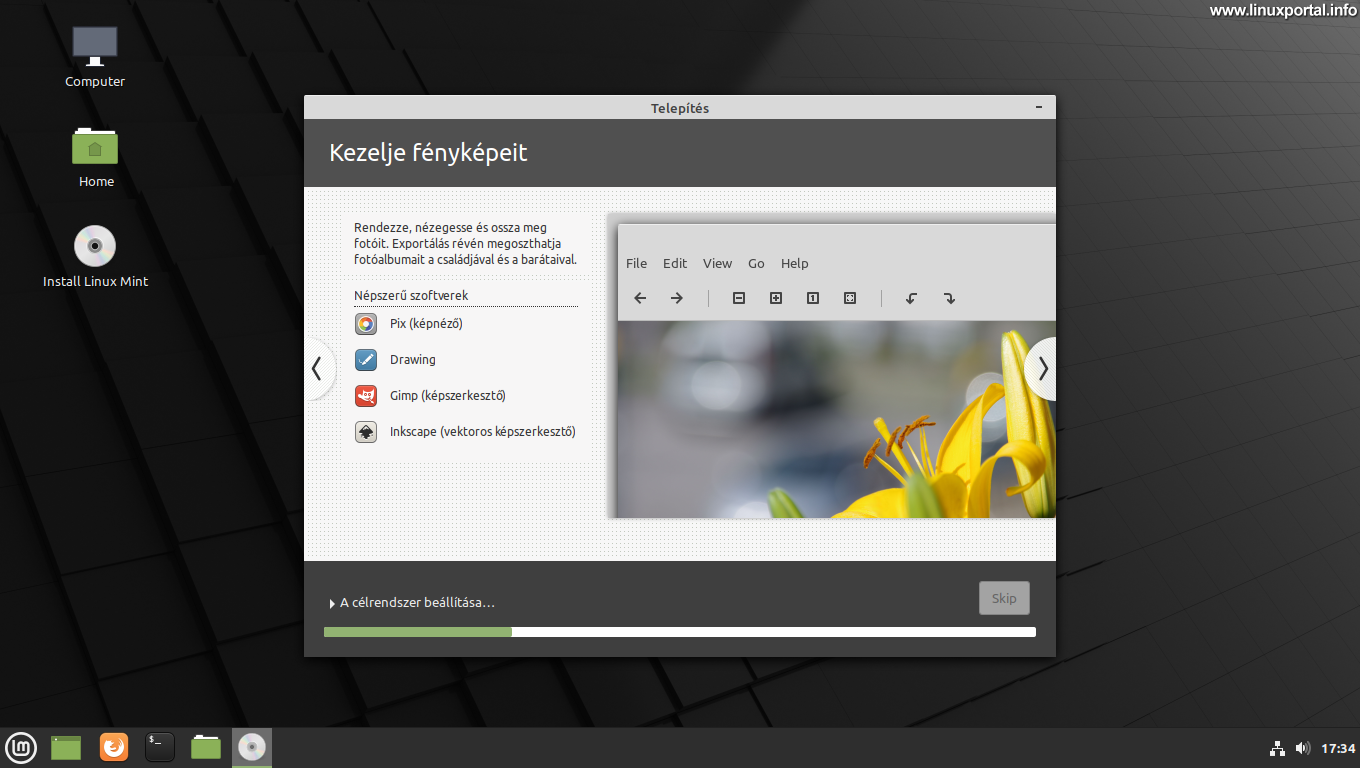
Installing system components
The system components are added in the last phase of the installation. There is nothing left to do here, it is an automated process while a slideshow informs us about the features and curiosities of Linux Mint 20.1 (Ulyssa).
Similarly, a To install Digital Prosperity Software Basic Package, here are the slideshow frames:


Installation is complete
After the installer has run, it will unload another panel informing you that you can continue to try Linux Mint if you want, but the changes and new documents will not be saved until you restart your computer.

To start using Linux Mint 20.1 (Ulyssa) normally, click Restart now labeled button. Before doing so, of course, remove the boot DVD or flash drive so that the installer does not restart.
Restart the computer
If you have restarted the machine, the login screen will appear:

Once you have entered your password, you will be presented with a welcome window:

Here we get a "quick guide" to set up different parts of the system. For example, on the "Getting Started" tab, you can access some desktop settings and device management programs:

So we can scroll through this window or even look through the other menus on the system.
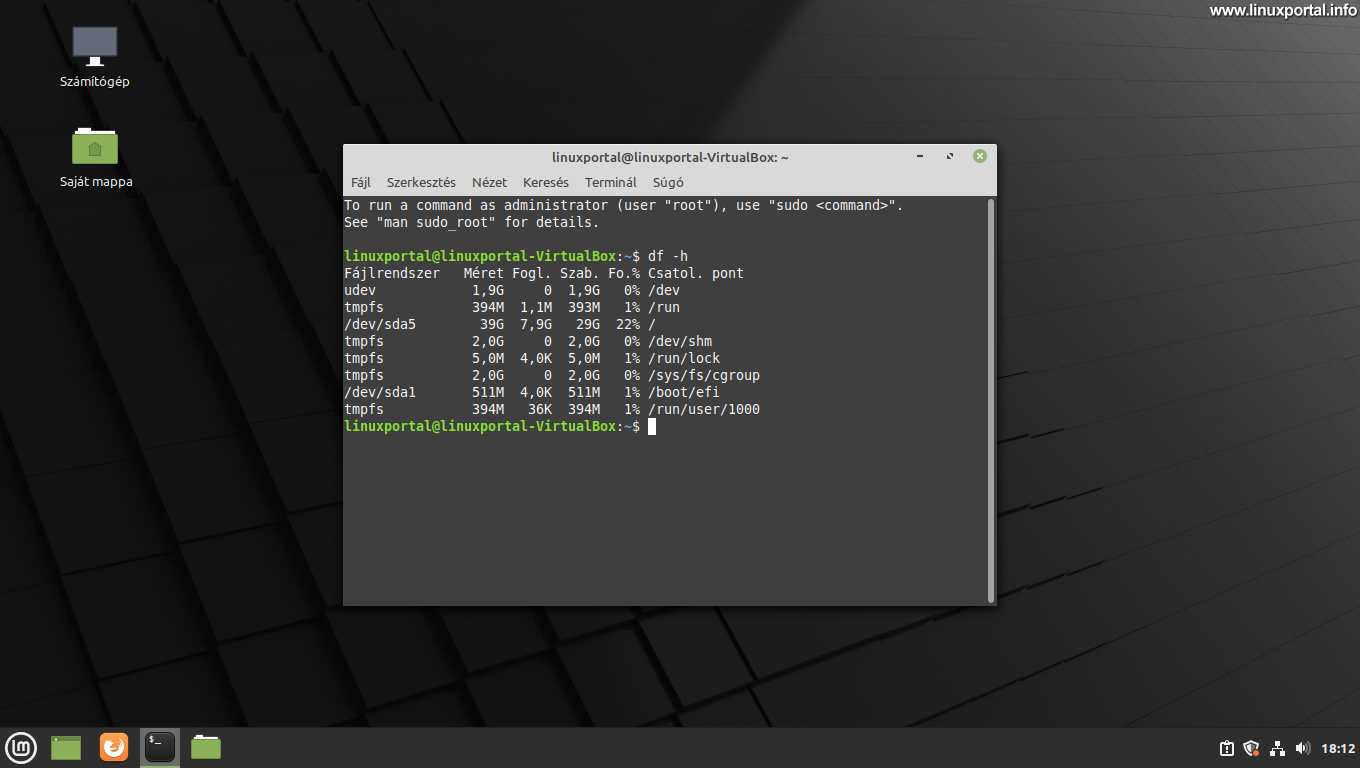
The total installation space is 7,9GB, so we have to calculate that much space for a fresh installation.
System upgrade
Another important thing to keep in mind is to update and keep your system up to date. As with all Operating Systems, Linux distributions receive regular software updates and fixes designed to maintain the security of the base system and installed components, and to provide additional functionality from time to time. To keep your computer and the data on it safe, it is recommended that you perform the update operation frequently. I have previously described the method and procedure for updating Digital Prosperity Software Basic Package installer description, so you can find out the details there. The update here is exactly the same as for Linux Mint 20 (Ulyana), which was the subject of the previous description.
Conclusion
This would be a recent installation of Linux Mint 20.1 (Ulyssa) with a Cinnamon desktop environment. Of course, this desktop environment still has a number of "faces" that can be lured out thanks to the rich settings, if you want to conjure a different style look on your desktop. The purpose of this description was primarily to illustrate the installation process, so that additional tutorials on other settings can be made later if needed. In the meantime, I recommend the Linux Mint distribution to anyone who wants to use a convenient, easy-to-use operating system with a nice graphical interface on their desktop or notebook running a Debian-Ubuntu-based Linux. In addition to desktop use, we can even add server functions to our system later.
- To post registration and login required
- 1171 views