
Content
Introductory
Thanks to virtualization, we have the possibility to run another operating system within the existing operating system of our computer. We can use this, for example, to experiment, or to get to know and try other operating systems, but also to run software that is not compatible with our current (host) system, in which case we install the appropriate guest system in which we can run the desired software. In this case, I use the free one for demonstration purposes VirtualBox virtualization program in which I install the guest operating systems that are the subject of the tutorials.
I’ve made a guide before that includes one I created a guest machine for Linux base systems in VirtualBox running on a Windows 7 host machine, and in this description, in VirtualBox running on a Linux host, I create a guest machine for Linux or Windows operating systems with a graphical desktop environment that requires more hardware resources - and therefore different settings in some places than before. For Linux base systems prepared version.
So in this example, on a Debian 10 (Buster) host, I will create an environment configured for Windows 11, which is of course suitable for other operating systems with a graphical desktop environment.
I will not cover all the functions of VirtualBox here either, but I will purposefully go through the settings that we will need to set up our guest machine.
Get a virtual box
https://www.virtualbox.org/wiki/Downloads
(Version 6.1.32 is the latest download available at the time of writing)
After installation, do not forget to install the Extension Pack on the host machine or the Guest Integration Services on the host machine. While the former provides greater hardware compatibility from the host machine, the Guest Integration Services installed on the guest machine help to properly manage and operate the virtual hardware. I've described some of these before:
- Installing an Extension Pack on a Linux (Debian) Host on VirtualBox 6.0
- Install guest integration services on a Windows guest machine under VirtualBox version 6.0.
We will not deal with this in more detail here, this description is not covered. More VirtualBox installation and other links can be found under this article.
Once you have Virtualbox installed, get started and get started!
Create a new virtual machine
To get started, click on the top toolbar on the VirtualBox main screen Uj icon.
Name and operating system
In the first window of the wizard, enter the name of the machine and the type of future operating system.

Since I'm going to install a Windows 11 for that - which will be a dual boot description later - I'll give it a name for Windows 11. Then set the type and version. Here, of course, select the operating system and its version according to your target machine.
Memory size
In the next step, you can set the amount of RAM in the virtual machine:
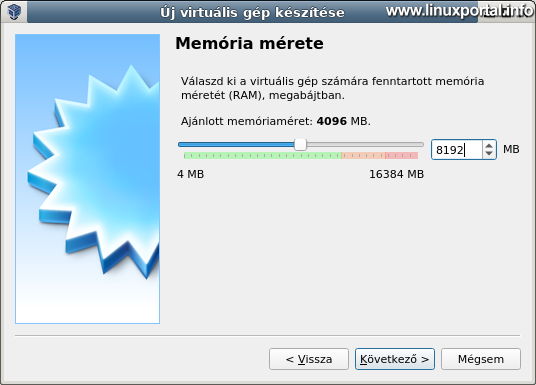
This machine has 16 GB of RAM physically, so I can farm from that. VirtualBox offers 4GB of RAM, which is of course sufficient for basic system operation. They usually offer 11GB of RAM by default for Winwows 8, so I set that up too. Of course, if you are installing a less memory-intensive guest system, or if you do not have that much physical memory, you can configure less, but it is no longer advisable to run today's operating system with a graphical desktop environment with less than 6GB of memory. Once set, move on.
Hard drive
In this panel you can set how to add the hard disk:

You can choose from three options:
- Do not add a virtual hard disk: If you select this, you can connect hard disks to the virtual machine at any time later.
- To create a new virtual hard disk: If you select this, you will create a virtual hard disk based on the settings in the next window.
- To use an existing virtual hard disk: Here you can select an existing hard drive from the virtual media manager.
Since I am creating a new machine with a new operating system now, I am choosing the second option here, so I am creating a new hard drive.
Hard disk type
Now we need to determine the type of hard drive:

Click here Expert mode button, and then you can configure everything about your hard drive in one step in a single panel, so no further steps are required.
Expert mode

- File location: Here, browse to the destination location and name of the virtual disk image file.
- File size: Adjust the size of the hard disk.
- Hard disk type: Here you can choose from several types of discs. Since I do not plan to run this virtual machine with other virtualization software, I choose VirtualBox's own disk format, so VDI (VirtualBox image) format.
- Physical hard drive storage: Here you can choose between two options:
- Dynamically growing: In this case, the physical size of the disk image file starts from a minimum size and increases during use. The advantage is that it does not take up unnecessary storage space even if the virtual machine is empty. The downside is that it works a little slower. However, for today’s SSDs, this doesn’t matter, so select this option.
- Fixed size: In this case, it takes up storage space that matches its full size when it is created.
If you have an SSD, you can optimize it here as you would on a real machine: You can create a smaller partition for the boot disk that is physically stored on the SSD, and then place another, larger drive on a larger but traditional hard drive.
Once you've set everything up, move on.
Overview
When we're done, our virtual disk has been created in the appropriate directory, and the new virtual machine has appeared in the main window of VirtualBox:
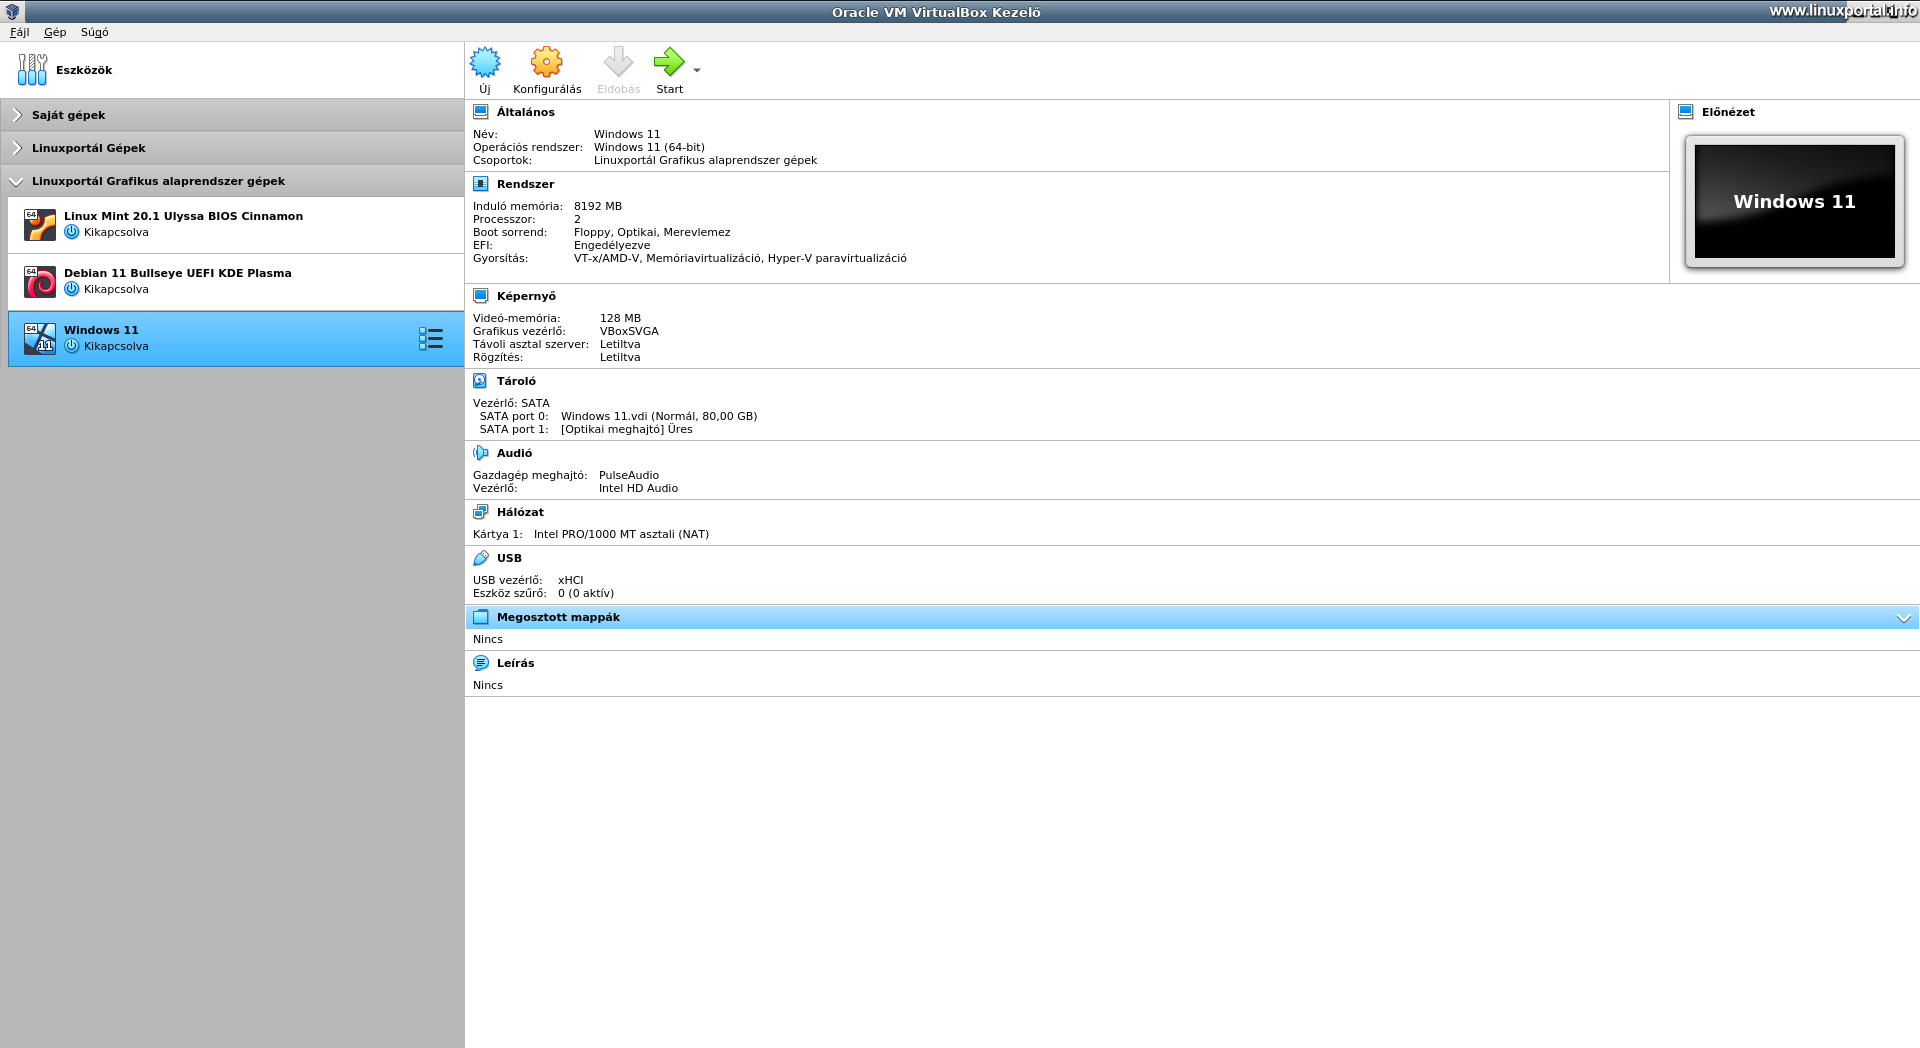
On the left is the list of virtual machines arranged in groups, where I also list the machines created for the previous tutorials, and on the right is an overview of the settings of the selected machine.
The virtual machine is done at the basic level, but we still need to make some settings to run our guest operating system without any problems.
Set up a virtual machine
In this section, we set the other parameters of the virtual machine to be ready for use.
While on the new virtual machine, click the orange in the top toolbar of VirtualBox configuration gear icon. The virtual machine settings will appear. There is a lot to be said here, but now we are only going through the parts that need to be changed.

General
Advanced tab
Here you can set the snapshot folder, clipboard, and drag and drop features:

Az Split Clipboard and the Drag and drop adjust settings to bi-directional for greater comfort and handling.
We have nothing else to do here, let's move on System menu.
System
Motherboard tab

- Basic memory: If necessary, we can change the memory here
- Boot order: Remove the Floppy option from here, nowhere is a floppy disk used, so it only slows down the boot process unnecessarily
- Chipset: Set this to ICH9, I will detail below.
- Pointing device: USB tablet (default setting)
- Advanced capabilities:
- Enable I / O APIC: be
- Enable EFI: be
- To set the hardware clock to UTC: can be left blank
The ICH9 sheet set emulation was introduced in version 4 of Virtualbox, so its use is now stable at version 6.1.
So if you want to take advantage of PCI express (for example, your host machine has such hardware), choose this chipset for modern guest operating systems. If the features listed above are not important to us or you are unfamiliar with them, leave them at the default PIIX3 setting.
Processor tab
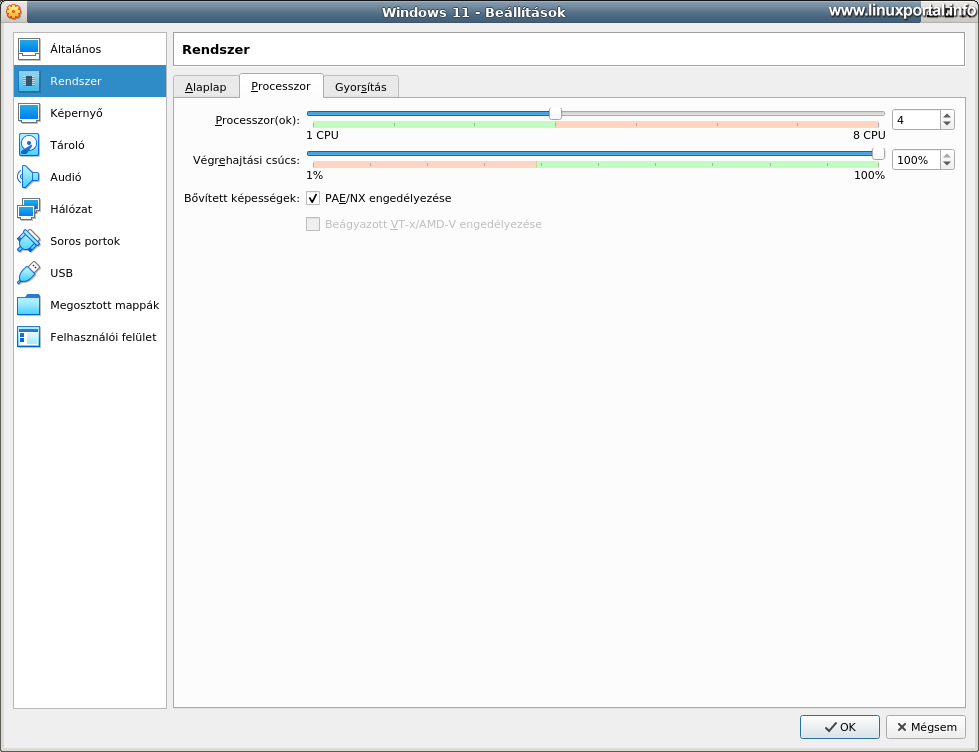
- Processor (s): Here we set up exactly as many processors (processor cores) as the number of physical cores the processor of our host machine has. This will work optimally (so set the slider to the upper limit of the green bar).
- Execution peak: 100%
- Advanced capabilities:
- Enable PAE / NX: be.
Screen
Screens tab

- Video memory: Set this to 256MB. (allows only 128MB maximum by default, but after turning on 3D acceleration, the maximum goes up to 256Mb, then set it)
- Number of monitors: 1 (base)
- Image scaling factor: 100% (default)
- Graphics controller: VBoxSVGA (default)
- Acceleration: 3D acceleration: on. (Then you can set the video memory to 256MB)
holding
Here, first select the top "Controller: SATA" option from the list of storage devices.
SATA controller settings

Here, select the "Use Host I / O Cache" option, leaving everything else as default.
Primary hard disk settings

Here, depending on the name you gave your virtual disk image file, the hard disk will appear with that name. I have "Windows 11.vdi".
If you are storing your virtual hard drive on an SSD on the host machine, set the "Solid-state drive (SSD)" option on the right side of the panel, leaving the rest at the original settings.
Setting up a DVD installation disc
Select the optical drive labeled "Empty":

Then set the ISO file you want to install by clicking the blue DVD icon at the end of the Optical Drive row on the right side of the panel. Once you have selected your ISO file, the "Blank" label in the middle list will change to the name of the selected ISO file.
Network
Card with 1 tab

In the "Connected here" option, select Bridge disappear card, because if your computer is behind a router, with this setting the router will also see the virtual machine as a separate computer and assign it an internal IP addresses on our LAN. Thus, while the guest machine is running, it can access its shared folders from the host machine, or vice versa, the shared folders on the host machine from the guest machine, making it easier to exchange data between the two machines.
We don't have to deal with the other settings here.
Overview of the configured machine
After setting up what you need and saving the window, take a look at the machine overview page:

Here you can run through your settings and change them if necessary.
If everything is OK, you can also boot the machine with the ISO installation kit configured.
Conclusion
That would be the way to set up VirtualBox 6.1 for an operating system with a more resource-intensive graphical desktop environment. These parameters can be used to install more modern operating systems, such as Windows 11 or even a newer Linux system with a KDE desktop environment.
- How to configure VirtualBox for basic systems
- Install VirtualBox 5.2 on Debian 9 (stretch) host operating system
- Installing VirtualBox 6.0.x on a Debian 10 (Buster) host operating system
- Install VirtualBox 6.1.x on Debian 10 (Buster) host operating system
- How to install Guest additions on Debian 11 (Bullseye) running in VirtualBox
- How to shrink image files of our VirtualBox virtual machines on Linux and Windows systems
- Dual boot: Installing Windows 7 and Debian 10 (Buster) operating systems in BIOS mode on a hard disk
- Encyclopedia - VirtualBox
- To post registration and login required
- 523 views