Content
Introductory
You may want to share larger files with others, or just receive ones that no longer fit in an email. Of course, there are also free file shares for this purpose, but if two-way data transfer is required more often, for example during teleworking, it is more expedient to solve this ourselves. SFTP (SSH File Transfer Protocol) is excellent for this, which offers a secure file transfer solution SSH over a connection, unlike unencrypted and outdated FTP with a relationship. SFTP is available by default on all servers with SSH access. As a result, in the current situation, the SSH connection has so many flaws that it is one shell it also provides access, which we won't need here right now, because we don't want them to be able to access other directories on our computer and even run commands through the shared access, but we want to be able to access only the directory to which we allowed. In this tutorial, we will look at how to create an SFTP user without shell access on your Linux system.
In this example, I will create an SFTP-only user on my desktop computer and access it from my laptop.
Prerequisites
We need to install an SSH server first, if you don't already have it:
sudo apt-get install ssh openssh-serverYou can then log in to the computer remotely with any shell user, or establish an SFTP connection. We will only need the latter of these now, so we will have to disable the user from the command line.
Create a user
We need to create a new user in the system with which we will connect via SFTP. Our username should be in this example "sharing1". Of course, you can enter any username. To create it, log in as root and then run the following useradd command:
useradd megosztas1 -s /sbin/nologin -MA -s switch to give the user another shell. In this case, this a nologine replaced by the command. This assures the user that he cannot enter the command line with him. THE -M and with the switch we instruct the useradd program not to create a home directory for the user either, because then we set separately which directory to access.
Then give him a password:
passwd megosztas1If you have, you can try su command to see if we really can't log in with this user:
su -l megosztas1A -l switch would try to log in as a login shell, so it would also log in to the user's home directory, which it fails because it doesn't have a home directory. It then outputs the error output from the nologin command: "This account is currently not available.". So the command throws us two error messages and then goes back to the root command line:
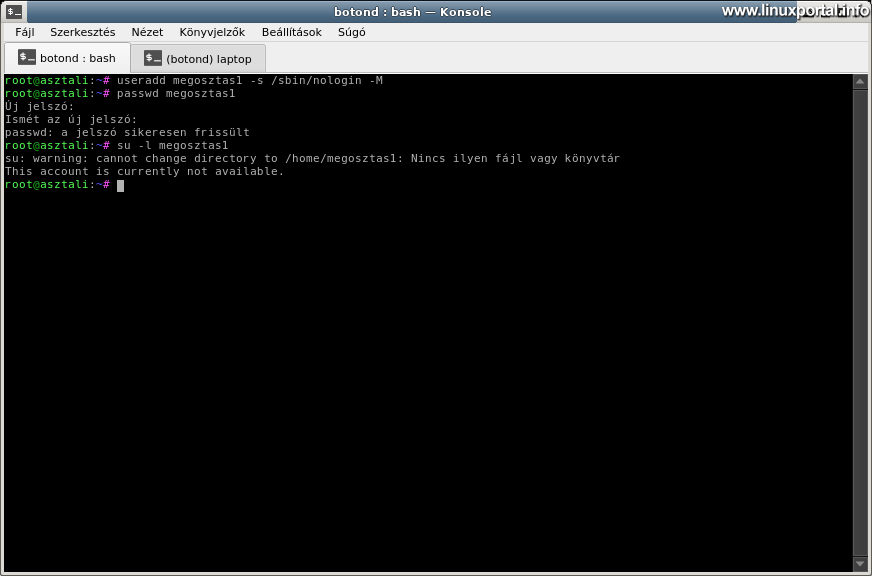
So so far we have a user that cannot access the command line.
Create and configure an SFTP directory
We will apply the OpenSSH server chroot setting to the SFTP directory. This, in turn, requires that the configured chroot directory be owned by root and not written to by any other user or group. If you also want to be able to write with your SFTP access, i.e. upload files, you will need to create a subdirectory under this chroot directory that is owned by the user himself. Documentation.
So staying root, let's create our user's directory:
mkdir -p /var/sftp/megosztas1Check your chroot directory, i.e. / var / sftp entitlement and owner:
stat -c "%a %U %G %n" /var/sftpIt must be a maximum of 755, so it cannot be written by the group or other users, and its owner must be root. When created, it is created by default, unless the umask is set. If these owner and permission settings are not in the directory, set them.
Then also change the ownership and permissions of the user directory under the chroot:
chown megosztas1:megosztas1 /var/sftp/megosztas1
chmod 700 /var/sftp/megosztas1
If we want to completely separate the users, then, of course, a separate chroot directory must be used for each user, which in this case requires the inclusion of another directory level (such as / var / sftp / share1 would be the chroot directory with the root owner and say / var / sftp / share1 / share1 would be the writable directory in it with the user owner). In this example, however, we only use one common chroot directory for simplicity.
So if we have the directory structure, it looks like this:

Configuring SSH for SFTP
If we're done with that so far, all that's left is to set up the OpenSSH server. To do this, open the edit / Etc / ssh / sshd_config file, and then add the following section to the end:
Match User megosztas1
    ChrootDirectory /var/sftp
    ForceCommand internal-sftp
    AllowTcpForwarding no
    X11Forwarding no
Here the lines mean the following:
- Match User : This section identifies this entire conditional block, which is executed only if the specified user matches the logged in user. If you have more than one user, you can list them separated by commas. If you want to apply a separate chroot directory per user, you need to create separate blocks for them that specify the different chroot directories.
- ChrootDirectory / var / sftp: The chroot directory must be specified here, so what root has and no one else can write to it. Within this, there may be separate directories for users to write to. The server reconciles these directories with SFTP users based on their owners, so directory names can be anything, so you don't have to enter them here. However, it is a good idea to use a consistent directory naming method, so for example, if it is the same as the user name, you will definitely not confuse them.
- AllowTcpForwarding from: Disables TCP port forwarding.
- X11Forwarding no: Disables X11 forwarding.
Save the file and restart the SSH service:
systemctl restart sshd.serviceYou are now ready to use SFTP.
SFTP testing
Before giving anyone SFTP access to our machine, we test the connection first.
If an SFTP connection is already available, it can be used in several ways: casually or persistently can be mounted on Linux systems, or We can also make it available from Windows systems, or if you don't need it all the time, you simply connect to a client program. In this section, we'll try out some of our new SFTP accounts.
Test SSH command line access
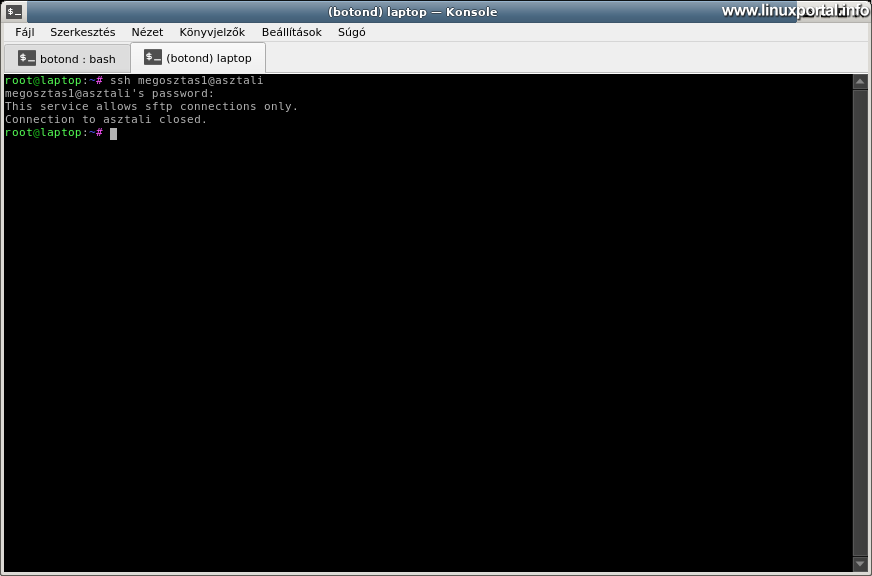
We first check to see if we really can't enter the command line with this user. On the client machine, run the ssh login with your own parameters. For example, I have:
ssh megosztas1@asztaliThen, after entering the password, it throws the following error: "This service allows sftp connections only. Connection to desktop closed." So now you are no longer throwing the error as in the beginning as we got for nologin, but now the OpenSSH server is handling this connection. This way you can be sure that command line access is disabled in two places.
Mount a remote SFTP file system with the sshfs command
If you are also using a Linux system on the client computer from which you want to log in to the SFTP account, it is sshfs linux command can be used to temporarily mount SSHFS file systems, which will disappear after the client machine is restarted. To use it, first install the program:
apt-get install sshfsThen you can mount the file system with the following syntax (also as root):
sshfs -o allow_other <felhasználó>@<szerver>:</abszolút/elérési/út> </helyi/csatolási/pont>Staying with our own example, first create a mount directory on the client machine:
mkdir /mnt/sftpThen run the above command with your own parameters:
sshfs -o allow_other megosztas1@asztali:/ /mnt/sftpHere we can also specify the root directory (/) as the absolute path, or any subdirectory of the structure that we need in the work.
You can then enter the mount directory, where you can already use your SFTP storage as a local directory:

If the connection is no longer needed, it is umount command, which can only be done as root:
umount /mnt/sftpLogin with the sftp command line client
If you do not want to mount the file system, it is sftp command to connect as a client from the command line:
sftp megosztas1@asztaliYou will then get an FTP-like command line in which you can perform the necessary file operations.

Login using the FileZilla graphical FTP / SFTP client
And finally, come to use the well-known and popular FileZilla.
Open your favorite places and click the New Station button. The setup window will appear:

Set the protocol here to "SFTP - SSH File Transfer Protocol", enter the hostname or IP address of the server for the address, then enter the port in the port section if you use a port other than the default port number of 22, otherwise leave blank. Then enter your username and password and save the panel.
The first time you connect, the usual unknown key message will appear:
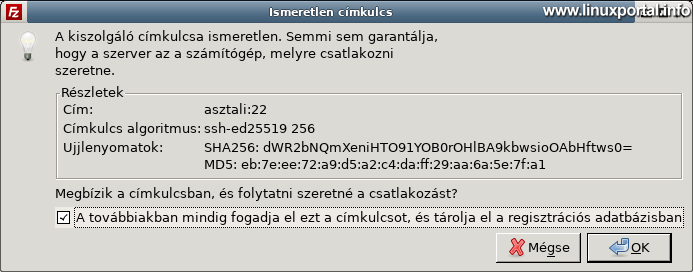
Make a note with him and then join.

And our things come up again from SFTP.
Conclusion
This allows us to create FTPS users, accounts, which can then be securely used over the encrypted SSH channel without users having to log in to the command line.
- To post registration and login required
- 298 views