
2. page content
Continuation
A on the first page of the description we installed the Samba file server and client support and configured it. We also created a Samba share with its associated Samba user. So the shared directory is ready for external access.
And on this page, we'll continue the process, starting with accessing from a Windows page.
Access Samba Sharing from Windows
The thing is we're out of trouble now, we just need to connect to a share from a Windows (on the same network and workgroup) as another standard share.
In Windows, open the networks where your Linux machine appears. Click on it and a password prompt will appear:

Enter the username for the share and the Samba password that you set earlier, and select to remember the credentials. Then, if all goes well, you will join our shared library:

Where the two test files also appear.
Everything is fine and good so far, but if you restart your Windows machine, you will have to re-enter your username and password to rejoin the share, even if you have checked your credentials as this only applies to this session .
This is not a big problem, but it becomes uncomfortable with regular use.
Make the connection permanent on the Windows page
To establish a lasting connection with sharing, you only need to take a few more steps.
In Windows, open the following window: Start menu -> Control panel -> User Accounts and Family Safety -> Credential Manager. This window will pop up:
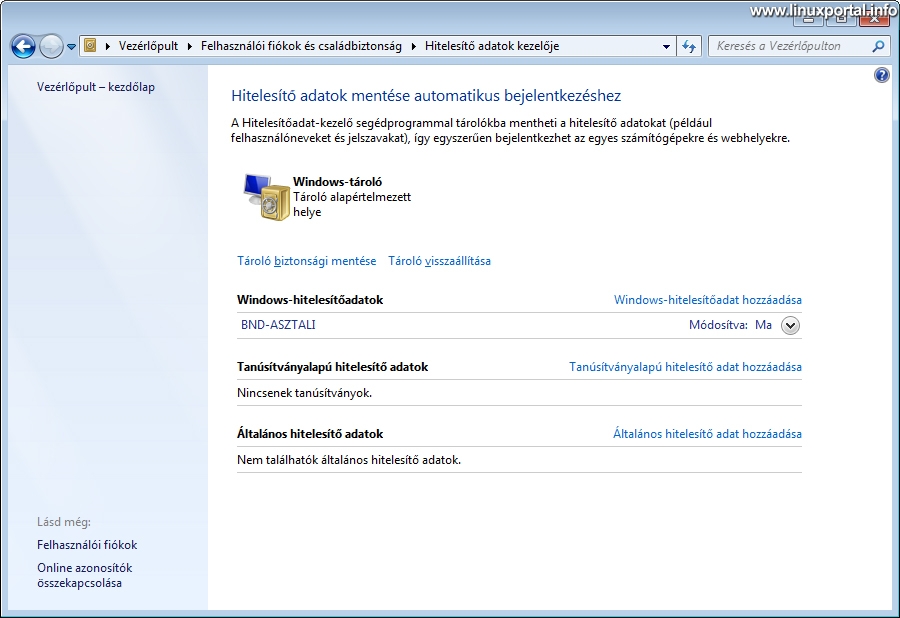
Here, in the Windows Credentials section (where I already have a setting), click Add a Windows credential link:
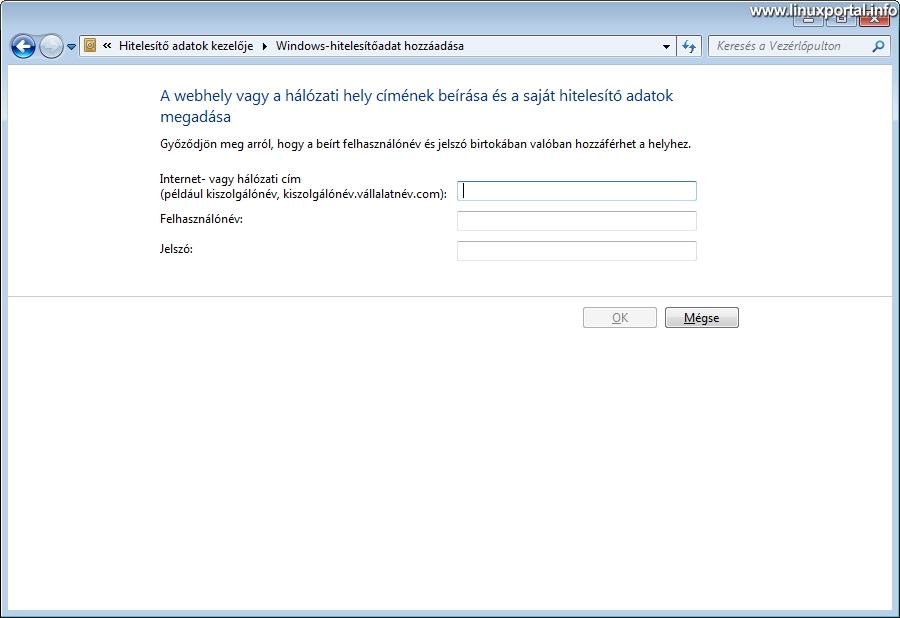
And here you enter the machine name, user name and password.
After that, Windows will remember the login information for the specified computer the next time it starts, so that you will not be prompted again.
Connecting a network drive
We can make it even more convenient to use the shared library by plugging it into Windows as a network drive and from there you can access it directly with a single drive letter reference.
To do this, go back to the networks and open the computer where the share is located. Then, right-click on the share (folder) you want to connect and select Connecting a network drive item:
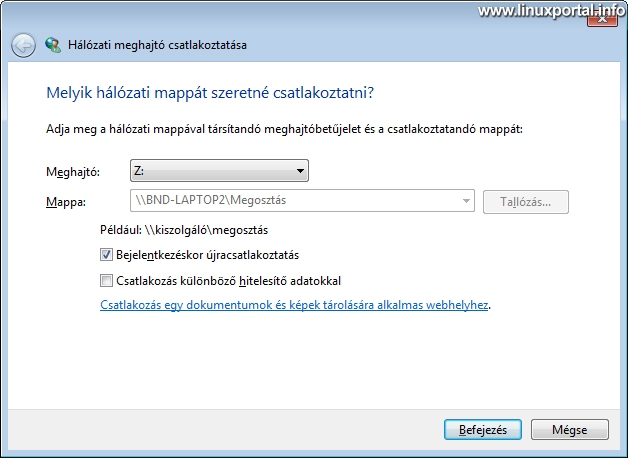
Enter the drive letter to which you want to connect your Samba share and select the Reconnect when logged in option to mount the network drive each time it starts up.
Connect to multiple users simultaneously
It's also worth talking about a little practice that lets you connect multiple users to the same computer at the same time.
Suppose you have multiple shares on a Linux computer, but each directory is owned by a different user, and we also set up the shares so that only their own user can access each. For example, a web server that has multiple websites running and you want to share hosting on multiple websites at once and then connect to each of them from Windows.
By default in Windows this does not work as Windows is the credentials of the remote machine IP address or domain name. This way, if you first enter a share and have already remembered your login information, you will no longer be able to access the share associated with another username on the same computer because you are trying to use the login information of the first one.
There is a very simple and elegant practice for this: Use multiple domain names for different shares!
As a Windows administrator, open the hosts file for editing (c: \ Windows \ System32 \ drivers \ etc \ hosts), and then add your own unique domain names to the IP address of the target machine. For example, the target machine's IP address is 192.168.1.101, and it has, say, three shares that have a separate host. In this case, set something like this:
192.168.1.101		megosztas1.local
192.168.1.101		megosztas2.local
192.168.1.101		megosztas3.local
Of course, any domain name that matches its rules can be specified.
Windows will now reach the destination computer with these three domain names.
After that, you only need to refer to each share on the networks by using the name you have given each one, and then making the connections lasting as described above. Windows will now store the three different login credentials under the three different domain names. This way we can use all the shares at once.
Delete network connection
In some cases, it may be necessary to delete any network connection that Windows has previously memorized for the session. In Windows, you can do this in a DOS window on the command line.
First, let's list your existing network connections to see everything clearly:
net use
Here you can see the current relationships.
Let's say we want to delete one of our Samba shares. This requires the following command:
net use /delete \\<számítógép>\<megosztásnév>This clears the connection from the cache so we can set up, modify, etc. again.
Troubleshooting
For example, if your Windows machine is not shut down properly, but simply anesthetized or hibernated, Samba sharing may not recover properly when you return. This is when the whole library becomes read-only, at least for me. Then you have to restart the Samba daemon on your Linux machine:
service smbd restartor the systemctl command:
systemctl restart smbd.service
The description on the next page learn how to connect from Linux to Windows shares.
Navigation
- To post registration and login required
- 2661 views