
2. page content
Continuation
The description on the first page we met the requirements to compile the source code for PHP 5.6 and then compiled and installed PHP 5.6.40. On this page, we will continue to work with the post-configuration of PHP and add it ISPConfig In the 3 control panel, add PHP 5.6.40 to the list of optional PHP versions.
Retro settings
Copy configuration files
The "factory" configuration files must be copied to their operating location.
Copy php.ini:
cp /usr/local/src/php-5.6-build/php-5.6.40/php.ini-production /opt/php-5.6.40/lib/php.iniTo copy a PHP-FPM configuration file:
cp /opt/php-5.6.40/etc/php-fpm.conf.default /opt/php-5.6.40/etc/php-fpm.confConfigure PHP-FPM
A PHP-FPM a pool directory must be created for which the configuration files of the web pages will be stored:
mkdir -p /opt/php-5.6.40/etc/php-fpm.dOpen the configuration file copied above for editing:
nano /opt/php-5.6.40/etc/php-fpm.confAnd set some parameters that are different from the following:
[...]
include=/opt/php-5.6.40/etc/php-fpm.d/*.conf
[...]
pid = run/php-fpm.pid
[...]
user = www-data
group = www-data
[...]
listen = 127.0.0.1:8999
Create a Systemd unit file
We need to create a startup file that can start or stop the PHP-FPM daemon at any time:
nano /lib/systemd/system/php-5.6.40-fpm.serviceInclude the following content:
[Unit]
Description=The PHP 5.6.40 FastCGI Process Manager
After=network.target

[Service]
Type=simple
PIDFile=/opt/php-5.6.40/var/run/php-fpm.pid
ExecStart=/opt/php-5.6.40/sbin/php-fpm --nodaemonize --fpm-config /opt/php-5.6.40/etc/php-fpm.conf
ExecReload=/bin/kill -USR2 $MAINPID

[Install]
WantedBy=multi-user.target
Save, then enable and reload the systemd-t:
systemctl enable php-5.6.40-fpm.service
systemctl daemon-reload
Launch and validate PHP-FPM
Let's start PHP-FPM:
systemctl start php-5.6.40-fpm.serviceIf there is no problem, this command will not output.
Let's also check the process list to see if everything is OK:
ps -auxf | grep "php-fpm"root 482 0.0 1.1 485884 45584 ? Ss 10:36 0:01 php-fpm: master process (/etc/php/7.0/fpm/php-fpm.conf) www-data 1009 0.0 0.2 485884 10512 ? S 10:36 0:00 \_ php-fpm: pool www www-data 1010 0.0 0.2 485884 10512 ? S 10:36 0:00 \_ php-fpm: pool www root 25160 0.0 0.0 12792 984 pts/1 S+ 21:34 0:00 \_ grep php-fpm root 25136 0.0 0.5 189836 23388 ? Ss 21:33 0:00 php-fpm: master process (/opt/php-5.6.40/etc/php-fpm.conf) www-data 25137 0.0 0.1 189836 8084 ? S 21:33 0:00 \_ php-fpm: pool www www-data 25138 0.0 0.1 189836 8084 ? S 21:33 0:00 \_ php-fpm: pool www
Between the processes, you can see that the FPM of "factory" PHP 7.0 is running, and below that is the 5.6.40 that is now installed. Both are hosted by www-data as these are the master processes. When a website is started using one of the PHP-FPMs, another pool is created that will already be running on behalf of the website user.
Enable and install PHP extensions
Enable Zend OPcache
A Send OPcache provides faster PHP execution by caching and optimizing intermediate code. Improves PHP performance by storing byte codes for precompiled script in memory.
Open the php.ini file to enable it:
nano /opt/php-5.6.40/lib/php.iniAnd add the following line to the end of the file:
zend_extension=opcache.so
Enable Memcache (optional)
We need to compile the Memcache module first and then enable it, just like the previous opcache.
Install required for translation libmemcached-dev package:
apt-get -y install libmemcached-devThen run the following commands to compile the Memcache module:
cd /opt/php-5.6.40/etc/
pecl -C ./pear.conf update-channels
pecl -C ./pear.conf install memcache
The last command asks if you want to enable session management support:
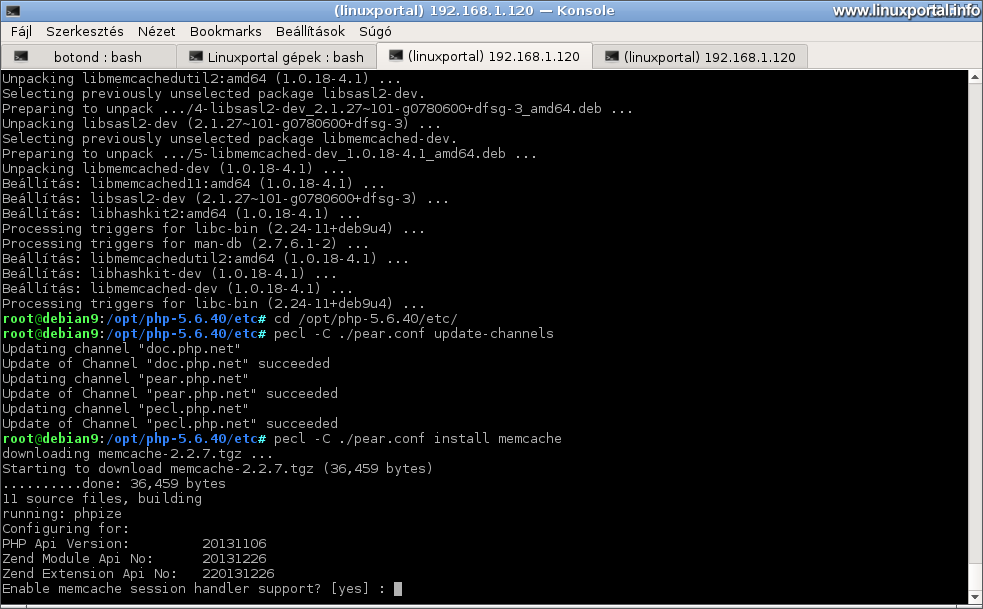
Enable this option here.
Then it translates nicely and then writes to modify the php.ini file for the new module. Let's do this, let's open the php.ini file:
nano /opt/php-5.6.40/lib/php.iniAnd let's add this line to the very end of the file:
extension=memcache.so
PHP-FPM restart and validation
Finally, restart PHP-FPM:
systemctl start php-5.6.40-fpm.serviceAnd let's check PHP:
/opt/php-5.6.40/bin/php --versionPHP 5.6.40 (cli) (built: Feb 18 2019 16:47:39)
Copyright (c) 1997-2016 The PHP Group
Zend Engine v2.6.0, Copyright (c) 1998-2016 Zend Technologies
with Zend OPcache v7.0.6-dev, Copyright (c) 1999-2016, by Zend Technologies
Now write Zend OPcache as well.
We can also check the PHP information, but even this only from the command line, as we don't have a working website yet:
/opt/php-5.6.40/bin/php --infoLists everything that the web interface uses phpinfo () function also prints, so it is possible to parse between the parameters.
Enable PHP 5.6.40 in ISPConfig3
We come to our last chapter where we can harvest the laurels: enable this PHP version in our ISPConfig3 control panel, which will then be available as an optional PHP version for any web page.
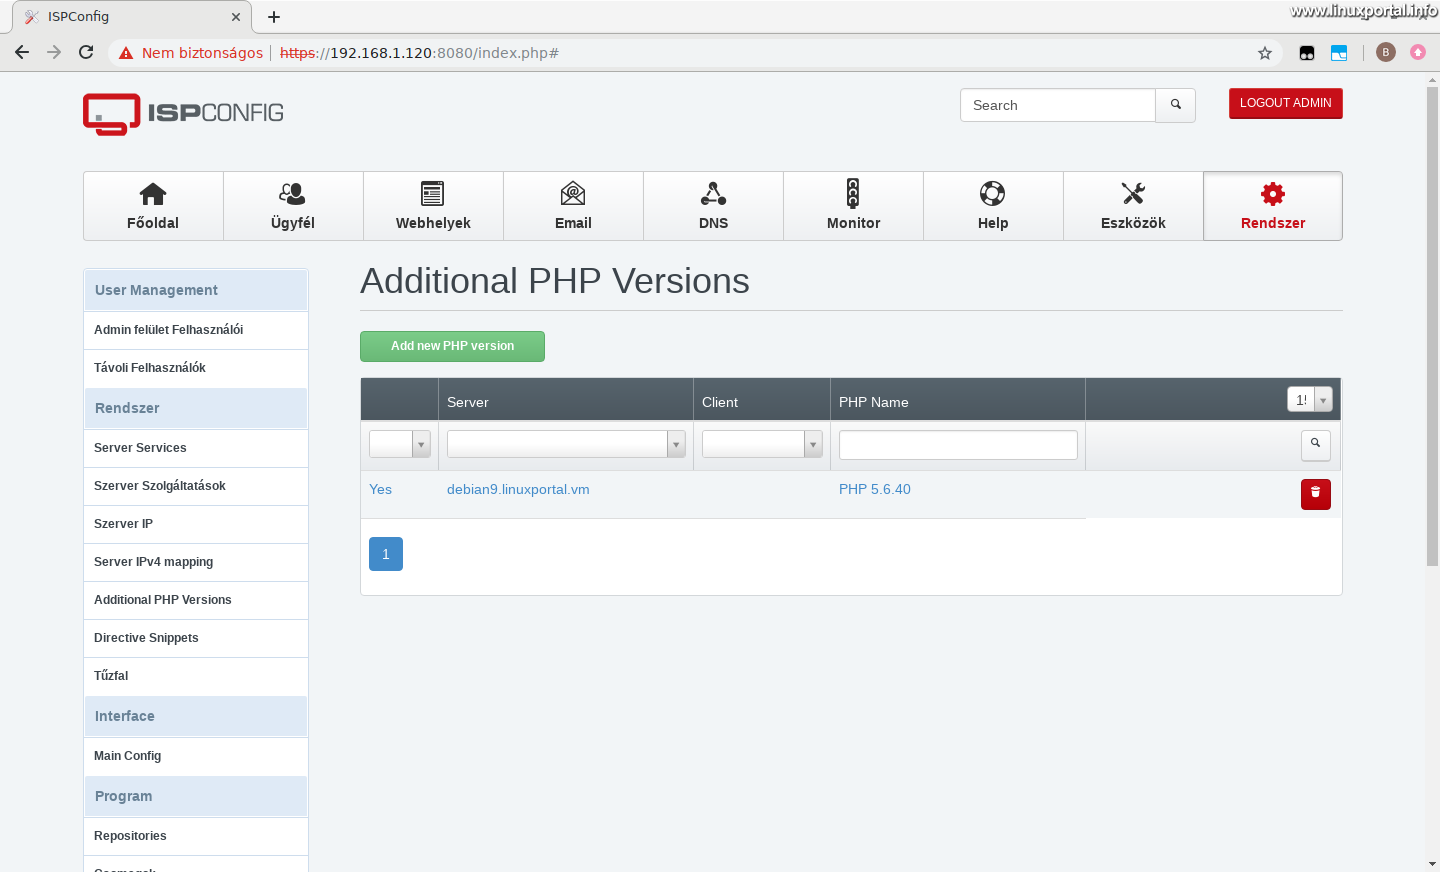
Log in to ISPConfig as an admin, then go to the "System" -> "Additional PHP Versions" submenu.

Click "Add new PHP version" above the (currently blank) list.
Name tab
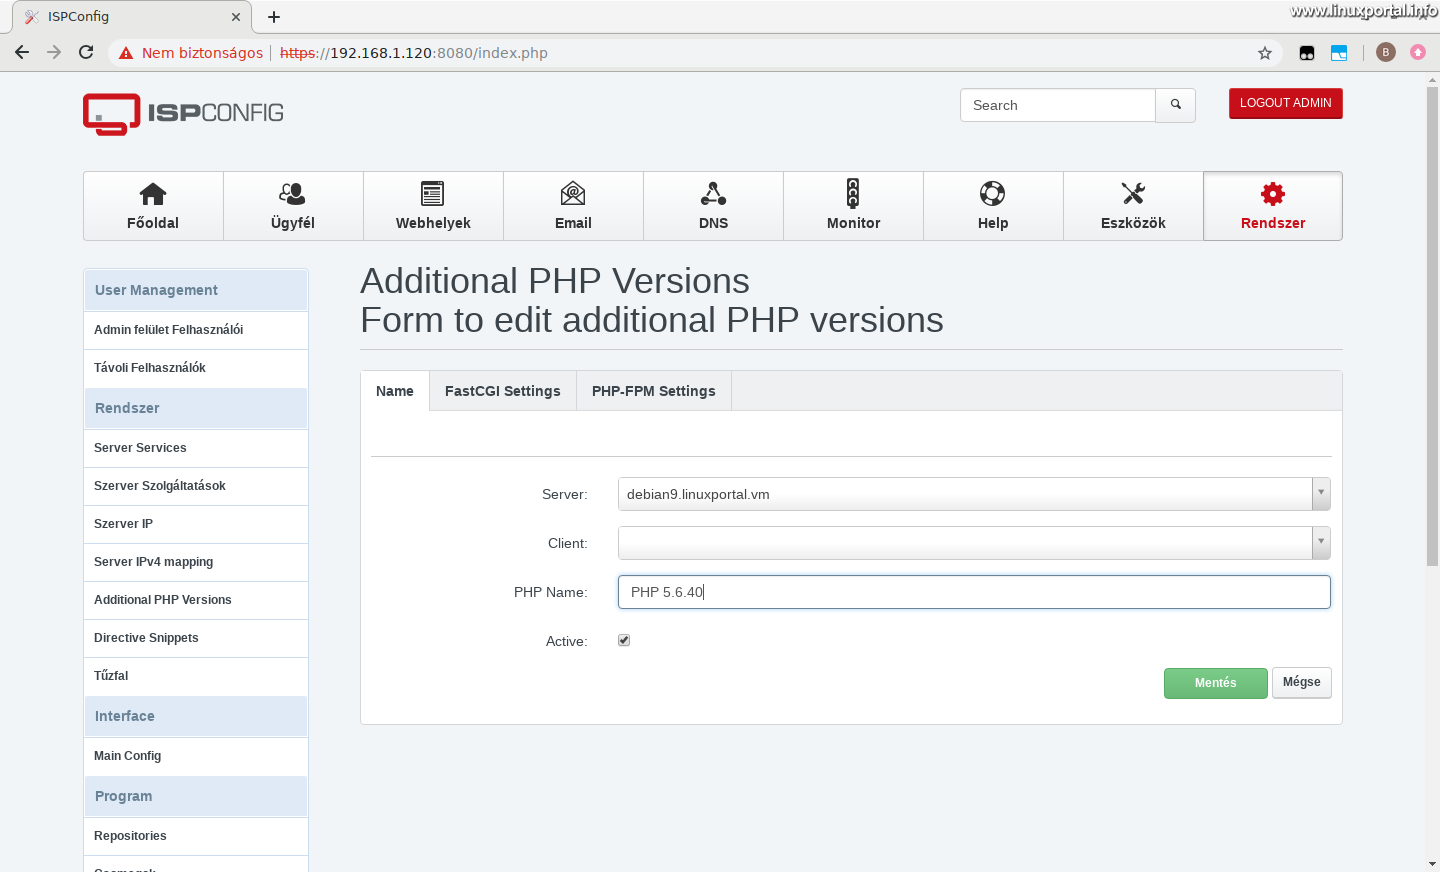
Use this tab to set up basic information about the PHP you want to include:
- Server: Here you are offering our server, leave it here.
- Client: If you have already added a client, you can configure here which client (s) will have this PHP version available. It is a good idea to leave this blank, as this will make this PHP available to everyone.
- PHP Name: This is the name of PHP. You can specify anything, but it is advisable to set the exact version so that you do not confuse it later if you have more versions.
Go to the next tab.
FastCGI Settings tab
We will also be able to use this PHP in FastCGI mode, so its settings are listed in this tab:
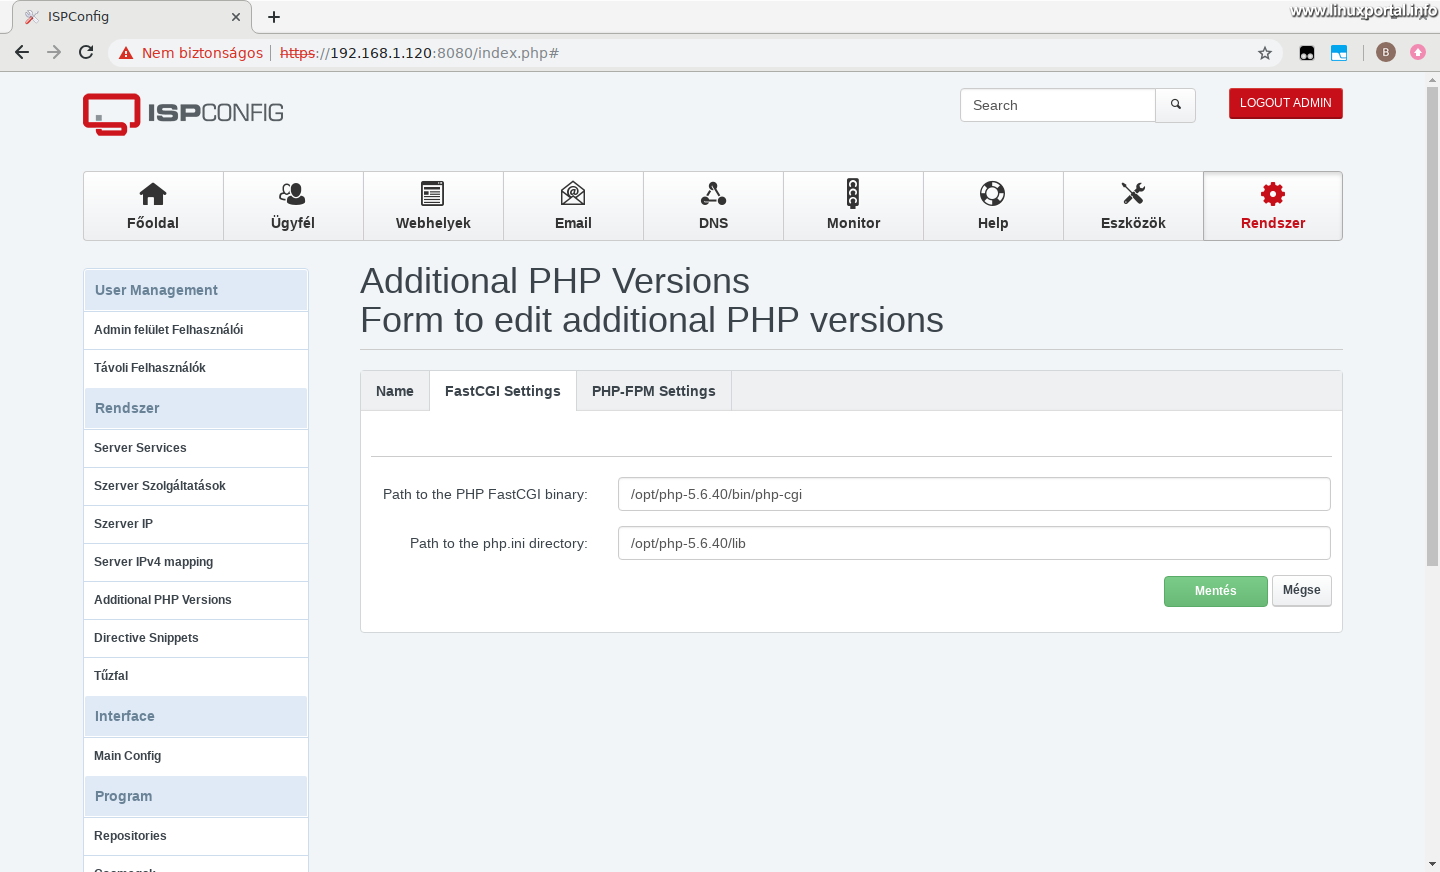
- Path to the PHP FastCGI binary: / Opt / php-5.6.40 / bin / php-cgi
- Path to the php.ini directory: / opt / php-5.6.40 / lib
PHP-FPM Options tab
Here's how to set up PHP-FPM:
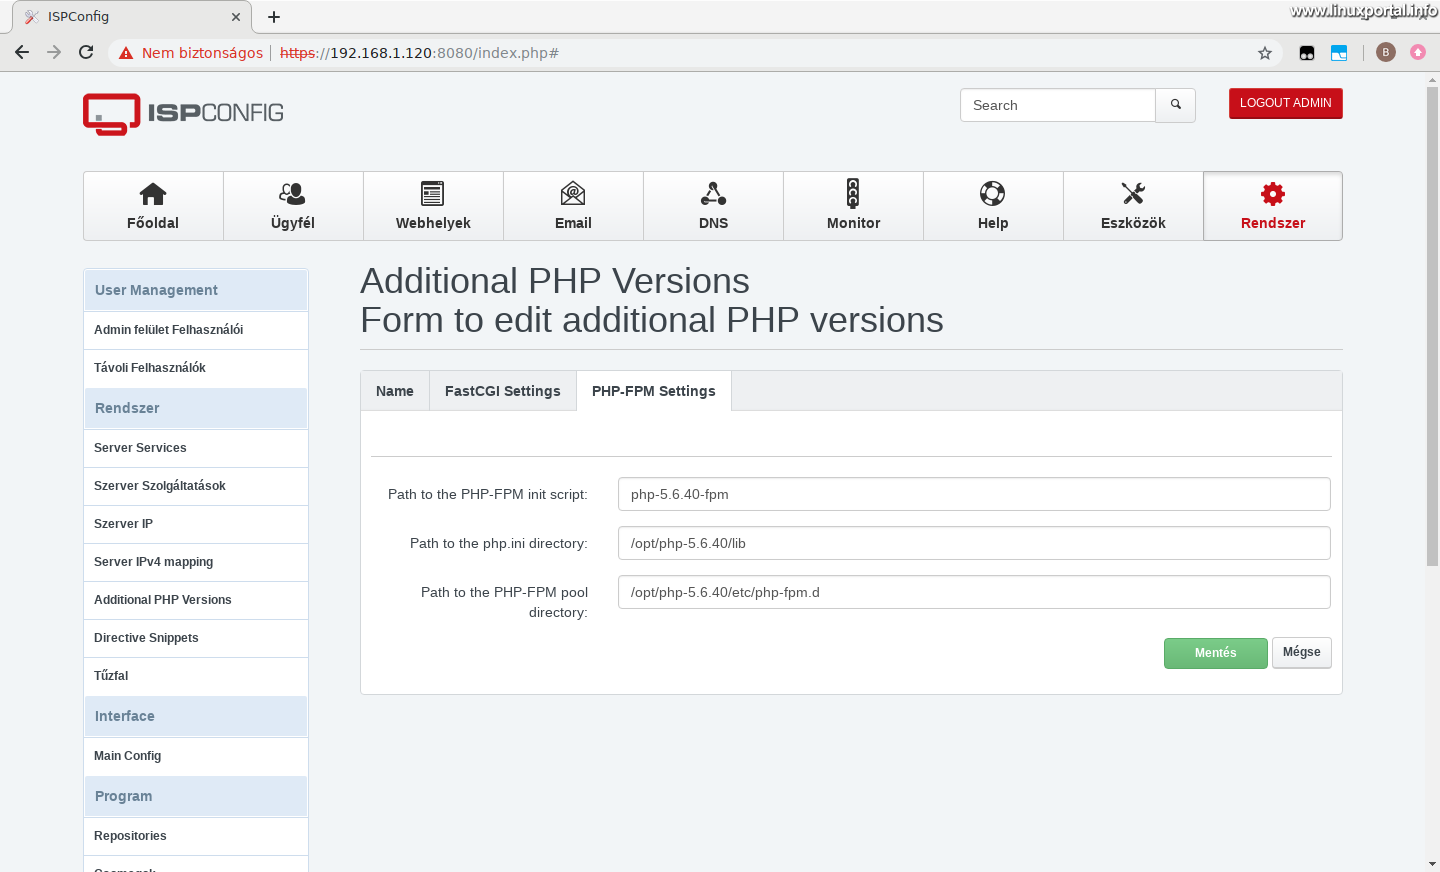
- Path to the PHP-FPM init script: php-fpm-5.6.40
- Path to the php.ini directory: / opt / php-5.6.40 / lib
- Path to the PHP-FPM Pool directory: /opt/php-5.6.40/etc/php-fpm.d
Again, make sure there are no spaces.
Finally, save the form.
And with that, our optional PHP version 5.6.40 on the server is complete:
Rotate Log Files (Optional)
You should consider rotating the log files with Logrotate. If we want to set it up, in this description we can find a way.
Conclusion
We have added a useful thing to our Debian 9 (Stretch) perfect server. From here you can configure PHP 5.6.40 for any web page that requires it.
Otherwise, it's quite realistic because Debian versions are running, so sooner or later we have to upgrade to newer versions. However, if you cut us an old web page that was written in PHP 5, then we are no longer confused.
- HowtoForge.com - How to install PHP 7.1, 7.2 and 5.6 as PHP-FPM & FastCGI for ISPConfig 3 on Debian 9
- How to install PHP 7.1.19 in optional mode on Debian 8 perfect server
- How to install newer PHP versions on our Debian 9 (Stretch) LAMP server in PHP-FPM mode
- How to configure custom PHP versions on our ISPConfig server
- Rotate and compress log files with Logrotate
- Perfect server: Debian 9 (stretch) V1.0
- Encyclopedia - PHP
- Encyclopedia - PHP-FPM
- php.net - Releases
Navigation
- To post registration and login required
- 166 views