
Content
Introductory
The regular, command line interface the work done will put a strain on the human eye, so we should try to make the text in the terminal easier to read.
When we create one shell user in Debian, for example, and we start working on it, by default, everything is displayed in one color. So, after a while, it becomes quite tedious, for example, to search the boundaries between the outputs of different commands, because in the absence of colors, everything blends. Or, for example, when you list a directory, you have to bug the subdirectories, which match the filenames.
There are terminal programs that differentiate certain parts of text with different colors, e.g. displayed IP addresses, or various error words to highlight the parts that are considered more important. An example of such a terminal program is a MobaXtermwhich I also use. However, highlighting in this automated way is not always enough, so we need to add our own solutions to the command line.
In this tutorial, we'll take you through a few simple practices to make your terminal work more colorful and comfortable.
For the sake of better illustration, it's smooth here Putty in terminal I show outputs that do not use syntax highlighting, so only my own color management solutions will be highlighted with different colors.
Let's color the prompt!
I think the most obvious thing to do in this area is to start with the coloring of the prompt, as it separates the output of the commands from each other, so the terminal text is much more optically structured.
First, let's look at how to change the color of our prompt.
If you look at the home directory .bashrc file, you will see parts that give the PS1 environment variable that controls the appearance of the prompt:
[...]
#force_color_prompt=yes

if [ -n "$force_color_prompt" ]; then
    if [ -x /usr/bin/tput ] && tput setaf 1 >&/dev/null; then
        # We have color support; assume it's compliant with Ecma-48
        # (ISO/IEC-6429). (Lack of such support is extremely rare, and such
        # a case would tend to support setf rather than setaf.)
        color_prompt=yes
    else
        color_prompt=
    fi
fi

if [ "$color_prompt" = yes ]; then
    PS1='${debian_chroot:+($debian_chroot)}\[\033[01;32m\]\u@\h\[\033[00m\]:\[\033[01;34m\]\w\[\033[00m\]\$ '
else
    PS1='${debian_chroot:+($debian_chroot)}\u@\h:\w\$ '
fi
unset color_prompt force_color_prompt
[...]
In this snippet, you can see that there is a color prompt option here, but it is just off. For example, edit the file with dwarf program, then remove the comment from the first line of the code snippet:
force_color_prompt=yes
The first condition of the file will also run, where tput after checking for the presence of a command, turns on the color prompt.
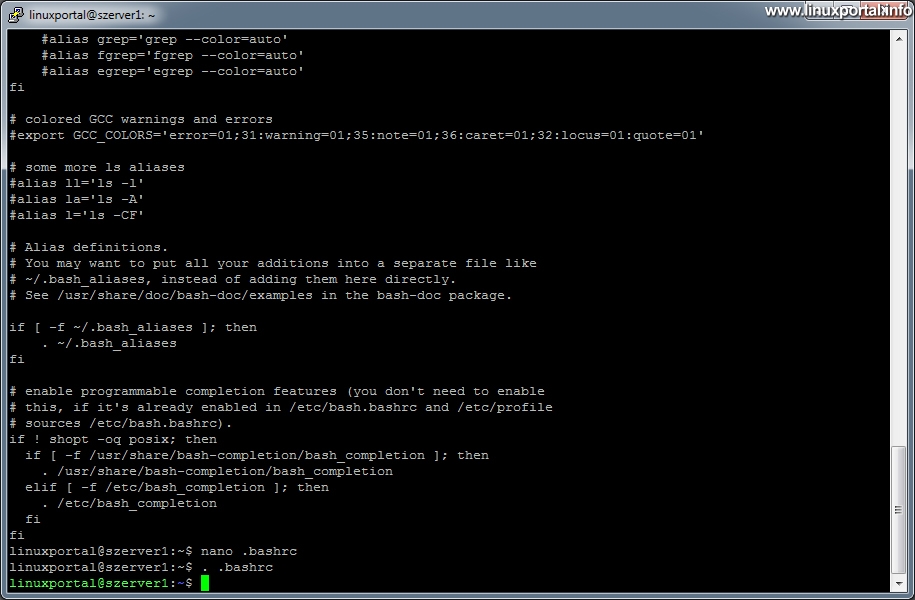
Save and run our .bashrc file at source command:
source ~/.bashrcOr, by shortening the source command, "." cent:
. ~/.bashrcThen we are prompted with a colorful prompt:
These colors are only part of the "factory" setting, of course it is possible to set custom colors.
By default, the prompt option looks like this:
\u@\h:\w\$
Where "u" is Username, "h" is Host and "w" is the Working directory, ie the current directory. Of course, there are several variables that you can print, such as date and time, but we are just dealing with them.
Looking back at the code snippet above, we can see that the default setting ran first in the second branch of a condition, and then, after removing the comment from the value assignment, the first branch of the condition containing the many cipher strings that contain the prompt variables just mentioned.
Here, essentially, all that happens is that the terminal and the Bash shell is different Escape that is, control characters can be used to tell what color / background color / attribute the characters after it appear. Then, after the part you want to color, you need a so-called reset string again, which resets the color attributes to their default state. Then after the next part comes a new color attribute, then comes the next variable, and then reset again. And so on.
To better understand the logic of this, run the following command:
echo -e "alap \033[01;32m zöld \033[00m alap"The output of which immediately shows the point:
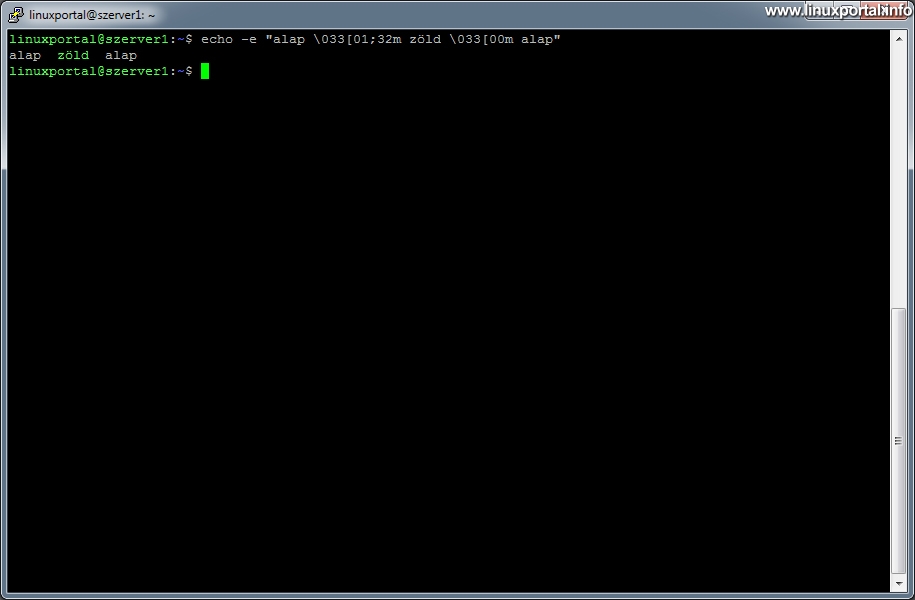
The echo command then needs the -e option, which allows special characters to be interpreted in strings. Without it, you would just write the part between the quotation marks one by one.
This makes the whole thing easier to understand. The various color codes and attributes responsible for the special behavior of the characters are discussed in detail in the last chapter of the description, now back to adjusting the colors of the prompt.
So we've seen the working principle of the whole thing, so now it's easier to start changing the colors of the prompt ourselves. Great for experimenting with http://ezprompt.net/ Bash PS1 generating website where we can visually compile our own prompt:
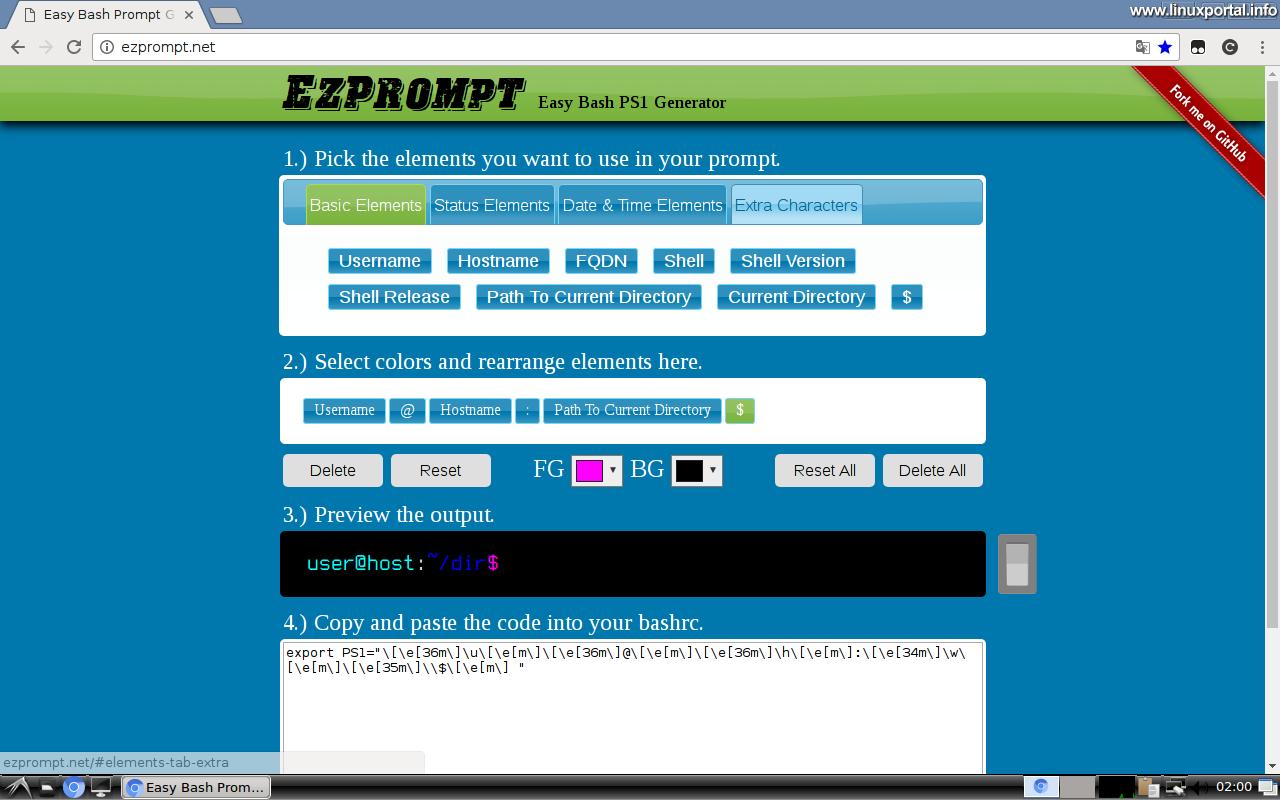
On this page we can conveniently put together any prompt with any colors (for me this is exactly my favorite compilation). Once your masterpiece is done, all you have to do is copy the code line that gives the value of the PS1 environment variable from the bottom text box, which you can replace with the line of code in the ~ / .bashrc file shown above. so that we can return to the factory settings at any time), then run the ~ / .bashrc file again with the source command shown above, and our color prompt is ready.
Use the color options of commands wherever possible!
With the following practice, we can bring the outputs of different commands to life using colors. Many commands have a switch to highlight your own output using colors. Let's take a few examples.
ls command
Ls is probably one of the most commonly used commands in the Linux terminal to list the contents of directories in many ways. The ls help we can find a -C or --color option to take advantage of the command's color management option. In many cases, the ~ / .bashrc file already defines this switch in the alias of the ls command:
[...]
# enable color support of ls and also add handy aliases
if [ -x /usr/bin/dircolors ]; then
    test -r ~/.dircolors && eval "$(dircolors -b ~/.dircolors)" || eval "$(dircolors -b)"
    alias ls='ls --color=auto'
    #alias dir='dir --color=auto'
    #alias vdir='vdir --color=auto'

    #alias grep='grep --color=auto'
    #alias fgrep='fgrep --color=auto'
    #alias egrep='egrep --color=auto'
fi
[...]
So, in this .bashrc file (Debian 8.10), the color management option of the ls command is already enabled by default (the first alias line is not commented out), which would, for example, result in root directory listing output:

However, it is not enabled by default for the root user. If we log in as root and list the root directory in the same way, our output will not be colored:

There really are no colors here, not even our prompt. How harder is it to read the whole thing?
This can be easily remedied by opening the /root/.bashrc file and removing the comment from the following three lines:
[...]
export LS_OPTIONS='--color=auto'
eval "`dircolors`"
alias ls='ls $LS_OPTIONS'
[...]
We will then run the file to apply the changes:
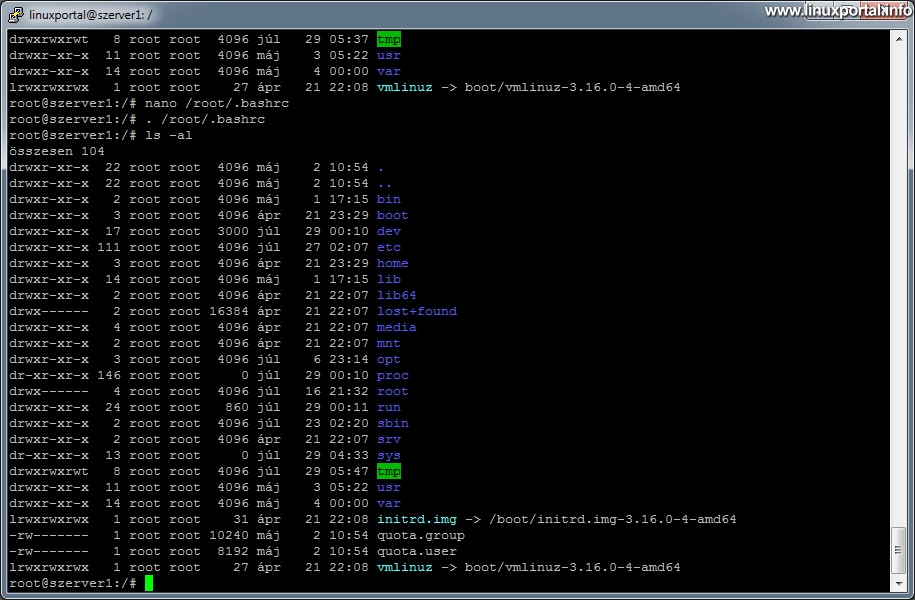
. /root/.bashrcAnd now let's re-list the root directory:
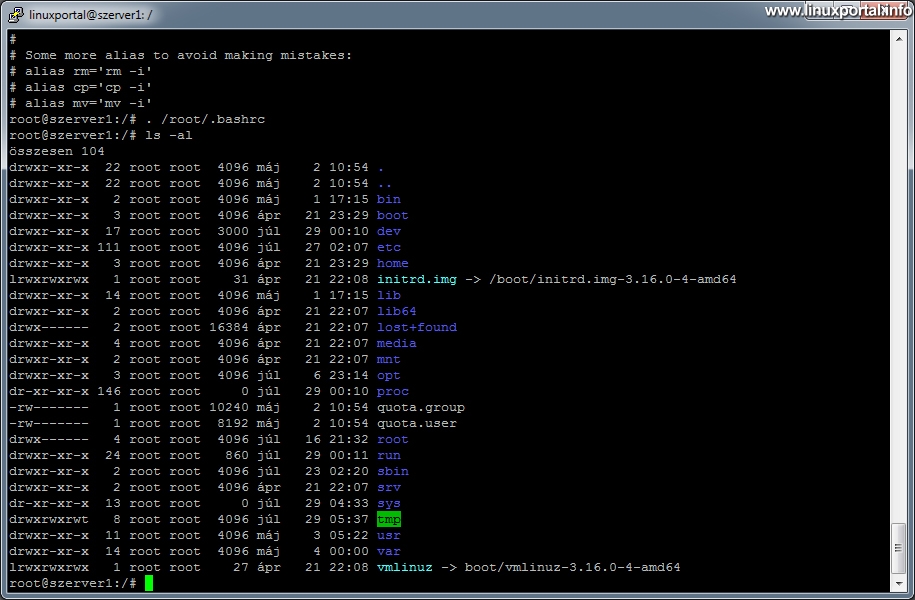
The colors also appear here in the output of the root user's ls command. This makes the whole thing much clearer. To further develop this with an additional library pre-sort switch:
[...]
export LS_OPTIONS='--color=auto --group-directories-first'
[...]
and running the .bashrc file again as before, the output of our following directory listing will be quite friendly:
This makes it even clearer because it lists the libraries ahead of time, which provides a much better readability.
The ls command gets its color scheme from the dircolors program, which uploads the color codes to be associated with the various file extensions to the "LS_COLORS" environment variable. So if we run this program:
dircolorsYou will then get a long list separated by colons, with the various file extensions and their color codes loaded:
LS_COLORS='rs=0:di=01;34:ln=01;36:mh=00:pi=40;33:so=01;35:do=01;35:bd=40;33;01:cd=40;33;01:or=40;31;01:su=37;41:sg=30;43:ca=30;41:tw=30;42:ow=34;42:st=37;44:ex=01;32:*.tar=01;31:*.tgz=01;31:*.arc=01;31:*.arj=01;31:*.taz=01;31:*.lha=01;31:*.lz4=01;31:*.lzh=01;31:*.lzma=01;31:*.tlz=01;31:*.txz=01;31:*.tzo=01;31:*.t7z=01;31:*.zip=01;31:*.z=01;31:*.Z=01;31:*.dz=01;31:*.gz=01;31:*.lrz=01;31:*.lz=01;31:*.lzo=01;31:*.xz=01;31:*.bz2=01;31:*.bz=01;31:*.tbz=01;31:*.tbz2=01;31:*.tz=01;31:*.deb=01;31:*.rpm=01;31:*.jar=01;31:*.war=01;31:*.ear=01;31:*.sar=01;31:*.rar=01;31:*.alz=01;31:*.ace=01;31:*.zoo=01;31:*.cpio=01;31:*.7z=01;31:*.rz=01;31:*.cab=01;31:*.jpg=01;35:*.jpeg=01;35:*.gif=01;35:*.bmp=01;35:*.pbm=01;35:*.pgm=01;35:*.ppm=01;35:*.tga=01;35:*.xbm=01;35:*.xpm=01;35:*.tif=01;35:*.tiff=01;35:*.png=01;35:*.svg=01;35:*.svgz=01;35:*.mng=01;35:*.pcx=01;35:*.mov=01;35:*.mpg=01;35:*.mpeg=01;35:*.m2v=01;35:*.mkv=01;35:*.webm=01;35:*.ogm=01;35:*.mp4=01;35:*.m4v=01;35:*.mp4v=01;35:*.vob=01;35:*.qt=01;35:*.nuv=01;35:*.wmv=01;35:*.asf=01;35:*.rm=01;35:*.rmvb=01;35:*.flc=01;35:*.avi=01;35:*.fli=01;35:*.flv=01;35:*.gl=01;35:*.dl=01;35:*.xcf=01;35:*.xwd=01;35:*.yuv=01;35:*.cgm=01;35:*.emf=01;35:*.axv=01;35:*.anx=01;35:*.ogv=01;35:*.ogx=01;35:*.aac=00;36:*.au=00;36:*.flac=00;36:*.m4a=00;36:*.mid=00;36:*.midi=00;36:*.mka=00;36:*.mp3=00;36:*.mpc=00;36:*.ogg=00;36:*.ra=00;36:*.wav=00;36:*.axa=00;36:*.oga=00;36:*.spx=00;36:*.xspf=00;36:';
export LS_COLORS
Finally, you execute the export command to load it into the LS_COLORS environment variable.
Then, using the ls command, you will know what color to display the files in the directory based on their file extension when listing the directory.
So if you might want to vary these colors, you only need to copy these two lines (value-adding and exporting) into your .bashrc file with the modified values.
grep command
A grep command to search for samples in our files or in the output just received on the pipeline. If we look at a simple example to find the word "if" in the user's home directory (recursively in all files):
grep -rnw . -e "if"then we get an unreadable, seamless, colorless output:

Like ls, grep has the same "--color = auto" option. If we now do the same search with this color management switch:
grep -rnw --color=auto . -e "if"
Then the output will be completely different. We get file name coloring, serial number highlighting, and of course the grep command also highlights the pattern you are looking for. So it's worth using this switch. If you use it regularly, you will need to remove the comment in the above .bashrc file from the grep command and run .bashrc and from there will be the default colors for grep searches.
There are other commands that can handle colors, so for more commonly used commands, look in its help for switches that indicate the color management of the output, such as "--color" for ls and grep. Then, using the pattern above, we can incorporate them into our .bashrc file so that we always get color output when using those commands.
Navigation
- To post registration and login required
- 1003 views