Content
- page: Brief description of the program, installation and global settings
- page: Manage, configure, and use SSH connections
2. page content
Continuation
The description on the first page We have installed the Asbrú Connection Manager program and reviewed its global settings, on this page we will continue to review the use of the program with the local Shell connection and SSH managing, setting up, and using connections.
Use
Start Local Shell
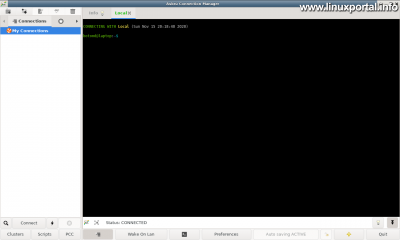
The button that launches the local Shell window, as I mentioned earlier, is located in the middle of the bottom menu bar of the main screen. Click to open the local Shell immediately:
The prompt appears here and you can already use the command line of the local machine. If you right-click on the terminal, a feature-rich menu will appear with many useful things:
Manage and use SSH connections
All that is left in this short tutorial is an overview of SSH connections. As a first step, create a group for your first SSH connection so that you can store your future accesses in an organized way.
Create a group
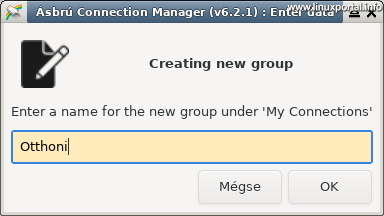
In the empty panel on the left side of the home screen, right-click and select "Add Group" from the pop-up menu, or click the icon with the first "New GROUP" help label in the icon bar above the panel. A small window will appear:
Enter a name here and OK. In the example, I give the name "Home" here.
This will take you back to the Asbrú Connection Manager main window, where your group will appear on the left. Then make the first connection.
Make a connection
Leaving the name of the group, click on the second icon (New CONNECTION) from the above icon bar, or you can also select the "Add Connection" option from the pop-up menu by right-clicking on the group. Then we need to enter the name and caption of the connection:
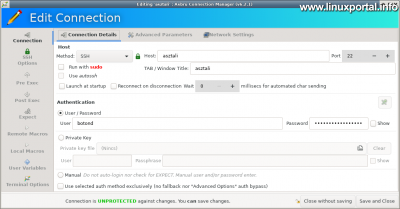
Once we have completed and proceeded, a larger window will appear where we can set up the connection in detail. As you can see, we are also greeted by many menus, tabs and panels in this window. First we go to the Connection menu, where we can set the most important things:
Connection menu
Connection Details tab
A host settings, you can set the connection method (SSH, FTP, SFTP, Telnet, RDP, etc.), then we must enter the hostname or IP addresses, port, and whether to start the connection with sudo, open the connection when starting the program, and to reconnect when the connection is lost, and how many milliseconds to wait before reconnecting.
A authentication and in part, you need to choose whether you want to connect with a username and password or with a private key.
Once you have specified these, you are actually ready to save the entire settings window, as many settings are enough for a normal SSH connection (hostname, username, password, or private key).
However, if you are wondering what else this setting window can do, we will quickly run through the other options to the extent of each sentence.
Staying in the same "Connection" main menu, you can see two more tabs at the top of the panel:
Advanced Parameters tab
Here you can configure the program to send a programmed REGEX string to be sent every second by the Asbrú Connection Manager to the server you are connected to, attach a command to the connection command, run various scripts when the connection is started, and log the terminal output.
Network Settings tab
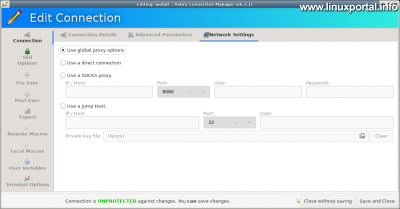
In this panel you can configure the network settings of the connection. Here you can choose from three settings: With the first setting, the network / proxy settings already described above will be applied to this connection. When you select a direct connection, you ignore the previous global proxy settings, and the last setting allows you to specify custom proxy settings. Of course, these settings are only associated with this connection.
SSH Options menu
In the SSH options panel you can set the SSH version (-1 | 2), X11 transmission (-X), compression (-C), allow the remote server to connect to local redirected ports (-g) and whether to forward your SSH authentication key to the server (-A) and select the IP protocol version (IPv4 or IPv6) (-4 | 6) and whether to disable remote commands (-N). The latter is useful if you do not want to run commands on the remote server, but only forward ports.
Below, in the tabbed section, you can set port forwarding: Local port forwarding (-L), remote port forwarding (-R), dynamic port forwarding (-D) and additional SSH options under the last tab (-o), which you can browse to select from the options listed.
See SSH switches in parentheses for operation ssh command on the manual page.
With these settings, up to one reverse SSH tunnel as well we can put it together to access the NAT our machine behind the network.
Pre Exec menu
In the Pre Exec panel, you can compile a list of commands that Asbruce Connection Manager will run on the local machine before opening the connection. Use the Add button to add more commands. If you select the "Ask: YES" option, a dialog box will pop up before running the command, asking if you want to run the command in question for sure.
Post Exec menu
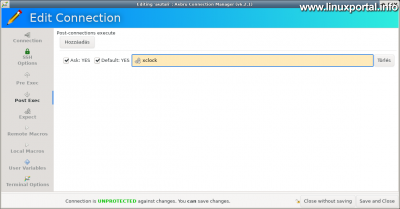
The Post Exec function works similarly to Pre Exec, except that the configured commands are executed here after the terminal connection is closed. So with the xclock example above, it looks like this when we exit the terminal instance of this connection:
So what happens here is that after running the exit command, the connection is lost and the dialog box pops up.
With this function we can perform, for example, regular post-exit operations, e.g. Delete the / tmp directory or run any other commands you may need after closing the terminal.
Expect menu
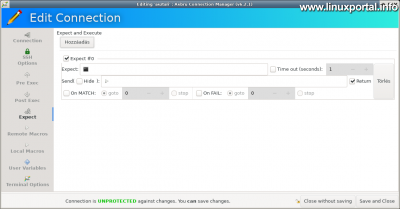
In this panel, you can bind various custom outputs or commands to the sequences expected in the terminal: In the Expect field, enter an expected string or regular expression, which, if it occurs in the terminal, will trigger the set rule. In the Time out section, you can specify the delay in seconds and then the string entered in the Send field will be displayed in the terminal. The Return option also sends an enter character to the terminal after the printed string, so if our set string is a command, it will execute it. Below that, we can control the number of occurrences, after how many occurrences what to do. Eg stops monitoring the rule, etc.
Remote Macros menu
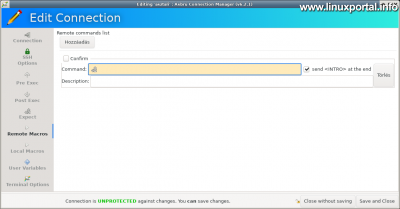
The Remote Macros function works in the same way as the globally configured Remote Commands shown earlier, only the commands configured here are limited to this connection. The entered commands can also be run in the terminal from the "Remote Commands" menu item in the right-click menu.
Local Macros menu
The Local Macros function works in the same way as the Local Commands with global configuration shown earlier, only the commands configured here are limited to this connection. The entered commands can also be run in the terminal from the "Local Commands" menu item in the right-click menu.
User Variables menu
The user variables function works similarly to the Global variables discussed earlier, only the values set here are limited to this relationship, there are no variable names, there are only variables indexed by numbers, and numbering starts from 0. These variables can also be called up in the terminal from the "Insert value - User variables" submenu by right-clicking on the pop-up menu.
Terminal Options menu
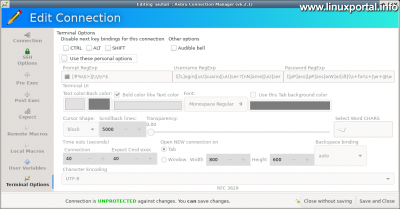
In the Terminal Options configuration panel, you can configure essentially the same as in the global configuration section of Asbrú Connection Manager, only here for this connection. At the top of the panel, you can disable the various keyboard assignments as well as enable the bell in the terminal. And if the lower part of the panel is enabled, these settings override the global settings for this connection, in which you must enter regular expressions that match the prompt, username, and password prompts so that the program detects their appearance in the terminal. Below this you can set the colors, character type, size, cursor, etc. of the terminal.
Use an SSH connection
Once everything has been set up, you can also start our newly set up SSH access by double-clicking on the connection in the connections panel on the left, starting from the main screen.
First SSH connection
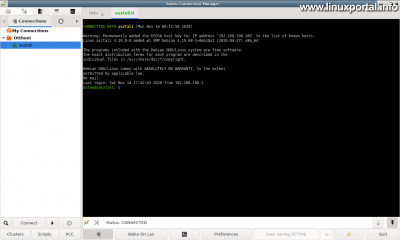
When you connect for the first time, the program indicates, as do other terminal applications, that you have added the server key to the list of known servers, and the standard login (say) text.
Use the screen
At the beginning of the use, it is worth mentioning the screen utilization options.
Full screen mode
You can hide the connections panel by clicking the button to the left of the "Wake on Lan" button in the bottom menu bar of the screen:
Also, by clicking on the double down arrow button in the lower right corner, you can also remove the bottom menu bar, leaving more space for the terminal (s):
Although the status bar as well as the ear bar still remains, we get a near full screen mode.
Vertical window sharing
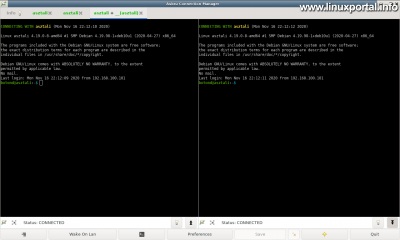
You can divide the available space vertically between two windows if you have more than one terminal open. To do this, right-click on the window of the terminal you want to share and select Split -> vertically submenu and select the tab you want to use to switch to split mode here:
The tab also indicates which two connections have been shared (I now have 4 identical connections open), and you can also drag the vertical bar between the two windows with the mouse to set the desired proportions. If you have set it up and want to restore it to equal parts, you can also right-click on the shared connection tab and then use the "Equally resize terminals" function to restore it to the middle.
Horizontal window sharing
You can also share space horizontally between two windows by right-clicking on the connection tab you want to share and then clicking Split -> horizontally In the submenu, select the other window with which you want to share the screen:
Clipboard and selection
As with other terminal emulator applications, we can use the clipboard for convenient data exchange. The contents of the clipboard on the local machine are common in terminals SHIFT + Insert can be pasted with a keyboard shortcut, and the area selected with the mouse is placed on the clipboard immediately by default.
The selection can be done in the normal way by just smoothly selecting with the mouse over several lines:
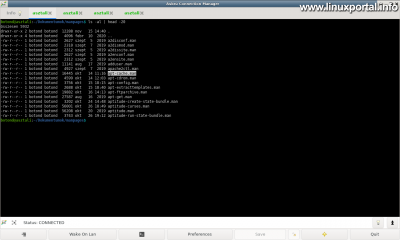
Additionally, double-clicking on a word selects the entire word:
When you select words, predefined characters count as one word, so what you select by double-clicking. This is presented on the first page Preferences -> Main Options -> Advanced tab, you can set it in the "Select-by-word characters" field, which has a default value of "-.:_/".
You can also triple-click to select an entire terminal line:
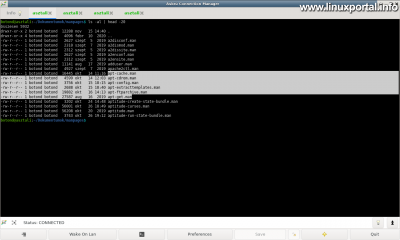
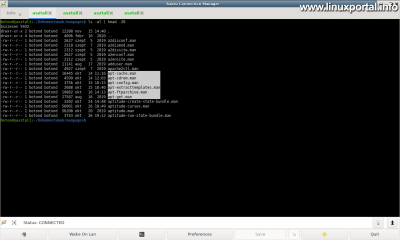
And finally, you can even select in a square / rectangle shape by pressing and holding CTRL key:
This is really useful if you want to copy only one column from a table, such as just the file names from the directory list above.
Conclusion
That’s how much it fit into this little description, which ended up being longer than I planned. But no problem, because at least I managed to review the most important parts of my favorite terminal program. Asbrú Connection Manager knows much more than the features presented here, many of which I haven't used yet. So anyone who has managed to pique your interest in this great little terminal application should definitely visit the official documentation page of ÁsBrú Connection Manager (link below).
Thank you for your attention, I hope that with this information I can make the work of others in the terminal more convenient.
Navigation
- To post registration and login required
- 45 views


