
Content
- Introductory
- Obtaining and installing the program on Debian and Windows machines
- First connection to the host computer
- Setting up the same desktop session on Debian / Ubuntu systems
- Remote control from Android phone
- Conclusion
Introductory
There is often a need to control a remote computer from another machine or even our cell phone. In the current epidemic, it is especially good to be able to connect to another computer, whether it be distance learning, helping, or even just doing a task on the other computer.
In this case, it is the most common for most users TeamViewer application comes to mind. It wasn’t any different in my own case either, so I used the free version on my home machines for a long time, and I provided remote assistance to family members with it during the “quarantine”. However, the system was disabled a few days ago, saying that business activity was detected - I think the total duration of the connections may have been too long - so I would have to subscribe to one of the packages. I also went to the prices page to see what the tariffs are, where I was shocked to see that the cheapest package costs about 80 thousand forints a year - which, of course, has to be paid in one amount. I found this to be a pretty peppery price for home use, so I had nothing else to do, I had to quickly look for a free alternative.
I installed the Chrome Remote Desktop program that I wanted to use to control my Debian 10 machine from the other desktop, so that I could see e.g. the output of the commands I was running while I was working on the other machine, but I found that the remotely controlled Debian machine came in with an empty desktop on the remote control interface. Whatever I did on the remote control, apparently nothing happened on the physical machine. After a little traversing, I’ve learned that Chrome Remote Desktop on Linux machines starts a new session by default instead of using an existing one. This can be useful, for example, if someone is working on the machine and we want to use it without disturbing the user sitting in front of it. However, if you want to remotely control your computer in the traditional sense, you can control the current session on your computer in the usual way after modifying a small configuration file. In this description, interspersed with a little general insight, we make this setting, after which we can use our remote Linux machine in the normal way.
So before we get into the settings, let's start from the beginning.
Obtaining and installing the program on Debian and Windows machines
The Chrome Remote Desktop app is free and consists of two parts: a Chrome browser extension that provides the interface for remote control, and manages the Google Account credentials through the browser, and a server program that must be installed on the machine to be remotely controlled (hosted). so that we can control.
In this example, we will now install both parts on the same machine so that we can control this machine later, and we will be able to control other machines with this machine as well.
https://remotedesktop.google.com/access
Install the Chrome extension
When you go to the page, you can immediately install the Chrome extension:
Here, on first use, the top is empty (I already have configured machines that are currently available). Click Install in the pop-up panel in the lower right corner. You will then be asked again if you are sure you want to install the browser extension, and we will verify this as well.
Remote control from the Chrome browser itself works without using the extension, but is recommended in its description because it provides a greater degree of compatibility. The extension works on any desktop operating system running Chrome. You need to download a separate app for Android phones, about that later.
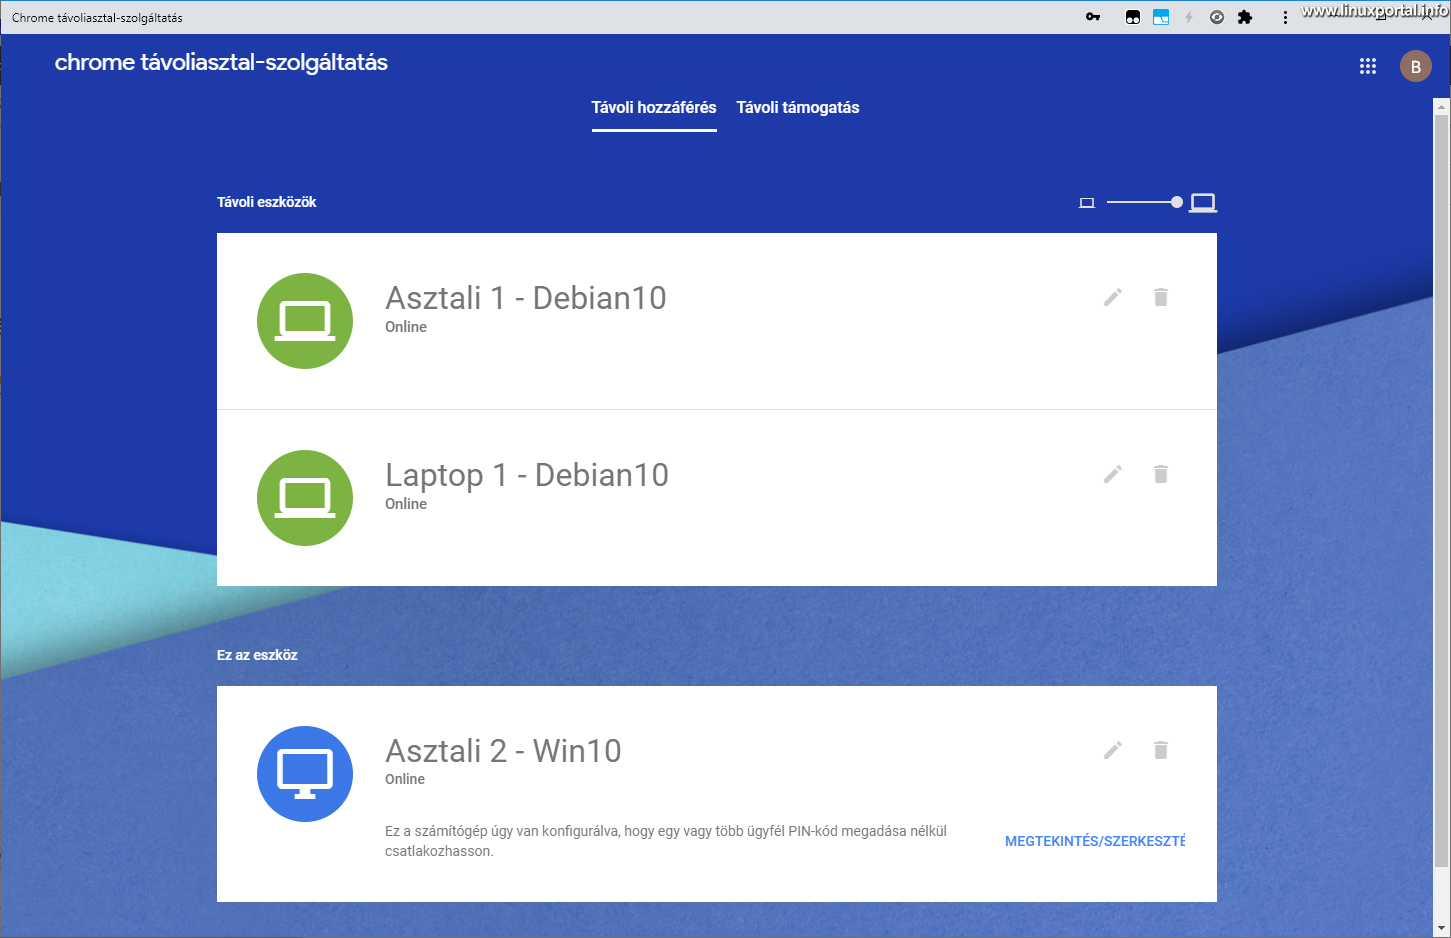
After installing the add-on, we get another window that is different from a standard Chrome browser window, but essentially works with the Chrome browser engine. On the right side of the upper window frame we will also see our already installed extensions. At the top of the window you can see your Google Account, below you the remote machines (which are empty at first), and below you the remote access settings:
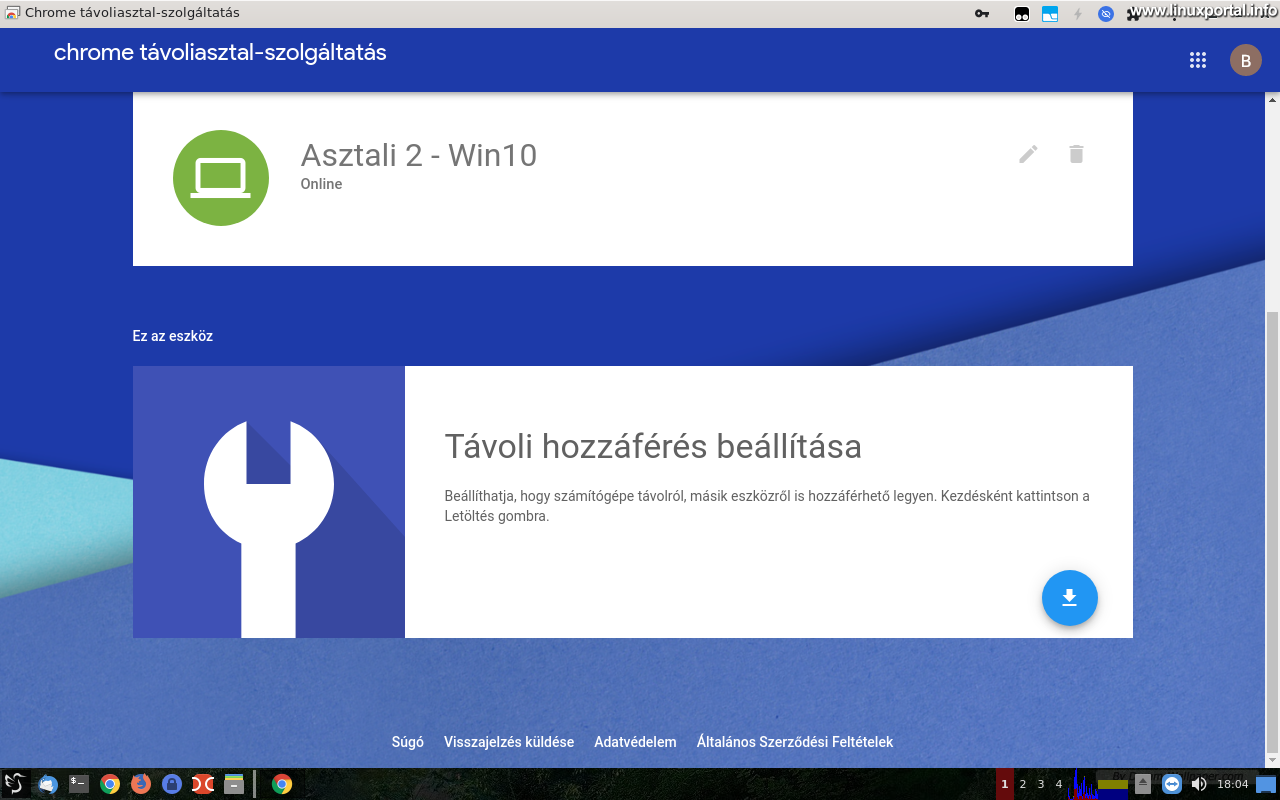
Set up remote access
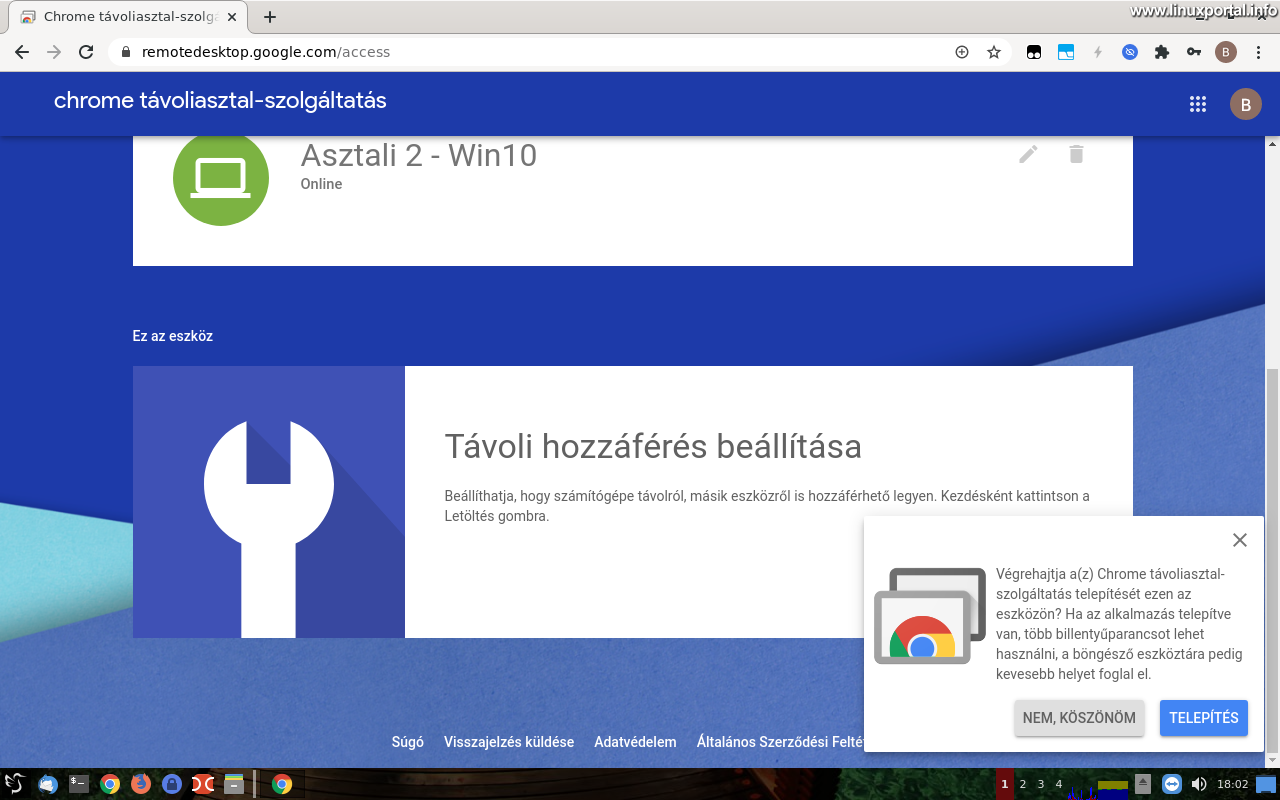
To be able to control the machine, you need to install the server program. To do this, click on the download icon in the panel. Once downloaded, another panel will appear asking you to accept the Google Terms of Service and Privacy Policy:

After acceptance, the downloaded installation program will start, and it will write an information message:

On Windows host machines, the installation of the program starts automatically, however, on Linux systems, not all distributions / desktops have the appropriate program association set by default. .deb to run installation packages, so it must be installed manually. To do this, open a terminal, go to the directory of the downloaded file, and install the program. For example, on Debian:
sudo apt install ~/Letöltések/chrome-remote-desktop_current_amd64.debYou will then install about 83 MB of data.
When the installation is complete, it immediately detects the presence of the server program in the window and asks for the Name of the Machine:
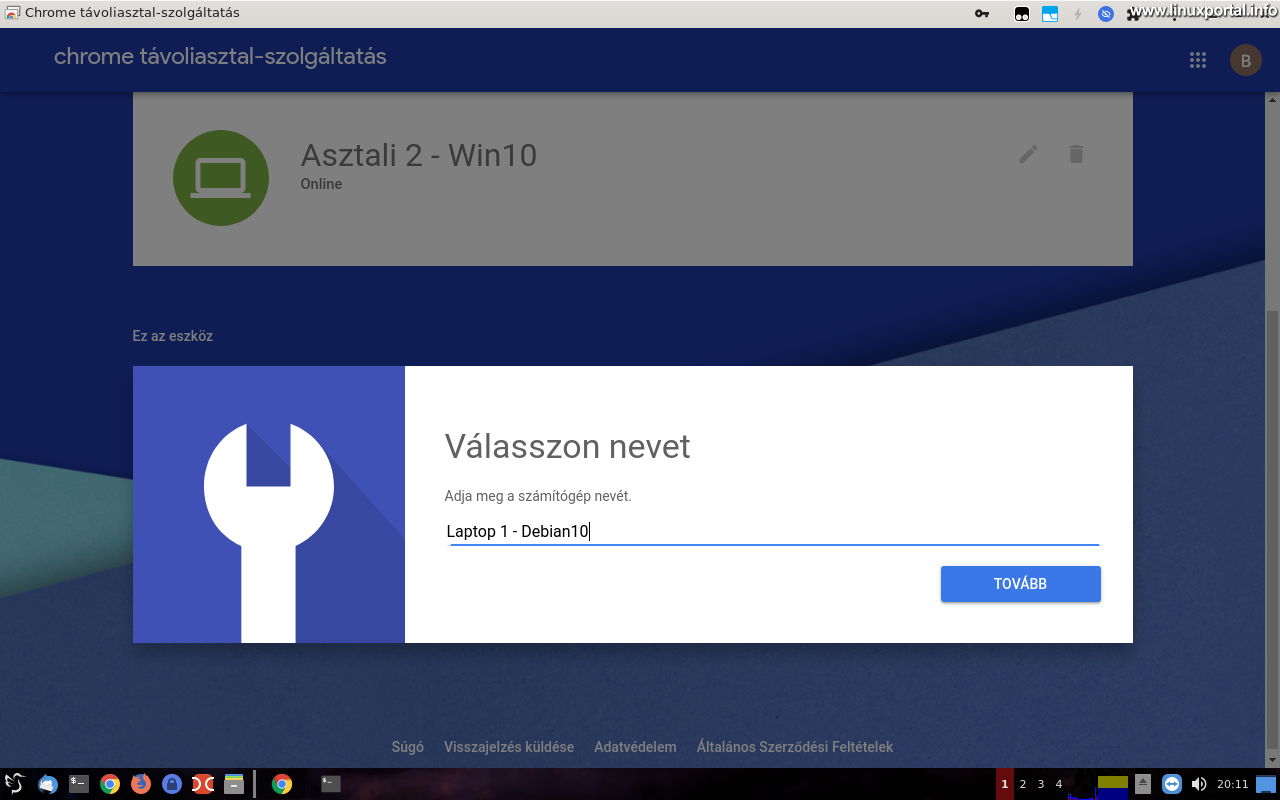
Enter a name here that will be included in our list of remotely controlled machines.
Next, you'll need to enter a PIN to access this machine from the machines you added to your Google Account:

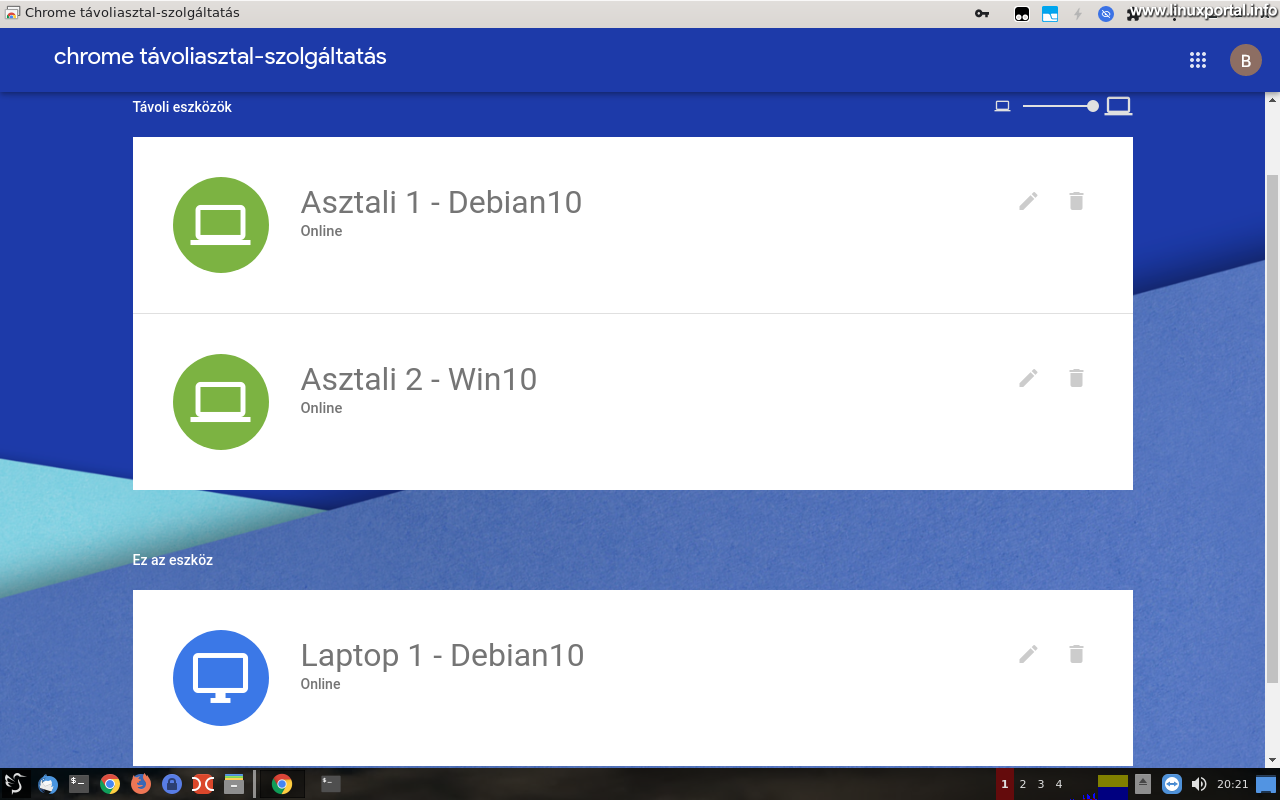
Once configured, it can also boot. Clicking on it will ask us for the root password. The window will then refresh to show the controllable machines that have already been set up (Remote machines) and the currently set up machine (This tool) at the bottom:
First connection to the host computer
Once we’re done so far, all we have to do is connect from another machine to the computer we just set up. On the remote machine, if you have installed the browser plug-in, launch it. I am now connecting from a Windows 10 machine to my laptop set up above. So when you start the remote control window:
Then click on the machine you want to remote control in the list above.
During the first session, you will be prompted for the PIN that you set during the installation of the server program on the host machine:

We can also memorize the PIN here so you won’t be asked for it next time.
On Debian / Ubuntu systems, the first time you connect, you will be asked which desktop session you want to use:
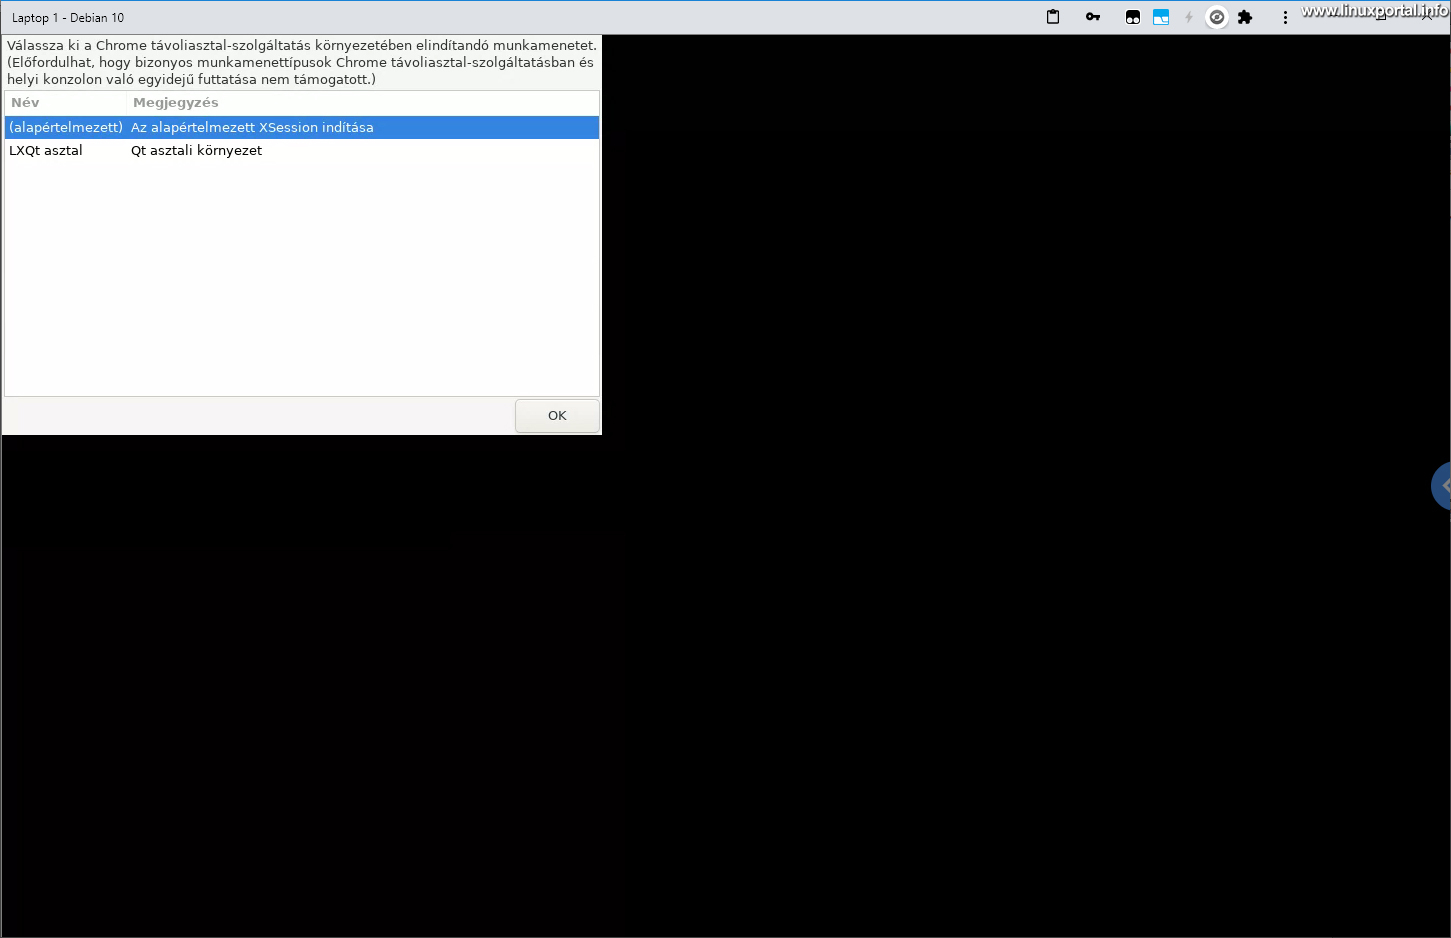
Here, one would logically think that choosing the default XSession results in a base table, and the second option joins the existing session. But, as you write in the panel, not all sessions are supported simultaneously by Remote Desktop. Maybe my LXQT desktop doesn't support it either, because I have chosen any of the settings, I get a basic table where there are no settings:
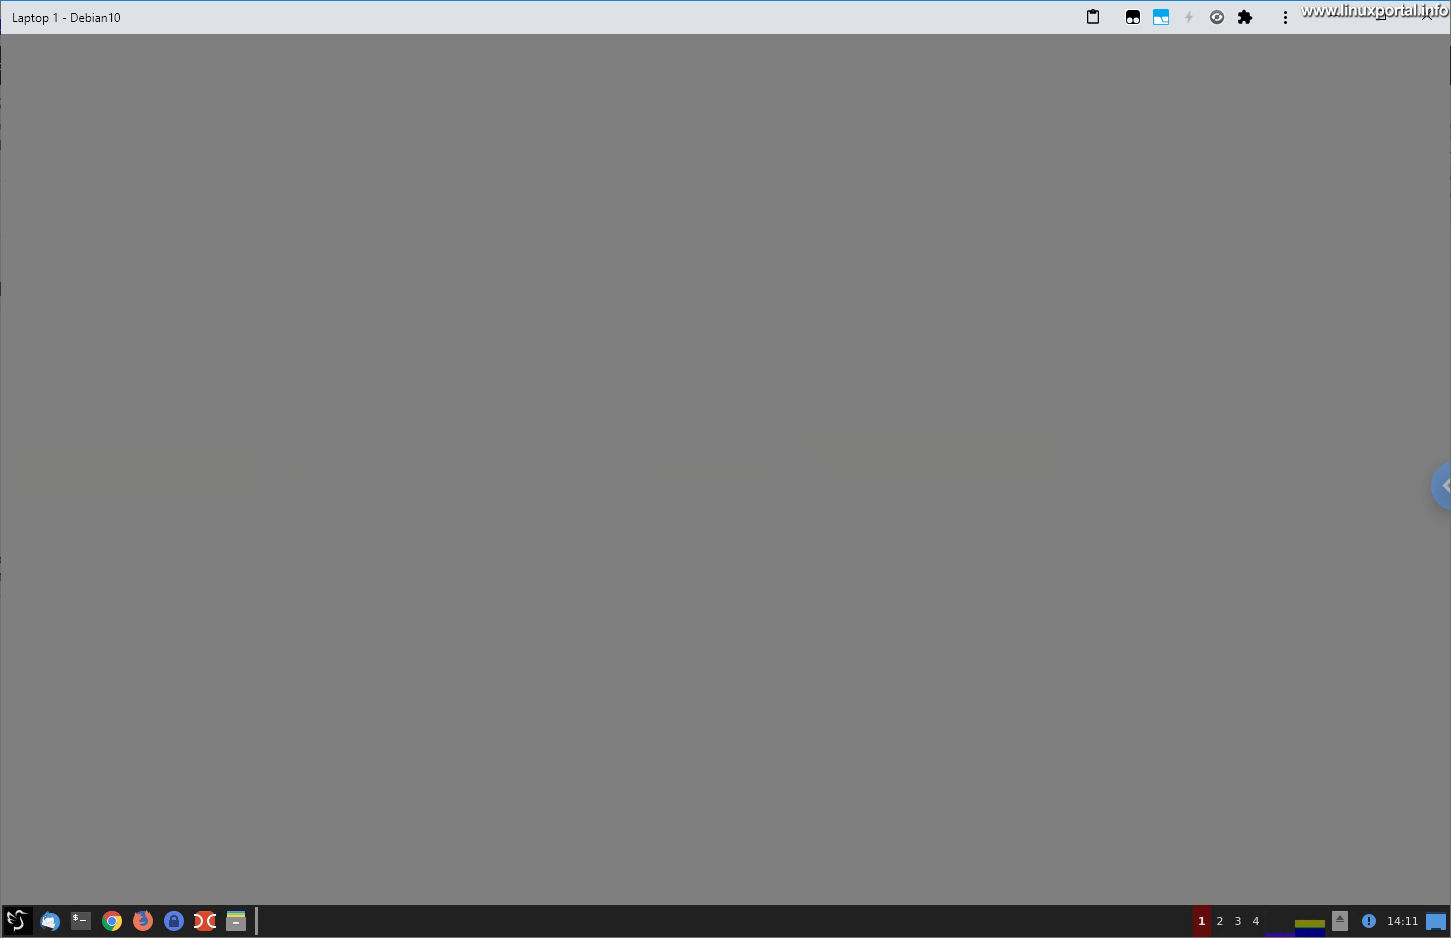
When I reconnected after restarting the service, I got the same result with the other setting: not even the wallpaper is set. Only the things in the tray have been loaded in this session. Interestingly, on my desktop machine, which also has Debian 10 with LXQT desktop, its background image was loaded on the first remote control.
The computer can be used remotely, we can start anything, but the graphical outputs of the launched programs are displayed only in the remote session, nothing opens on the desktop of the machine. So it's not real if you're not connected to the current session, taking over its full state and all its settings.
For Windows host machines, there is no parallel session management, where it connects to an existing single session, so it looks the same in the remote control window as on the monitor.
There is also a solution for Debian / Ubuntu systems, in the next chapter we will set up the appropriate session for remote control.
Setting up the same desktop session on Debian / Ubuntu systems
By default, Chrome Remote Desktop is configured to start a new desktop session on Debian / Ubuntu systems. Of course, the operation may be similar for other distributions, but for now we will only deal with them. Essentially, this is why I created this description to solve this problem, and we can actually use the remote control program for remote control on Debian / Ubuntu host machines as well.
The best way to approach this problem is to query the value of the DISPLAY variable in a remote session:
echo $DISPLAY
For me, this value is 20. So the problem stems from this, because the ID of the desktop session running on the machine is 0. The same is queried on the laptop:

So this is where the remote control should connect as well, and then we get our usual desk in the remote control as well.
I found a solution to this with some follow-up. Although the original tutorials were made for Ubuntu, they also worked for me in Debian (Resources below).
Exit the remote control, close the remote control window, and do the following on the host machine As root.
Stop the Chrome Remote Desktop service
Stop Chrome Remote Desktop:
Ubuntu:
/opt/google/chrome-remote-desktop/chrome-remote-desktop --stopDebian:
systemctl stop chrome-remote-desktopModify the Chrome Remote Desktop python file
Make a backup copy of the python file you want to edit:
cp /opt/google/chrome-remote-desktop/chrome-remote-desktop /opt/google/chrome-remote-desktop/chrome-remote-desktop.origThen open Edit e.g. the dwarf-with:
nano /opt/google/chrome-remote-desktop/chrome-remote-desktopIn this, let's do the following step by step:
Add custom resolution (optional)
This step is optional, but you can add the resolution of your client machine to the list:
DEFAULT_SIZES = "1600x1200,1920x1080,3840x2560"
Set the number of the first free X display
Here we need to set where to issue the first X display ID when the remote control is connected. This is originally set to 20, which is why the above DISPLAY query gave this result. Additional connections will be connected to the next session with a free display ID. Set it to zero so that you can assign an ID of 0, that is, the remote control can connect to our base desktop environment:
FIRST_X_DISPLAY_NUMBER = 0
Disable searching for more X publishers
Here, let's comment on two lines marked in green below so that the loop doesn't run to find more X viewers:
  def get_unused_display_number():
    """Return a candidate display number for which there is currently no
    X Server lock file"""
    display = FIRST_X_DISPLAY_NUMBER
#    while os.path.exists(X_LOCK_FILE_TEMPLATE % display):
#      display += 1
    return display
Recyclability of an existing X session
In newer versions, this section is no longer listed like this. If we don't find this part, we skip it. For older versions, make the following modification.
In the next step, we make the existing X session reusable instead of starting a new one. To do this, comment out two lines from the code snippet below, as well as add the two bottom lines highlighted in green:
  def launch_session(self, x_args):
    self._init_child_env()
    self._setup_pulseaudio()
    self._setup_gnubby()
#    self._launch_x_server(x_args)
#    if not self._launch_pre_session():
#      self._launch_x_session()
    display = self.get_unused_display_number()
    self.child_env["DISPLAY"] = ":%d" % display
Restart Chrome Remote Desktop
If you are done with the changes, restart the service:
Ubuntu:
/opt/google/chrome-remote-desktop/chrome-remote-desktop –startDebian:
systemctl start chrome-remote-desktopConnect to an existing desktop session on your computer
Start the remote control window on the other machine:
Then start the machine you just set up:

As you can see, our entire desktop comes in with the background, our icons, and the window left outside on it. Also, if you move the mouse or windows, all actions are visible on the machine. So we get full remote control in the same desktop session.
Remote control from Android phone
If you’ve already run through the installation of the Chrome desktop extension and host app at the beginning, it’s also worth mentioning the Chrome Remote Desktop Android app, which allows you to control your machines from your phone. The program is very easy to use, so it is not worth missing out on.
https://play.google.com/store/apps/details?id=com.google.chromeremotedesktop
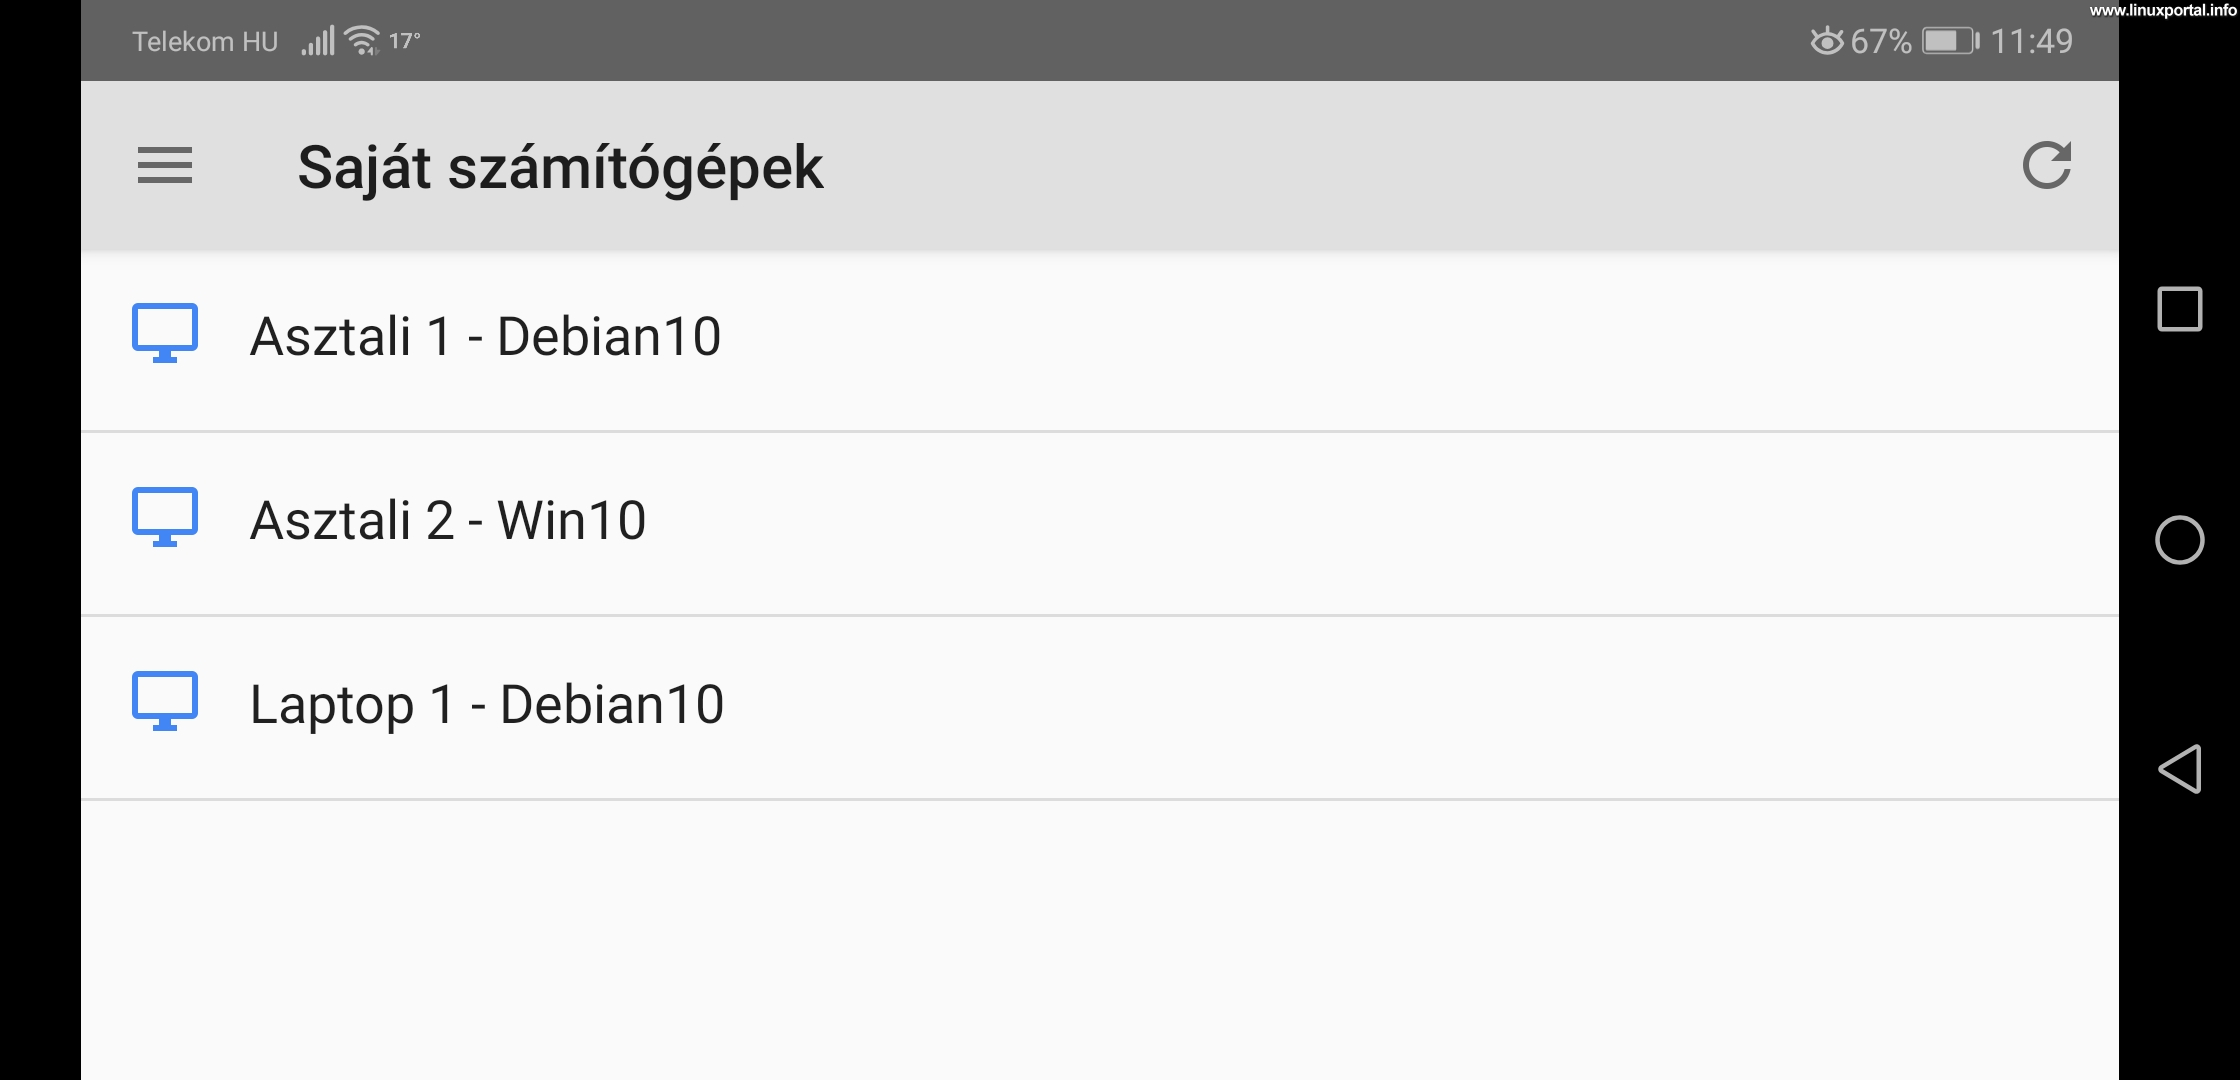
After launching the app, you'll also see a list of our already configured machines through your Google Account:
Then select the machine you want to control:

Enter the PIN code, or you can memorize it with the program, then tap connect.

And we can already use the remote host. So it's so easy to control it remotely from your phone.
Conclusion
Chrome Remote Desktop is very easy to use, but as we’ve seen, Linux machines require some intervention to connect to an existing session remotely. However, once the setup is complete, you can conveniently and easily control your favorite Debian, Ubuntu, etc. computers. And for Windows machines, the remote control works right away.
It's worth noting that TeamViewer has a richer feature pool and a wider range of transferable keyboard shortcuts and mouse actions (such as drag and drop), but keep in mind that it's a paid software, and not cheap, with a free "trial" "expires after a while during daily use - Unlike Google 's completely free service.
- remotedesktop.google.com
- Google Play - Chrome Remote Desktop
- How can we manually unmask services that are masked (service is masked) that we cannot unmask with the unmask option of the systemctl command?
- researchxuyc.wordpress.com - To show the same display session in Ubuntu by Chrome Remote Desktop
- superuser.com - Configuring Chrome Remote Desktop with Ubuntu Gnome 14.04
- support.google.com - Chrome Remote Desktop on Ubuntu only shows wallpaper
- How to troubleshoot a "Not authorized to perform operation" error message when automatically mounting flash drives and other external USB storage devices
- To post registration and login required
- 1248 views