The 1. page content
Introductory
It’s time to start building servers on Ubuntu as well. We will be the first to build the Ubuntu 18.04 LTS (Bionic Beaver) minimal server, which will be the building block of many more descriptions. Ubuntu has been providing support for members of the LTS (Long Term Support) family for five years, so we will receive updates for version 18.04 until April 2023. This provides an excellent basis for installing a server - which we want to run securely for many years to come.
The installation guide has been completed with the newer version of Ubuntu:
Ubuntu 20.04 LTS (Focal Fossa) minimal server installation
Get Ubuntu 18.04 LTS
Installation
There are several ways to install: Write the ISO file to a flash drive Under Windows, or On Debian, or you can install it on a virtual machine. I choose the latter, so one VirtualBox I will install it on my machine, which I will add to the downloads later.
After booting the machine from the ISO file in one of the ways, the installer starts.
Boot with GRUB
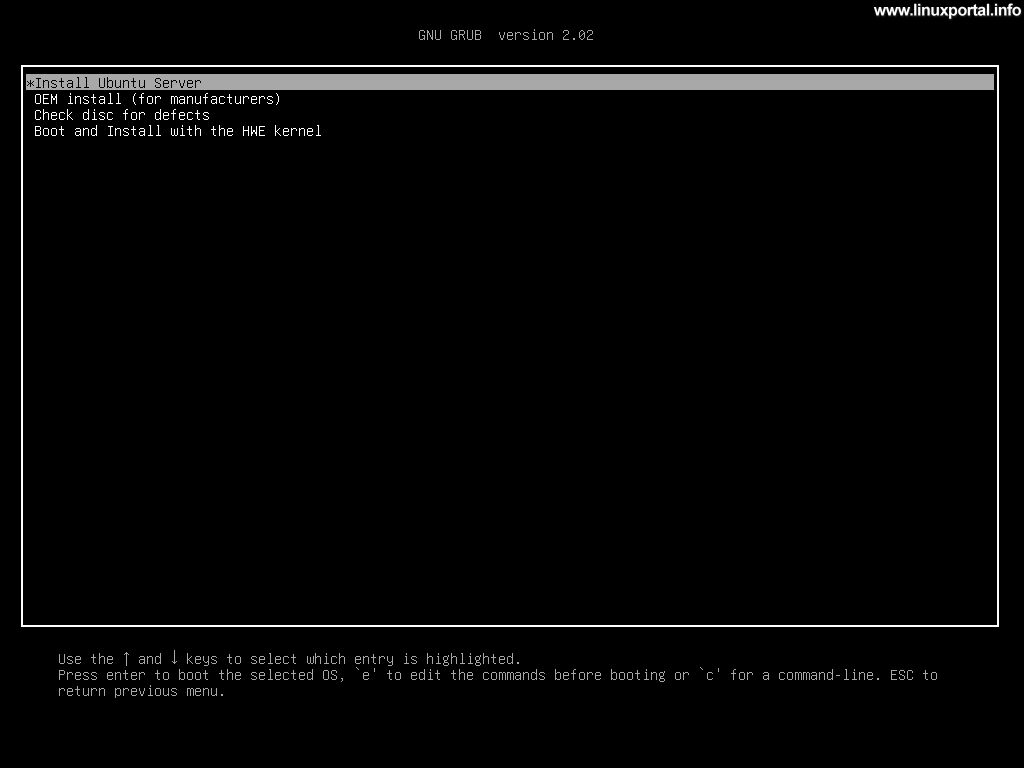
On the first screen is the good old man GRUB a boot loader welcomes us, which offers us more options. Select the very first option here: Install Ubuntu Server.
Language and locale settings
After a little boot, the language selection menu will appear:

Choose your language here. The next step is to set up your keyboard layout:
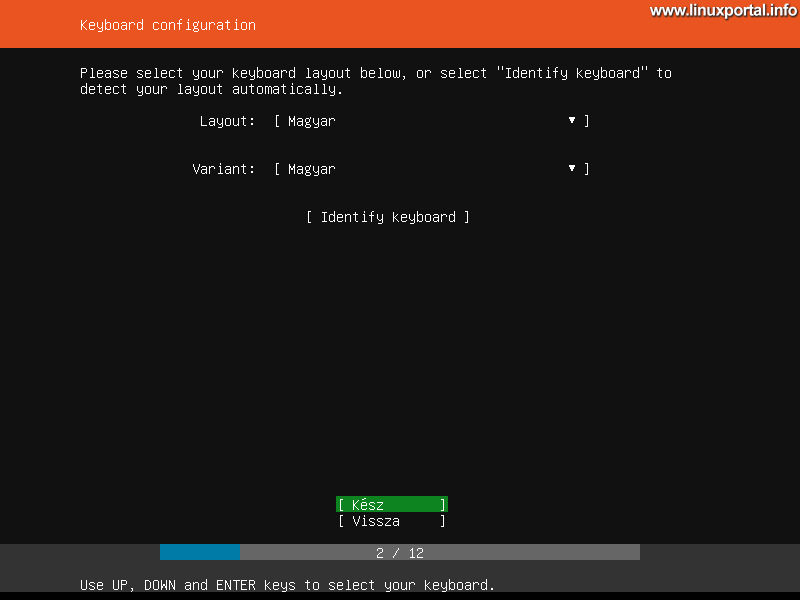
Set your keyboard layout here. If you do not know exactly how many keys, etc., you have, then select Keyboard Recognition (Identify keyboard) option, which - with the help of some questions e.g. typing different accented characters, etc. - identifies our keyboard.
When you are done, press the bottom "Done" option.
Installation method
In the next step you will be offered several installation methods, eg for cloud servers, etc.:
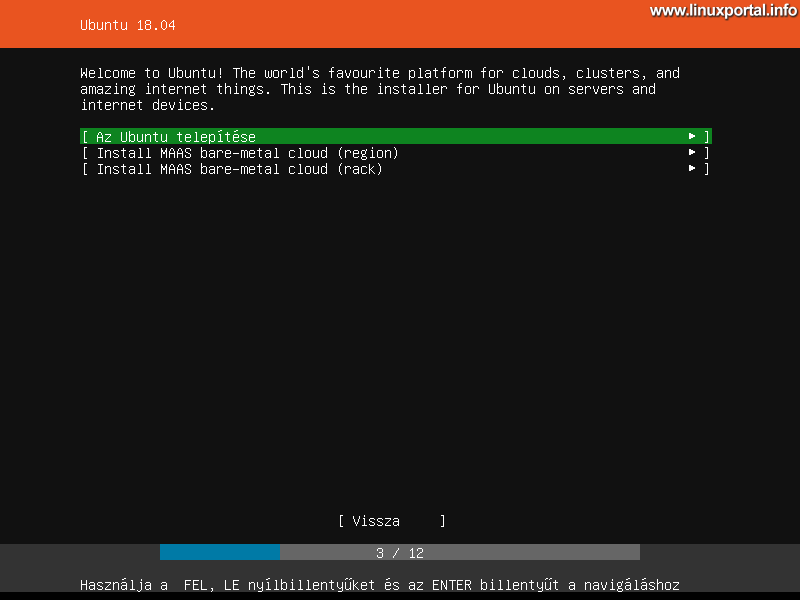
Select here Installing Ubuntu option.
Set up a network
In this step, you need to configure the network card:
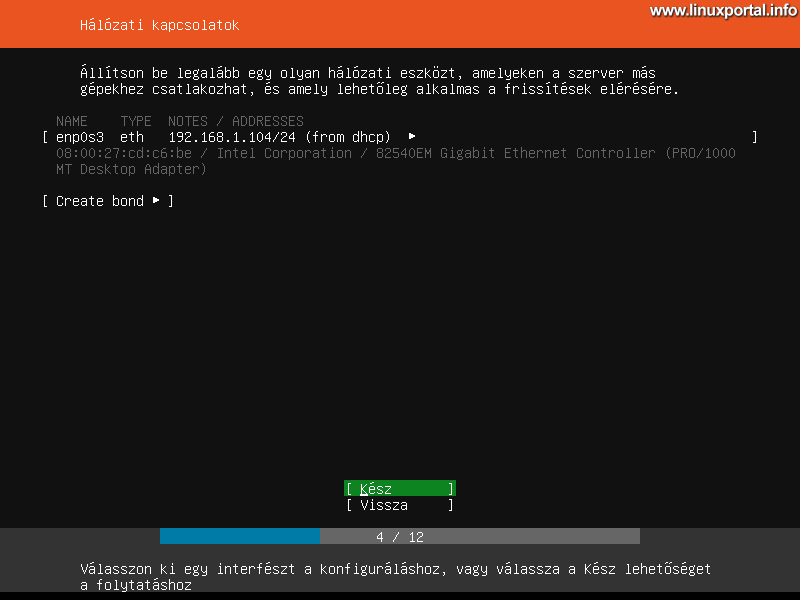
Here we can see a network card (enp0s3) - which will henceforth be our main network device - and a IP address range CIDR in the form - which in this case is my router DHCP server allocates to the virtual machine. We will now approve this section and get a dynamic IP address from our router. At the end of the installation, we will set a fixed IP address for our server, so now select Ready option.
You will then be prompted for proxy settings:
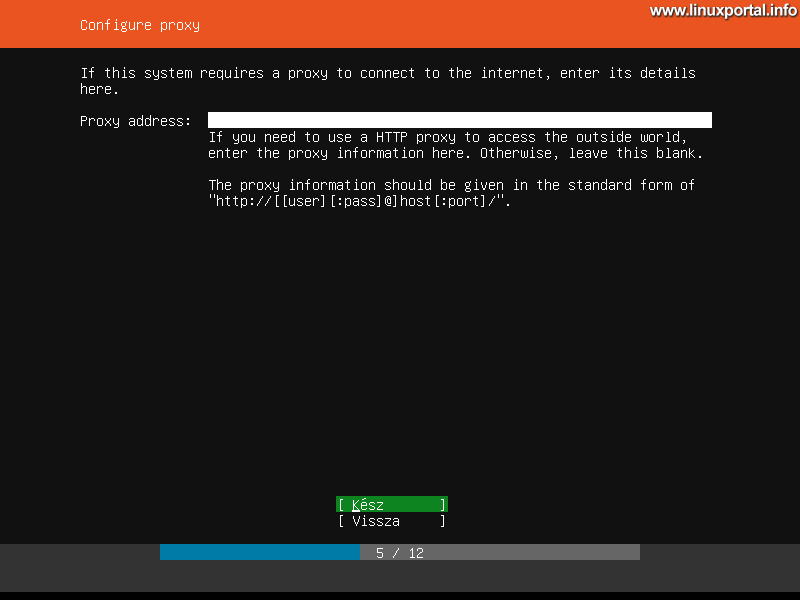
If you are connecting to the Internet through a proxy, configure it here. If you are not connected to a proxy or you do not know about it, leave it blank and move on to the Done option.
It then asks what kind of ubuntu mirror we want to use:

You can leave this at the default setting, but if you want to use another mirror we can pick from here. Whatever we choose, it will be later APT package manager we can set this up again at any time. I leave this for the suggested setting now.
Partitioning disks
This step will partition your hard disk:
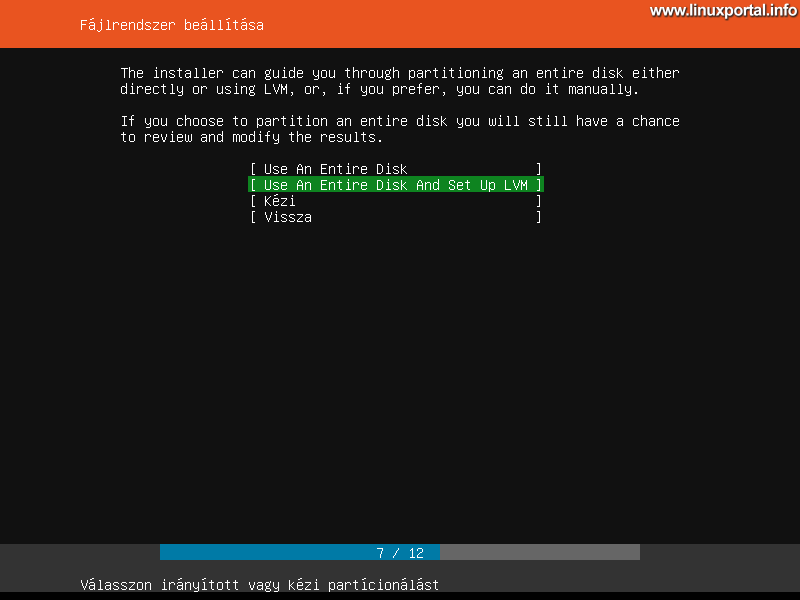
Here, for the sake of simplicity, choose the second option: Use an Entire Disk And Set Up LVM. This option automatically creates a full hard disk partitioning scheme with separate partitions for the root file system, bootloader, etc. Of course, if we know the full partitioning process, then of course we can partition our available hard disks.
You can then choose which hard drive to do all this:
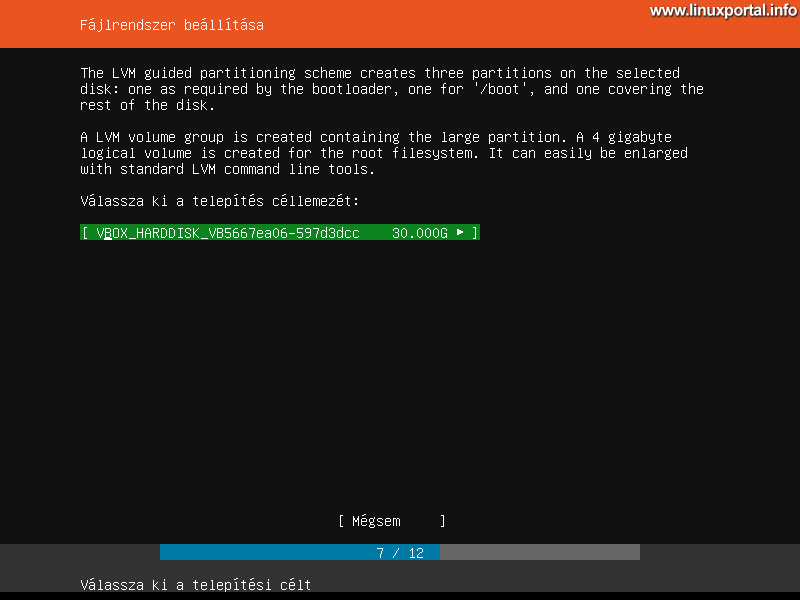
I created an 30 Gb (dynamically growing) disk for this virtual machine, so now you offer it to me.
After selecting the hard disk, you will see an overview of the partitions:

Then if we go on to Ready option, you will drop another confirmation that the data on the disk will be permanently lost, etc.
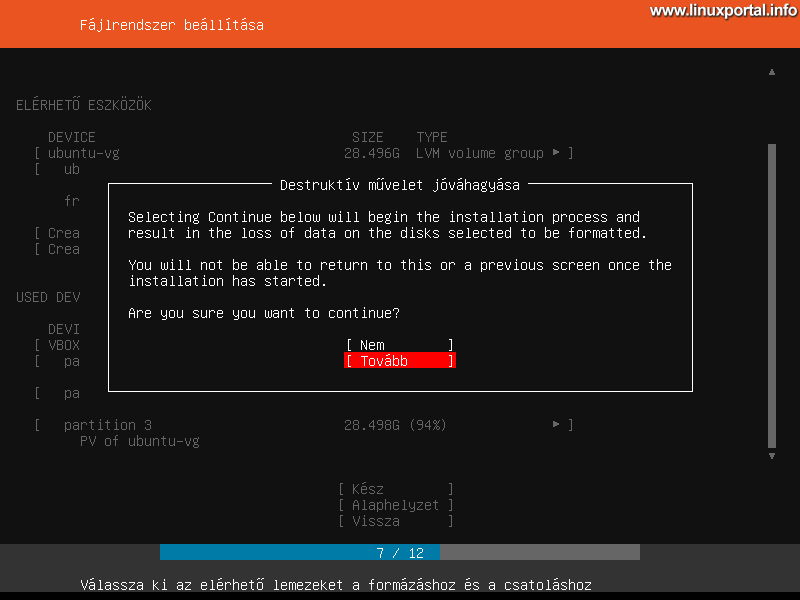
If you are really sure that everything is set up well, then go on.
profile Settings
The next step is to find yourself in a multi-field form asking for:
- Your name: Enter your full name here
- Your server's name: Enter the host name of your server. No suffixes can be specified here, it will be written as a non-usable character when a dot is entered. So here we just enter the hostname of the server.
- Pick a username: Enter a username.
- Choose a password: Enter the password for the username.
- Confirm your password: Confirm password
I filled in the following:
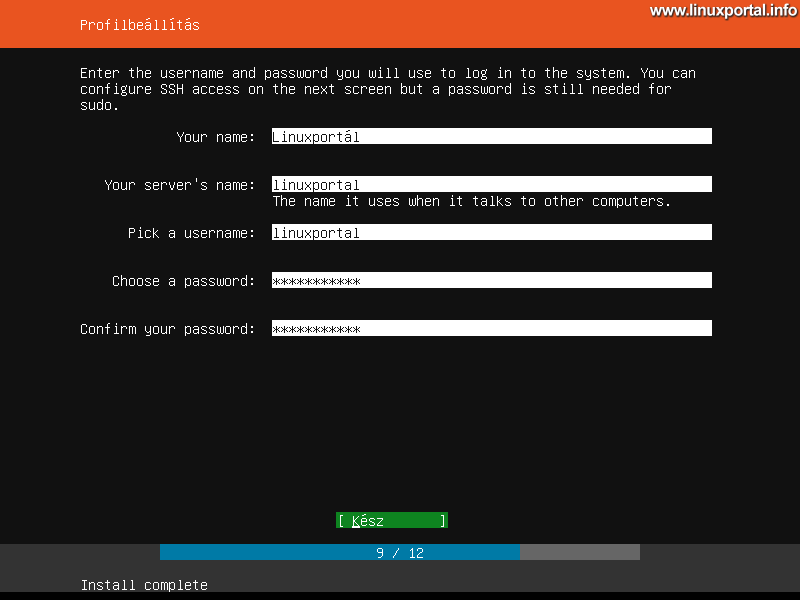
For the sake of simplicity I have provided a linuxportal everywhere. In the meantime, if you observe, there is a low level of background installation during the completion of the form. Well done.
SSH setting
Here you will be asked if you want to install the OpenSSH server package:
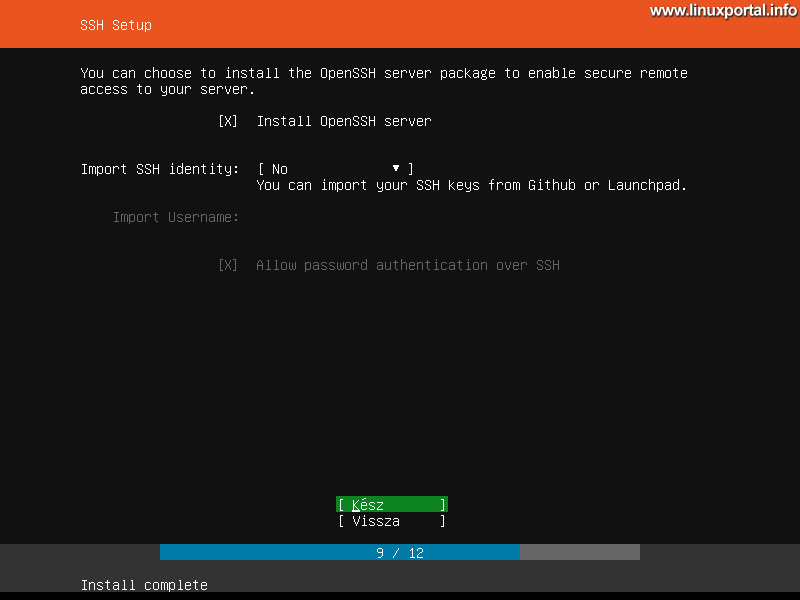
Of course, mark it. But if you missed it, you can install it later. You can also import SSH keys here from login without password setting.
Extra services
And finally, the installer offers a number of well-known server applications that we can customize:

We could select anything here, but since this is a minimal server installation that forms the basis for further descriptions on the site, I would suggest that you do not select anything here to keep your installation as “clean” as possible and then customize it later to suit your individual needs.
By the way, here I am now wondering that I do not see any LAMP server component such as Apache, PHP vagy MySQL. Although there is a PostgreSQL here ... I saw these in one of the previous Ubuntu installers as a ready-made LAMP package and separately. In this version, these seem to have been omitted. Of course, there is nothing wrong with this, as it will be our task in the future to build our own servers for this basic installation.
Installation complete
Once you have completed the previous step, an installer will run in front of you to finish the installation:

Here you can choose to reboot and the machine will boot with our new basic system.
Although the installer is complete, but our work is not yet done, there are still some settings left to continue to the next page.
- Ubuntu 20.04 LTS (Focal Fossa) minimal server installation
- Install Debian 8 (Jessie) Minimum Server
- Install Debian 9 (Stretch) Minimum Server
- Install Debian 10 (Buster) Minimum Server
- Debian 11 (Bullseye) minimal server installation
- Howtoforge.com - How to Install Ubuntu 18.04 LTS (Bionic Beaver) Minimal Server
- Install v18.04 on the Ubuntu 1.0 LTS (Bionic Beaver) LAMP Server
Navigation
- To post registration and login required
- 1024 views