
Content
Introductory
We've talked about it before how to create a bootable flash drive On Windows systems, and now on Debian, we will bring together a bootable flash drive.
In this description, I present two ways to do this: First using UNetbootin, then dd command to create the boot.
Print boot image using UNetbootin
Boot (also known as boot) to create a flash drive, we must first look for a program designed for this purpose, in which we can conveniently set everything up in a graphical interface. Under Windows there is Rufus, but now we have to solve the task on Linux, in this case specifically on Debian.
The perfect choice for this is the UNetbootin program, built for multiple platforms, so you have Linux at your fingertips.
Get a program
Download it from the manufacturer's website version of our architecture.
The program also has some dependencies, so install them (as root) before starting apt-get command:
apt-get install mtoolsAbout further addictions here you can find out, but I just had to install the mtools package just now.
Then go to the directory of the downloaded program to make the file executable chmod command:
chmod +x unetbootin-linux64-661.binrun
You can also run the file from a terminal:
./unetbootin-linux64-661.binAfter launch, throws an error message:
Unable to load library icui18n "Cannot load library icui18n: (icui18n: nem nyitható meg a megosztott objektumfájl: Nincs ilyen fájl vagy könyvtár)"
The missing ICU system (due to the lack of packages in question) has not been installed, but it still starts the program and can be used:

We have two options here.
If you select the top option, you can select a Linux distribution from the drop-down list and then its version. Thus, the program will download the selected distribution to us. There are plenty of varieties to choose from, so this is the more convenient solution for creating a Linux installer.
With this option, the selected installation packages contain UNetbootin compilations, so for example, when booting the system, the GRUB we are hosted by UNetbootin's own loader.
If you choose the lower option (Disk Image), you can also burn your own ISO file so you can install Windows or any other operating system.

Accordingly, I copied a freshly downloaded Debian netinstall to / Root library, which is small, so perfect for this presentation.
From here on, both options continue in the same way:
Select the drive from the drop-down list:

Then OK button.
Then, if there was something on the flash drive that might conflict with the content you are now uploading, it will throw another window:

Press Yes to All here.
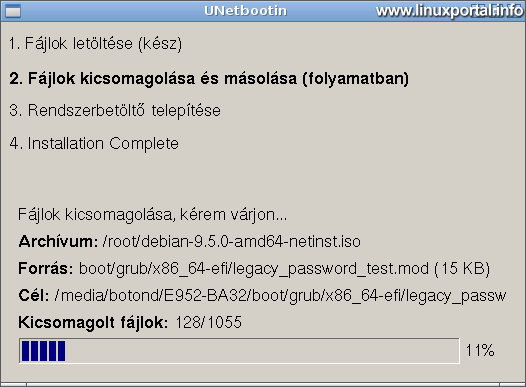
Copy files
This will copy the ISO files and the boot loader:
Finally, you will be notified of the completion of the operation and instructions on how to start the flash drive:
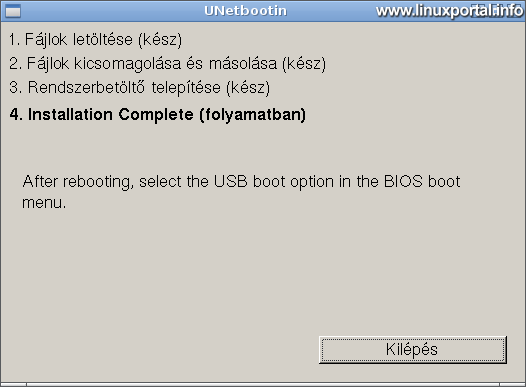
This completes our boot flash drive.
One thing to note about this is that there is no formatting here, so the previous contents of the flash drive will be retained, except for conflicting files, directories. So if you leave other materials on the drive in a subdirectory, they will remain intact.
Print the boot image using the dd command
If for some reason UNetbootin does not start up or is not working properly, we still have another quick option to make a bootable flash drive.
In this example, dd Linux command we will use it for this purpose. It should be noted here that only a isohybrid ISO files created in this way will be able to boot. Examples include installation images downloaded from Debian sites, but other installers could have been created using this method. Non-isohybrid ISO files are isohybrid can be converted to start with the dd command.
I will use the Debian 9.5 netinstall used in the UNetbootin example above to illustrate this.
Discovering a pen drive
First, insert a flash drive into the machine, and then run the fdisk command as root to find the device on the flash drive block:
fdisk -lOf course, from UNetbootin we can already know how to access the device on our flash drive, but here we need to determine it anyway.
The command lists all the hard disks and USB devices in the machine and their logical units.
The output should look for something like a flash drive:
Disk /dev/sdc: 7,5 GiB, 8011120640 bytes, 15646720 sectors
Units: sectors of 1 * 512 = 512 bytes
Sector size (logical/physical): 512 bytes / 512 bytes
I/O size (minimum/optimal): 512 bytes / 512 bytes
Disklabel type: dos
Disk identifier: 0x2f8116b4

Device     Boot Start      End  Sectors  Size Id Type
/dev/sdc1  *     2048 15646719 15644672  7,5G  c W95 FAT32 (LBA)
An 8 GB (7,5 GiB) storage a / Dev / sdc device with a FAT32 partition a / Dev / sdc1 -en.
Run the dd command
Here we will now need the main tool. Navigate to the directory of your ISO file you want to burn, then rootrun as:
dd if=debian-9.5.0-amd64-netinst.iso of=/dev/sdc bs=4M; sync- Az if enter your iso file
- az of parameter, the name of the block device on our flash drive, not its partition.
Be careful not to misspell here, as it will be overwritten by another incorrectly specified container. - A bs parameter specifies that 4 MB pieces should be copied, rather than the default 512 byte size, so copying is much faster.
- a sync and the switch ensures that the write operation is synchronous, so not in the background. This way, we will not receive our prompt until the copy is actually made.
The output of the above command is as follows:
2+1 beolvasott rekord
72+1 kiírt rekord
305135616 bájt (305 MB, 291 MiB) másolva, 0,906688 s, 337 MB/s
You are now ready to boot.
Conclusion
We have also tried two methods to create a bootable flash drive on Debian. Both solutions are useful. UNetbootin comes in handy when we have a graphical interface, so just a few clicks and the copy is done. The dd command will help you if you don't have a graphical interface and need a boot loader soon.
- Make bootable flash drives with Rufus 3.3
- Make bootable flash drives with Rufus 4.3
- Making a bootable flash drive with the balena Etcher 1.5
- How to make a bootable flash drive with Rufus (earlier version)
- UNetbootin official site
- Debian.org - Print USB
- Creating a recovery flash drive using GParted Live
- To post registration and login required
- 4760 views